How to Make a Rubber Stamp
Learning how to make a rubber stamp may feel a little daunting at first, but with a few steps you’ll be on your way to making a variety of your own personalized stamps.
Uses for Rubber Stamps
I love using these stamps to personalize wrapping paper for Christmas, birthdays, & baby showers. They are also great to make sets of themed stamps for kids. You could also use them to make small stamps for certain things you may want to print over and over again, like a little embellishment for the backs of Christmas cards, labels, or perhaps to help with branded packaging for a small business.
There is also always the case to make rubber stamps purely for the enjoyment of art and creativity. Block printing is one of my favorite art forms and I love to see how different artists transform linoleum into intricate designs and then use a variety of layering and blending paints to make one larger picture.
Cost & Investment in Tools
Making rubber stamps does have an upfront cost. You will need to purchase or borrow from a friend a set of carving tools ($8-$12) and a set of rubber stamps (linoleum or speedy-carve) ($3-$30). If you’re searching, Speed Ball is a good brand and available at most craft stores. Dick Blick also has a great selection. I use their Soft-Kut printing blocks.
Paint or Ink to Use with Rubber Stamps
Once you carve a rubber stamp you will need to some kind of paint or ink to use your stamp.
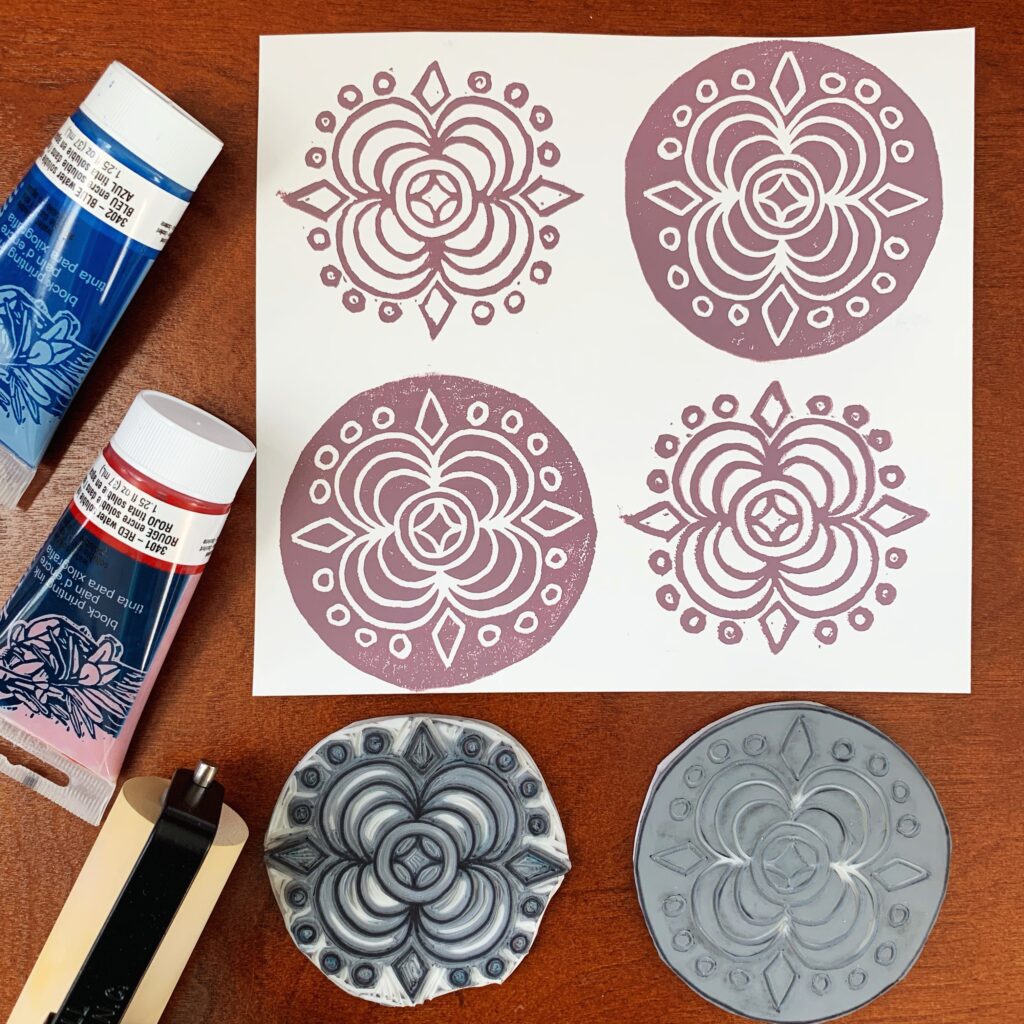
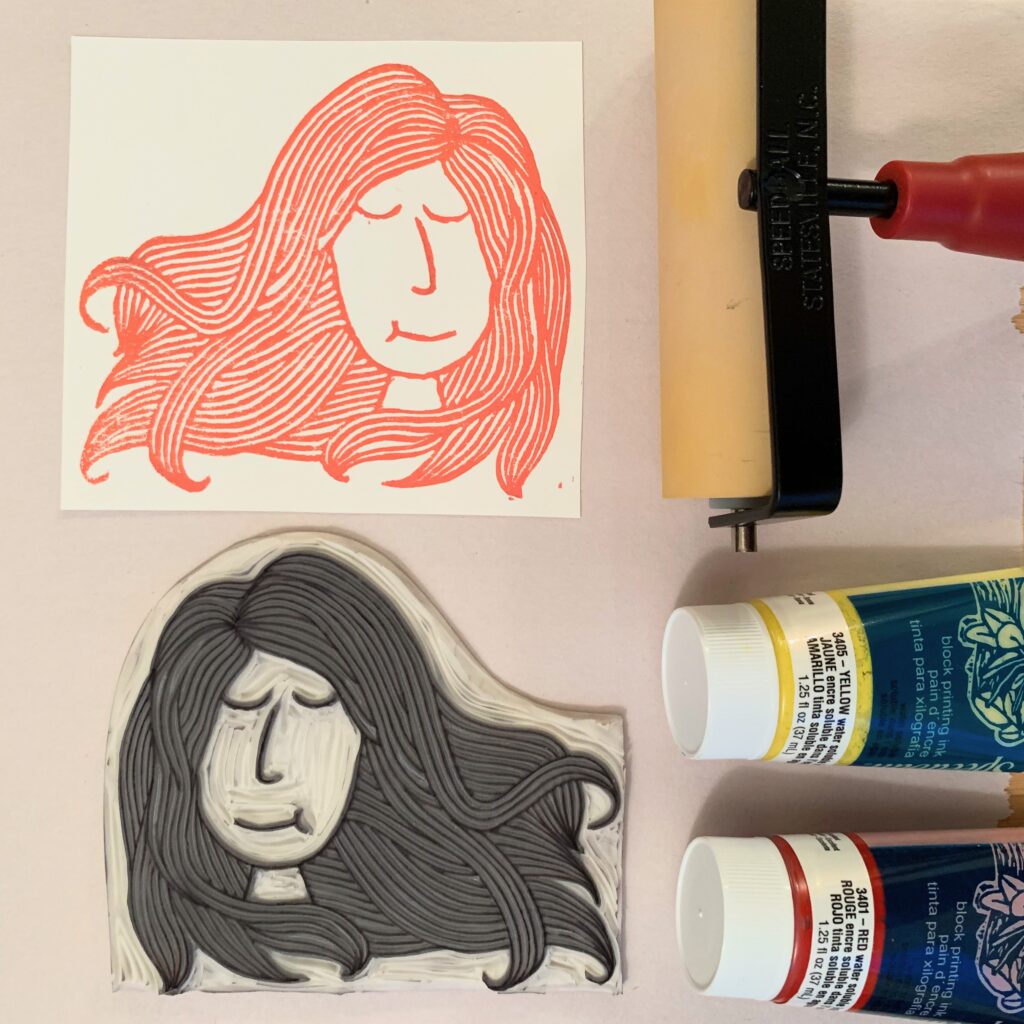
Traditionally, artists use block printing ink and a roller to roll paint evenly onto the stamps for a smooth and even transfer. If you would like, you can invest in these paints and a roller.
If you don’t want to make an investment in storage space and money on new painting supplies, you can also easily use plain acrylic paints and simply brush them onto the stamp. Or you could use ink pads. If you want to stamp designs onto fabric, you can use a textile medium mixed into acrylic paint to make it safe for fabric.
Essential Tools and Materials
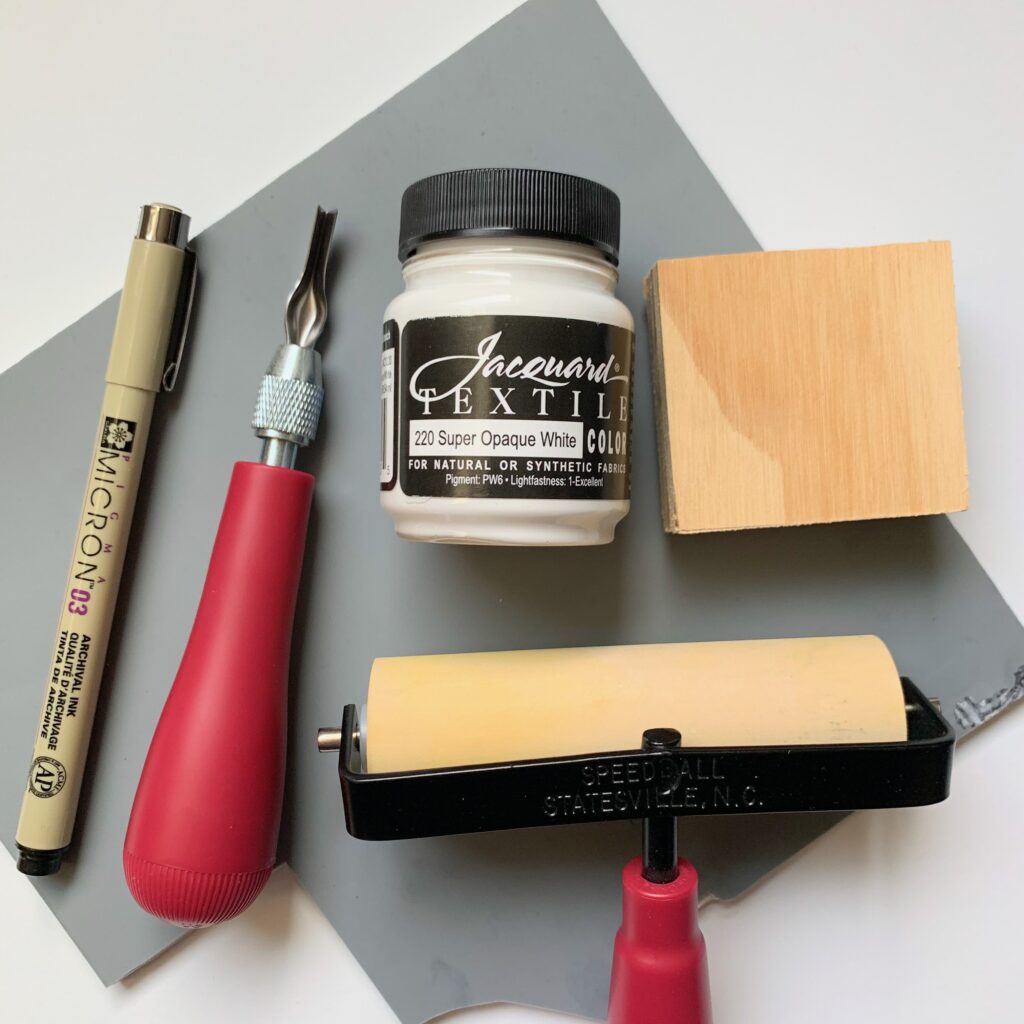
- Rubber Carving Block: Choose a soft, easy-to-carve material such as linoleum or Speedy-Carve rubber. These blocks are available in various sizes to accommodate different stamp designs. I suggest finding a thin one and you can easily cut multiple stamps out of one block.
- Carving Tools: Invest in a set of quality carving tools designed specifically for rubber stamp carving. These typically include cutting blades of various shapes and sizes, as well as a handle for comfortable grip. I love the Speed Ball cutting set. It’s affordable and all of the blades conveniently store in the handle.
- Design Inspiration: Whether you prefer sketching your own designs or seeking inspiration online, gather ideas for your stamp designs before you begin carving. Simple motifs, patterns, and typography are great starting points for beginners.
- Paint or Ink: If you plan on using your stamp, you will need paint or ink. Print making ink, acrylic paints, fabric paints, and ink pads are all great options!
Like I’ve mentioned before, Dick Blick is one of my favorite stores for rubber stamp making materials. Their brands are cheaper than Speed Ball.
Make a Rubber Stamp – Carving
Now that you have your materials ready, let’s carve your first rubber stamp! Follow these steps:
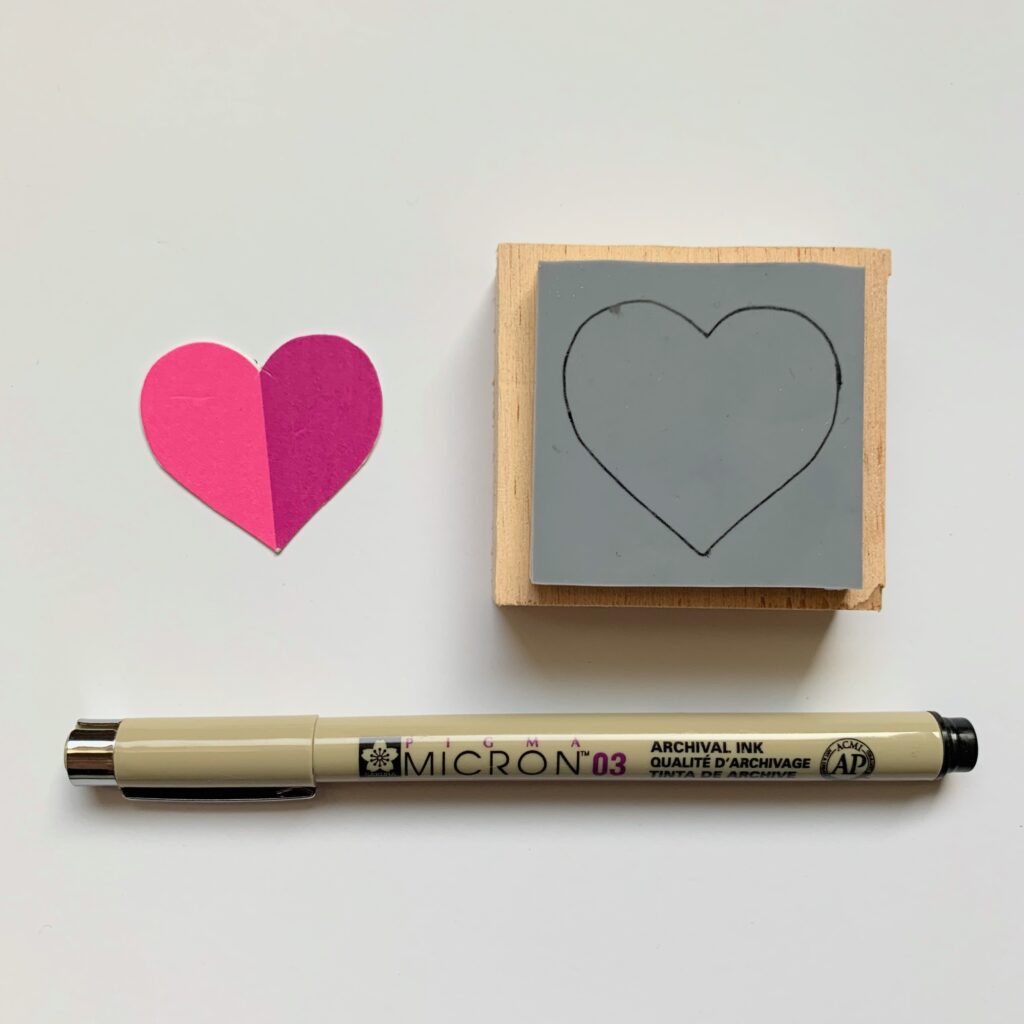
Transfer Design to Stamp
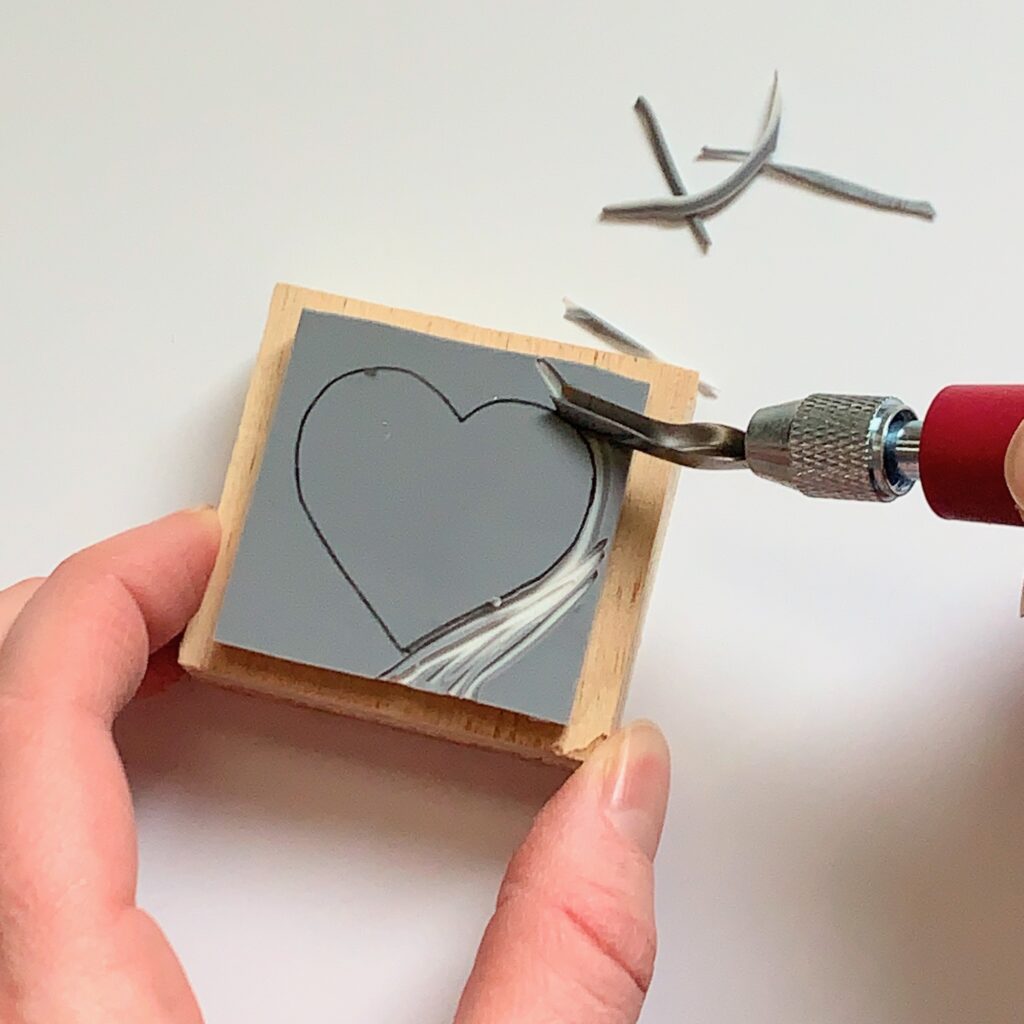
If you want a simple design, like my heart above, simply trace it onto a piece of rubber.
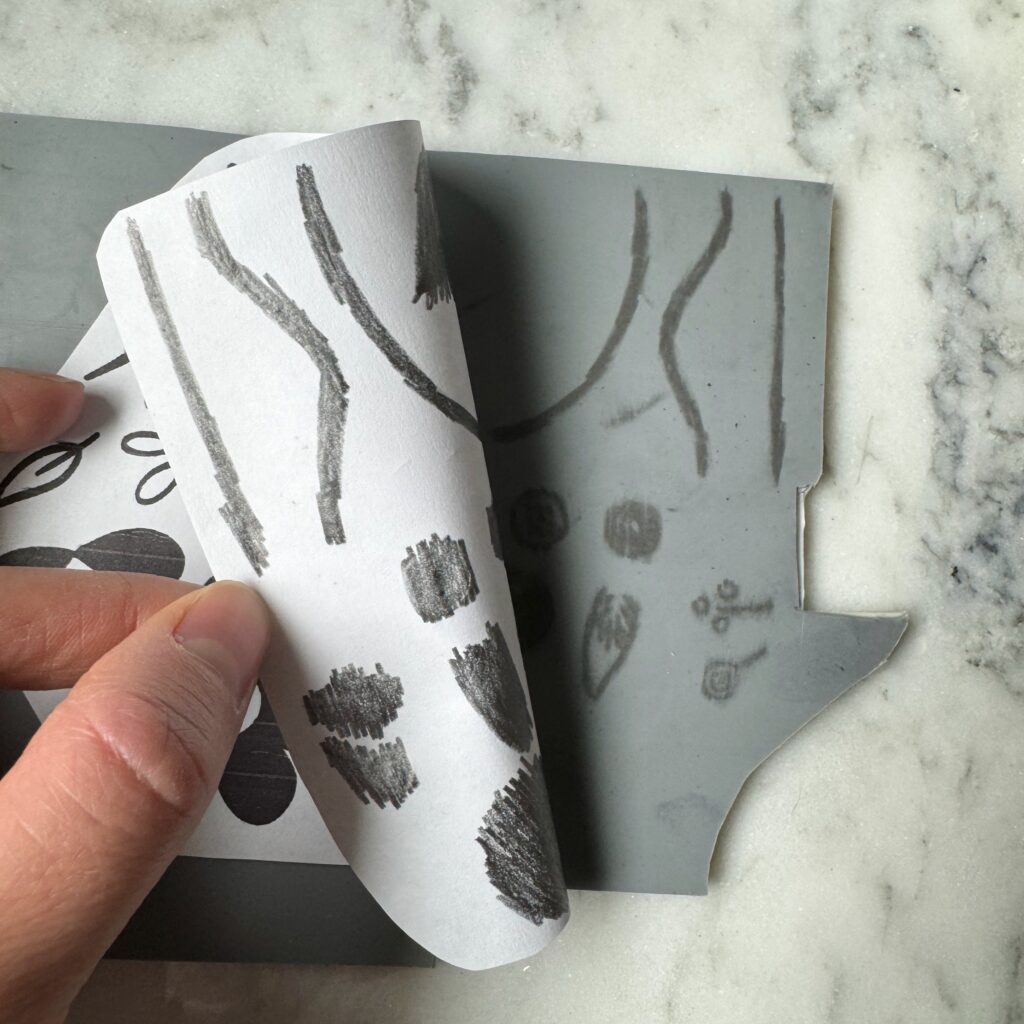
If your design is more intricate, you can flip your design over, and use a pencil to cover the backside of the design in graphite. Once it has a thick layer of graphite, lay your design right side up on the rubber and trace over the design. It will lightly transfer to the rubber. I like to go over the rubber with a marker to make the lines rub-proof and more opaque.
Remember that what you carve away will have no ink/paint and that your image will be mirrored. (VERY IMPORTANT FOR TEXT!)
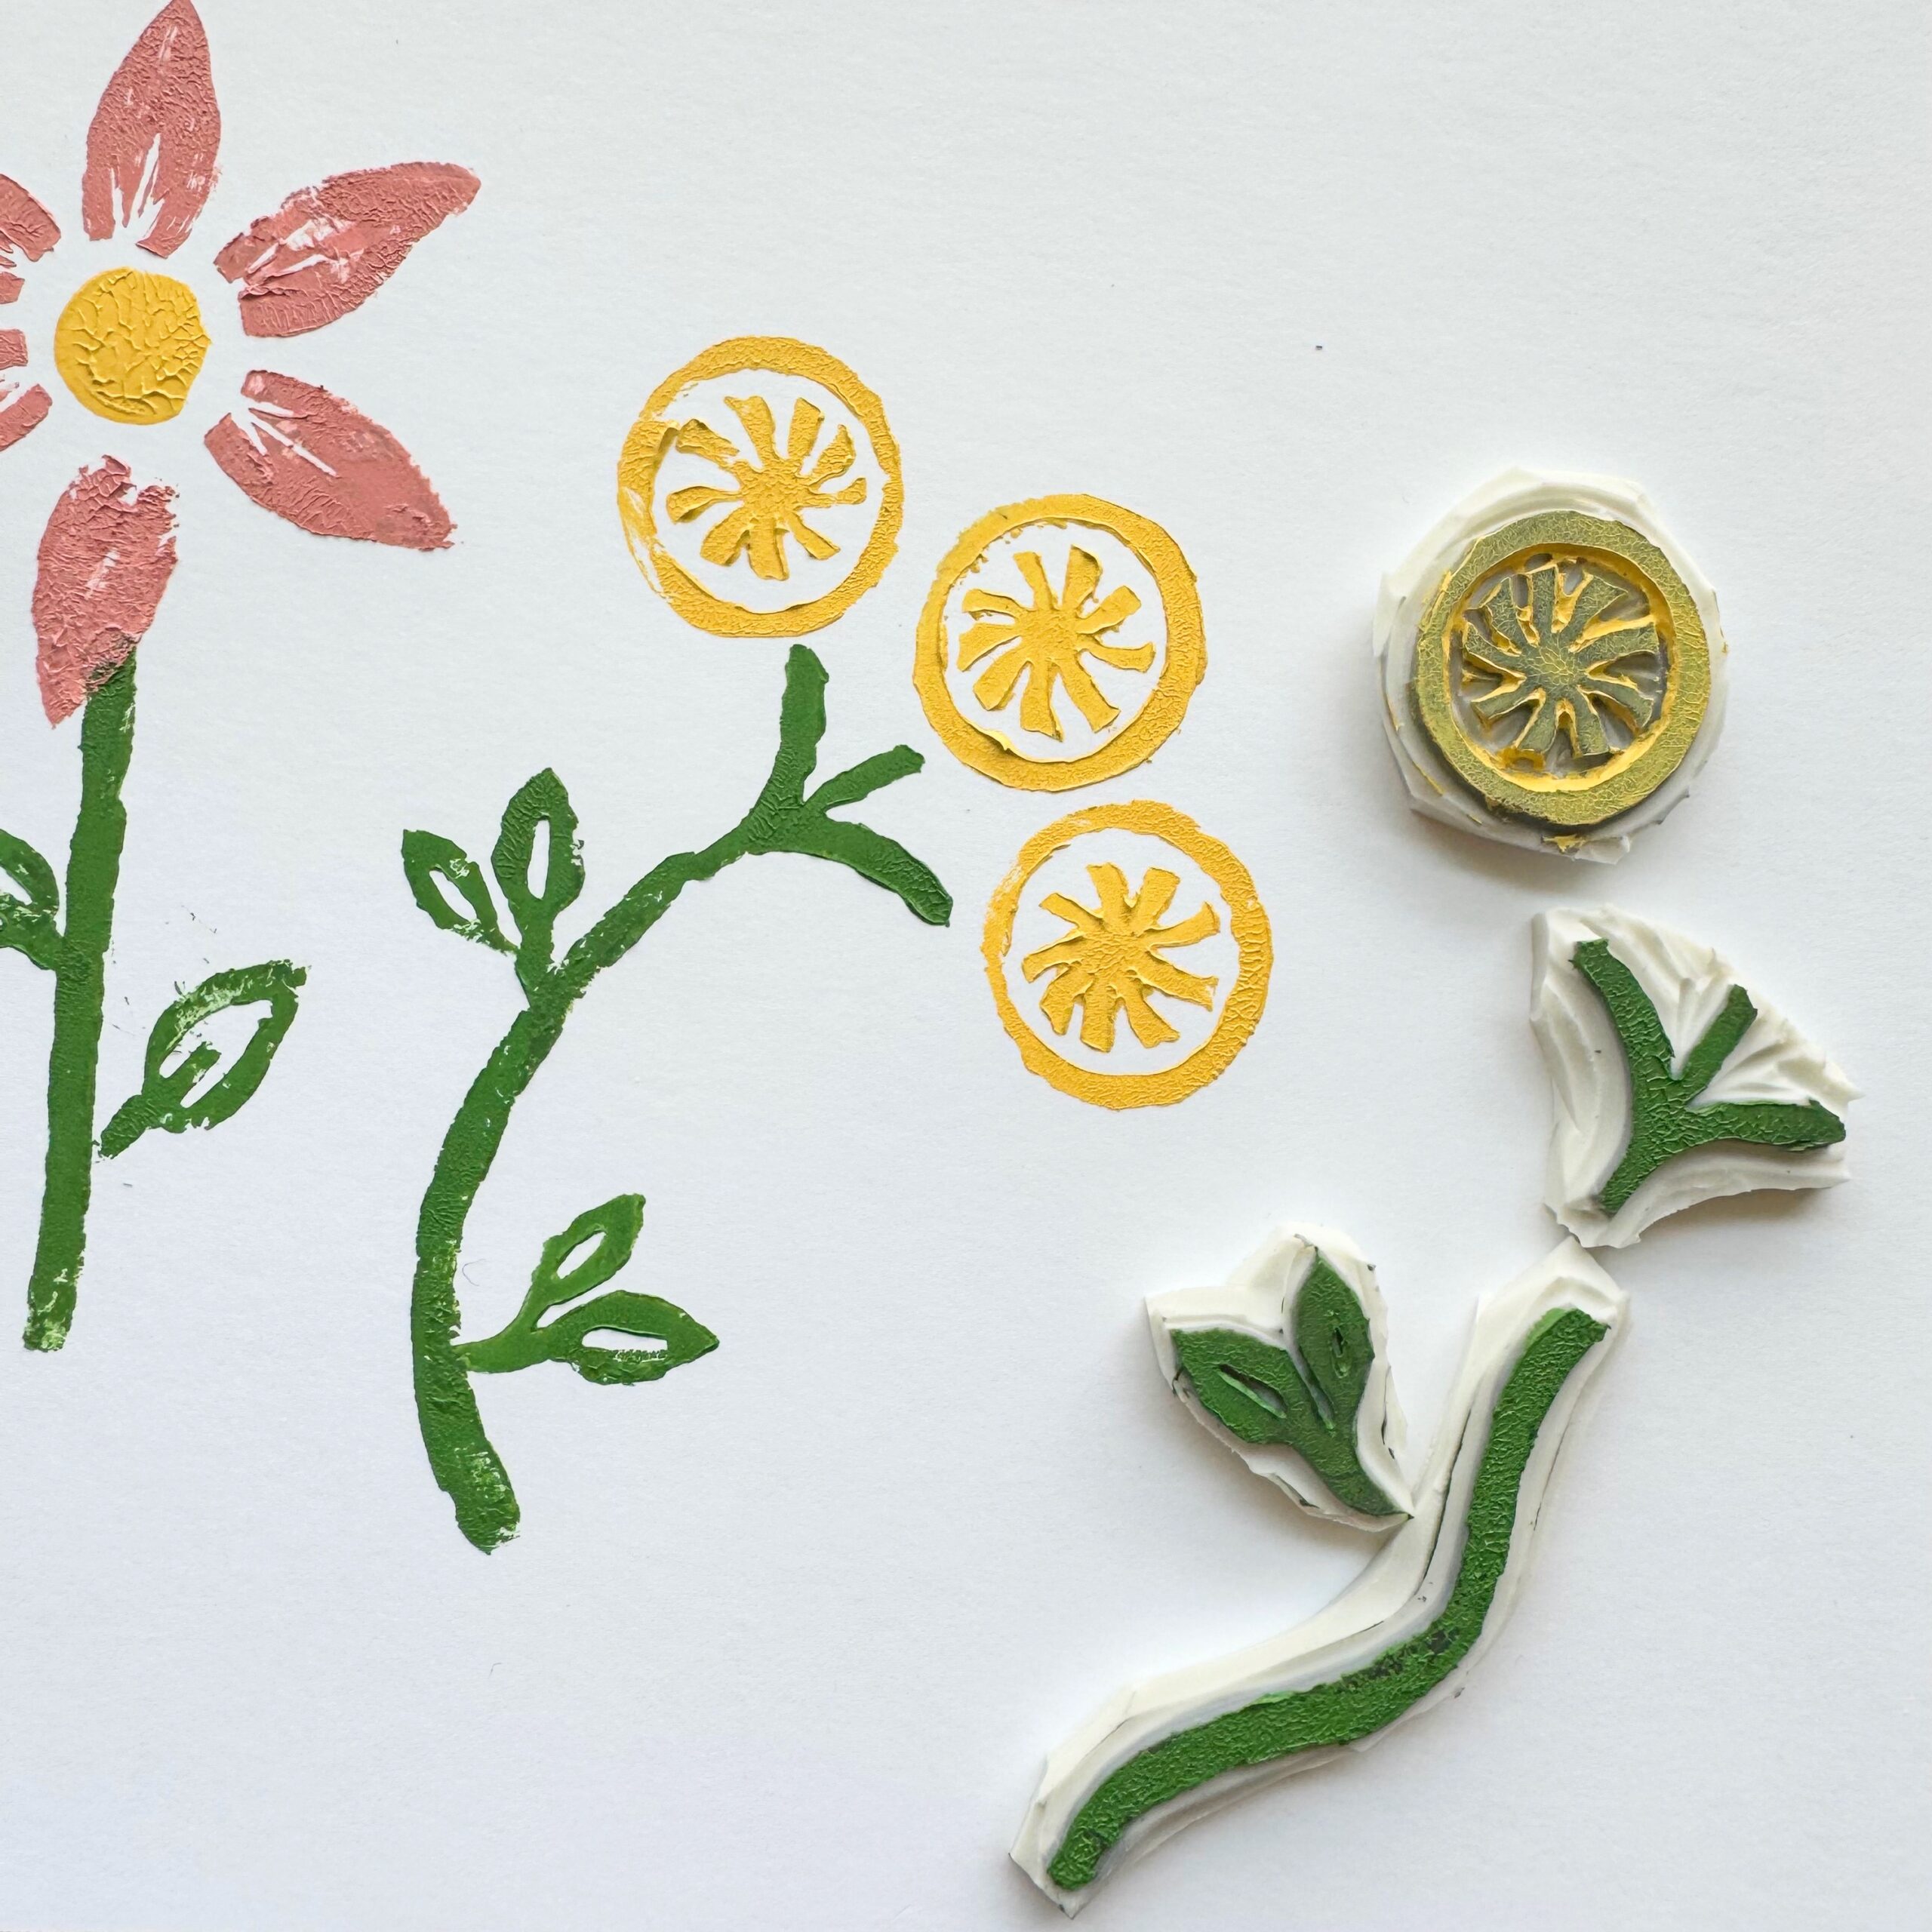
Carve your Design
With your carving tool with a v-shaped blade, carefully carve away the excess rubber around your design. Start with shallow cuts and gradually deepen them as needed. Remember to work slowly and patiently, especially around finer details.
For safety, you should always carve AWAY from your hands and body. If the blade moves suddenly, it may cut you.
Make a Rubber Stamp – Mounting
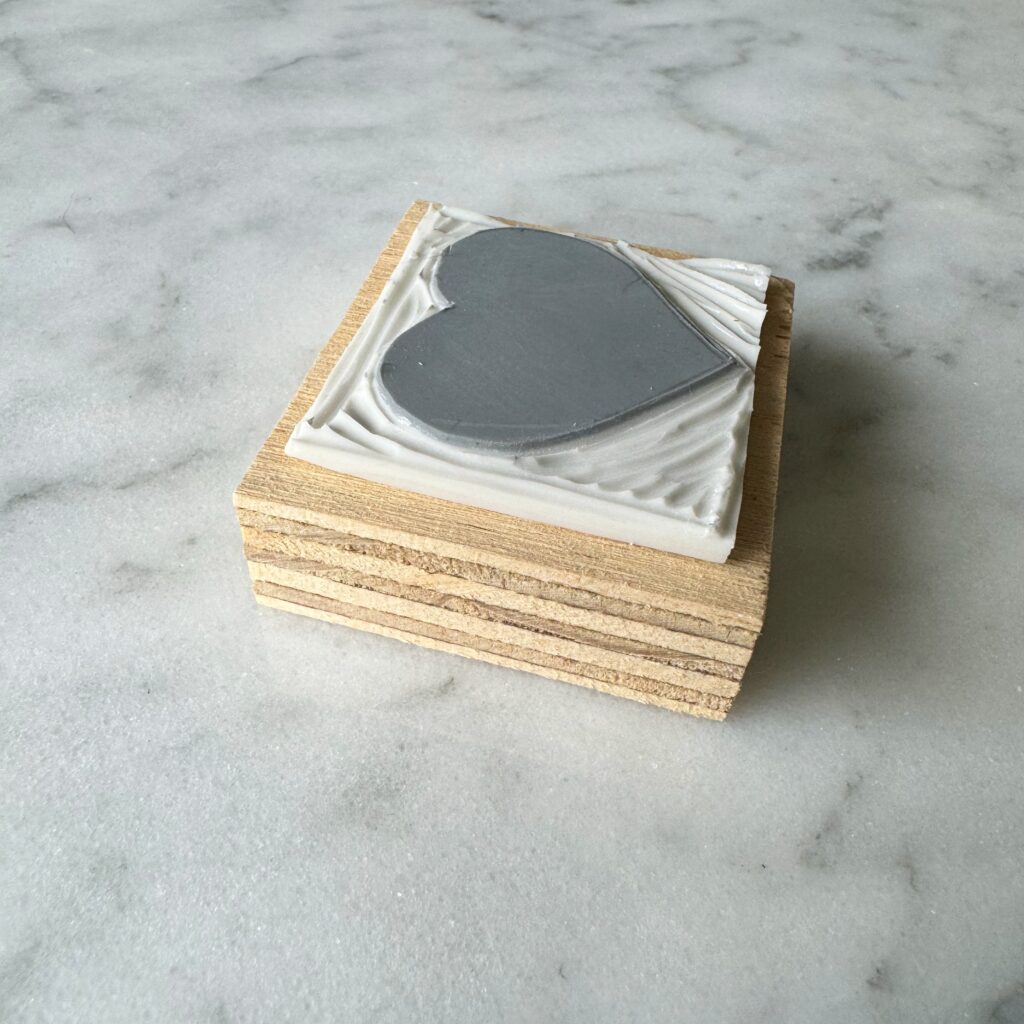
If you want, you can mount your finished stamp onto a wooden block, wine cork, or popsicle stick for easier handling and storage. Your mount should be as big as your stamp for even pressure when using it.
I mounted the heart stamp on a block of scrap wood, since I had the perfect size. You could also mount it onto a piece of cardboard, popsicle stick, wine cork, or any other rigid material.
You absolutely do not need to mount the stamps. It just makes them a little easier to use!
Apply Ink or Paint
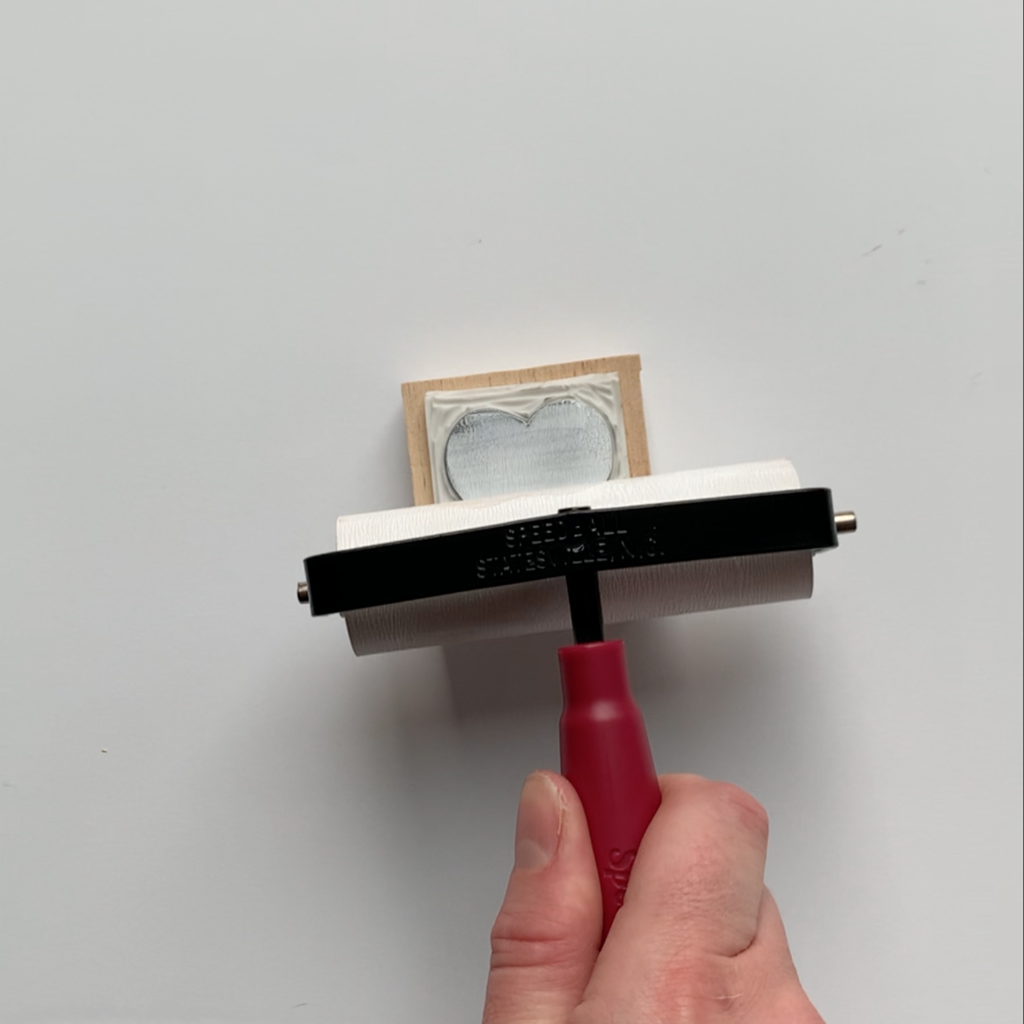
When applying ink or paint, the most important thing is that the stamp is evenly coated.
A stamp pad works great. If you are applying paint or block printing ink you place some ink/paint on a plate and use a roller to evenly spread the paint, and then use the roller to cover the stamp.
You can also experiment with painting on paint with a paint brush. Just keep in mind to keep it an even in thin layer of paint for best results.
Be sure to make a test print on scrap paper before placing it on your final project! Especially if you are working with fabric or something you don’t have a second attempt at.
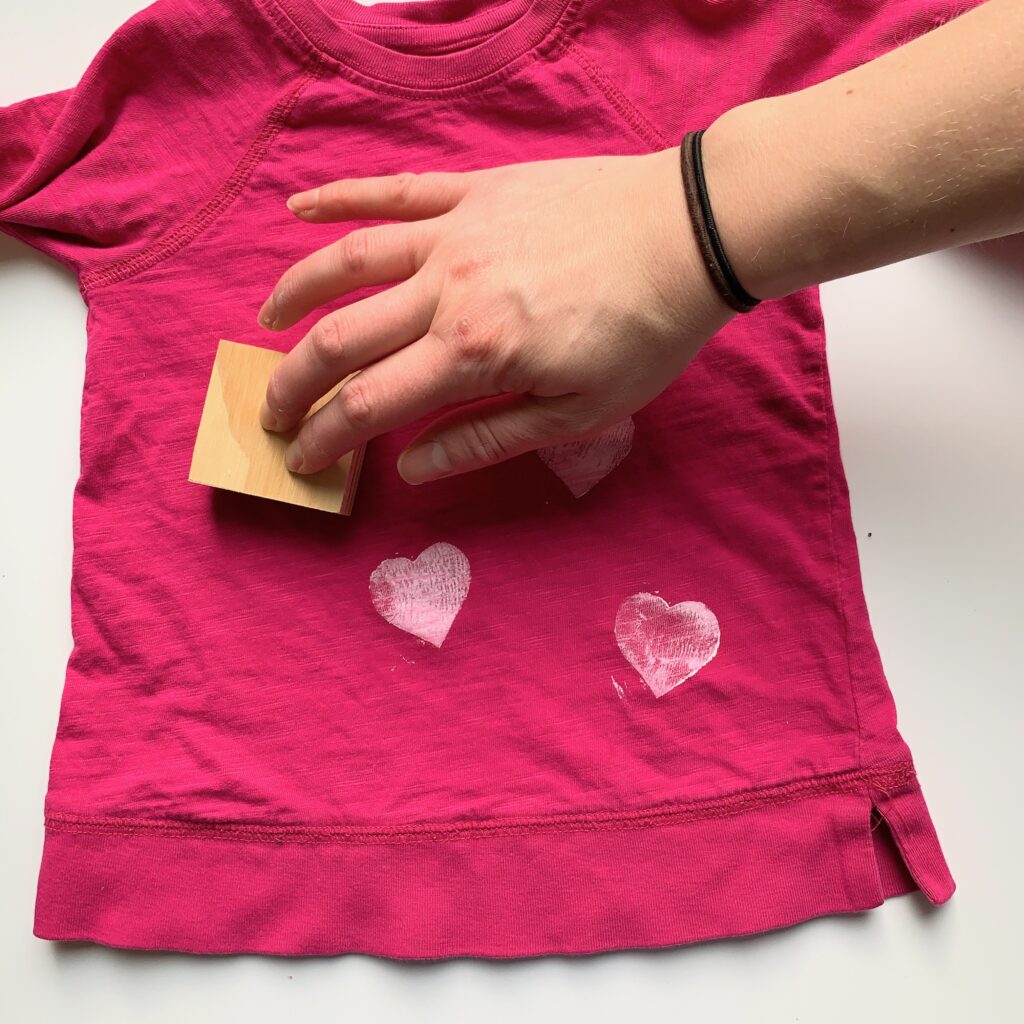
Above is a shirt my daughter and I added hearts to together. The fabric ink wasn’t quite as opaque as we wanted, so we went back in with a paint brush to apply more. In hindsight, I should have added more paint to the roller. We learn as we try new things!
Exploring Creative Possibilities
Now that you’ve mastered the basics of rubber stamp carving, it’s time to let your creativity go. Experiment with different designs, patterns, and techniques to create a diverse collection of stamps. Here are a few ideas to inspire your next projects:
- Gift Wrapping Accents: Use your stamps to embellish gift wrap, tags, and packaging for presents. Create custom motifs that reflect the recipient’s interests or the occasion.
- Themed Collections: Create themed sets of stamps for various occasions, such as holidays, birthdays, or seasons.
- Custom Stationery: Personalize your snail mail by stamping envelopes, letterheads, and notecards with your own unique designs. Hand-carved stamps add a whimsical touch to everyday communication.
- Textile Decoration: Explore the world of fabric stamping by using fabric-safe ink pads or fabric paint to stamp designs onto clothing, accessories, or home textiles. Customize t-shirts, tote bags, or tea towels with your style.
- Stamps for Kids: Create a set of your own stamps for your kids to play with. You can specifically tailor them to their interests and make them the perfect size for their washable stamp pads
- Mixed Media Collage: Incorporate your hand-carved stamps into mixed media artwork, collages, or journal pages. Combine them with other artistic elements for added depth and texture.