Build a Garden Flower Stamp Set – DIY
Making Your Own Stamps
Last week I posted a blog post about carving stamps out of linoleum or a similar material, like Speedy Carve by Speedball. These rubber stamps are so easy to make once you have a few under your belt. This garden flower stamp set was a perfect beginner project.
I love the idea of stamp sets where you can use them to build pieces of an overall scene. As a garden and plant lover, I knew I wanted to make one for flowers. I knew it would be perfect for spring and I thought my daughter would love it as well!
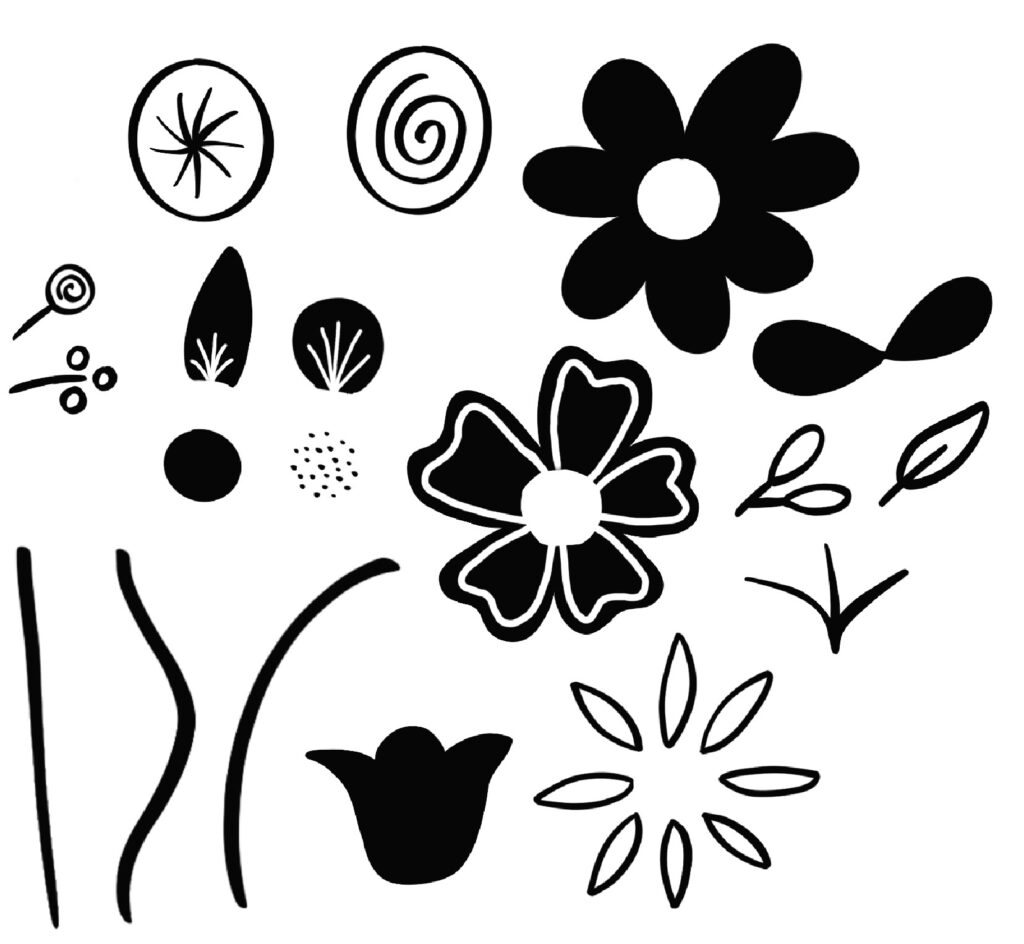
Garden Flower Stamp Template
I got some inspiration from one of my favorite flower drawing books of all time, Botanical Line Drawing by Peggy Dean. I reference this book during a lot of my crafts. Like when I embroidered a collar of flowers around one of my Wiksten Shift Tops.
I built the stamps into a few categories: stems, leaves, little flowers, bigger single flowers, and “build a flowers” with insides and separate petals.
If you would like to download this template for free, feel free to check out my freebies library! Which is open to all email subscribers.
Transferring Template to Carving Rubber
My favorite way to transfer this template is by taking a pencil and drawing a thick layer of graphite across the backside of the template. Then place the piece of paper onto the rubber and trace around the edges of the flowers, stems, and leaves. This will cause the graphite to rub off onto the rubber.
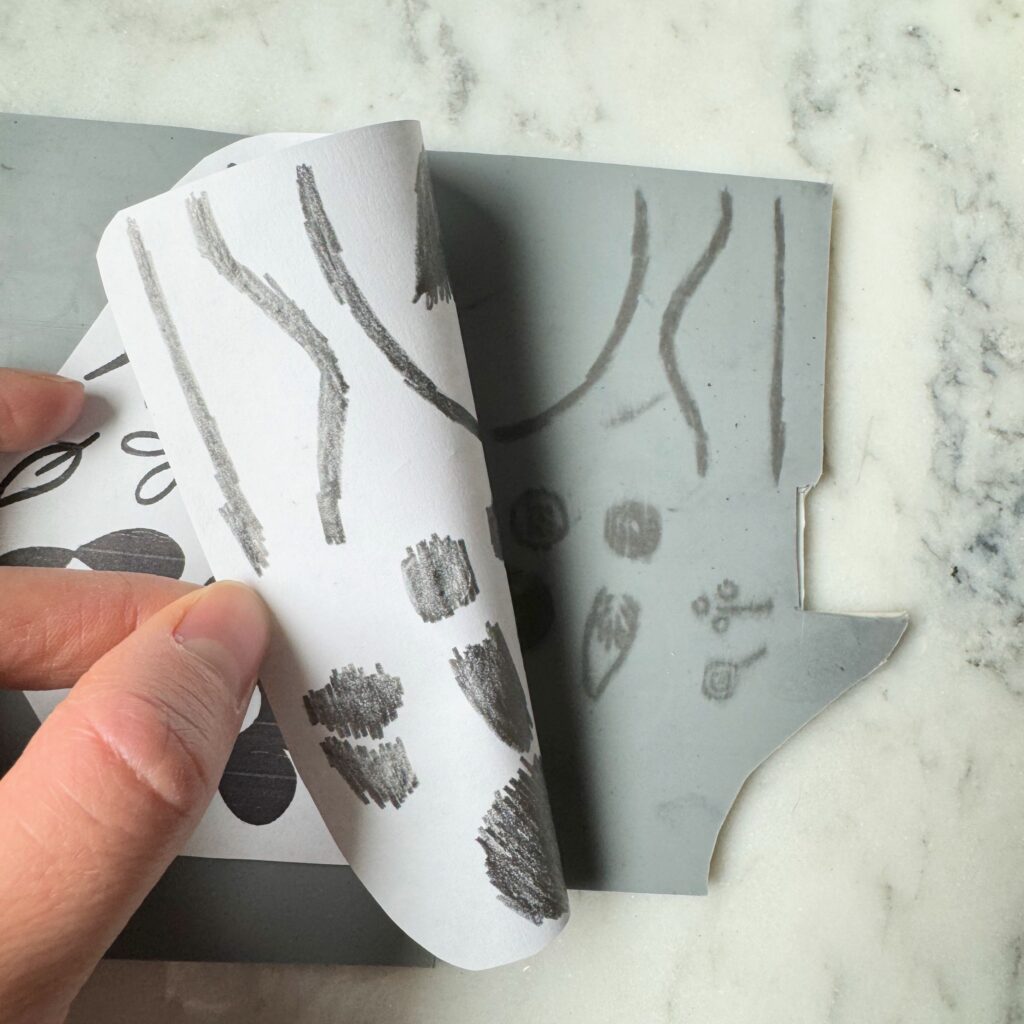
Once you pull back the piece of paper, you will begin to see the outlines. I like to take a marker and make a more defined line for carving.
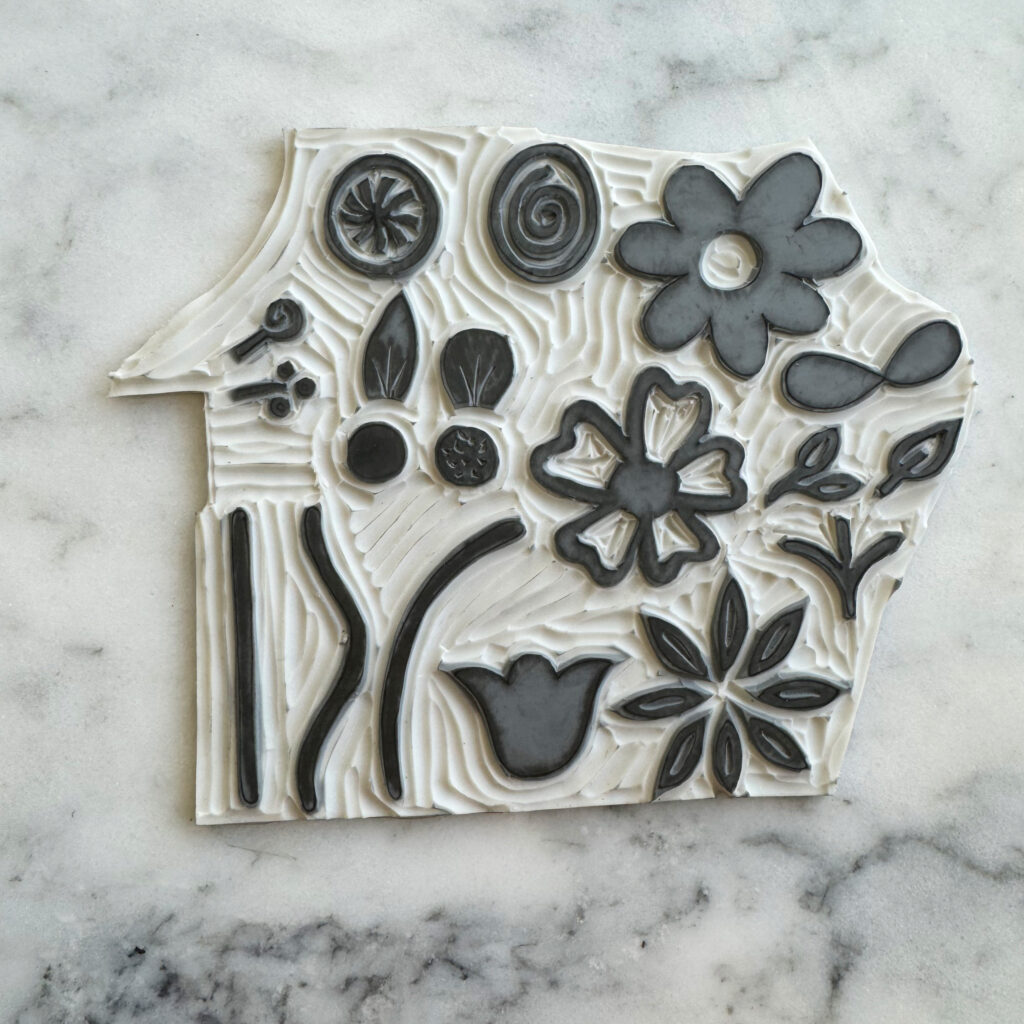
Cutting The Garden Flower Stamps
I like to keep it as one large rubber block and carve all the stamps individually. You can carve away the inside spaces with a larger U shaped blade. The larger block allows you to grip more easily so carving is easier and safer.
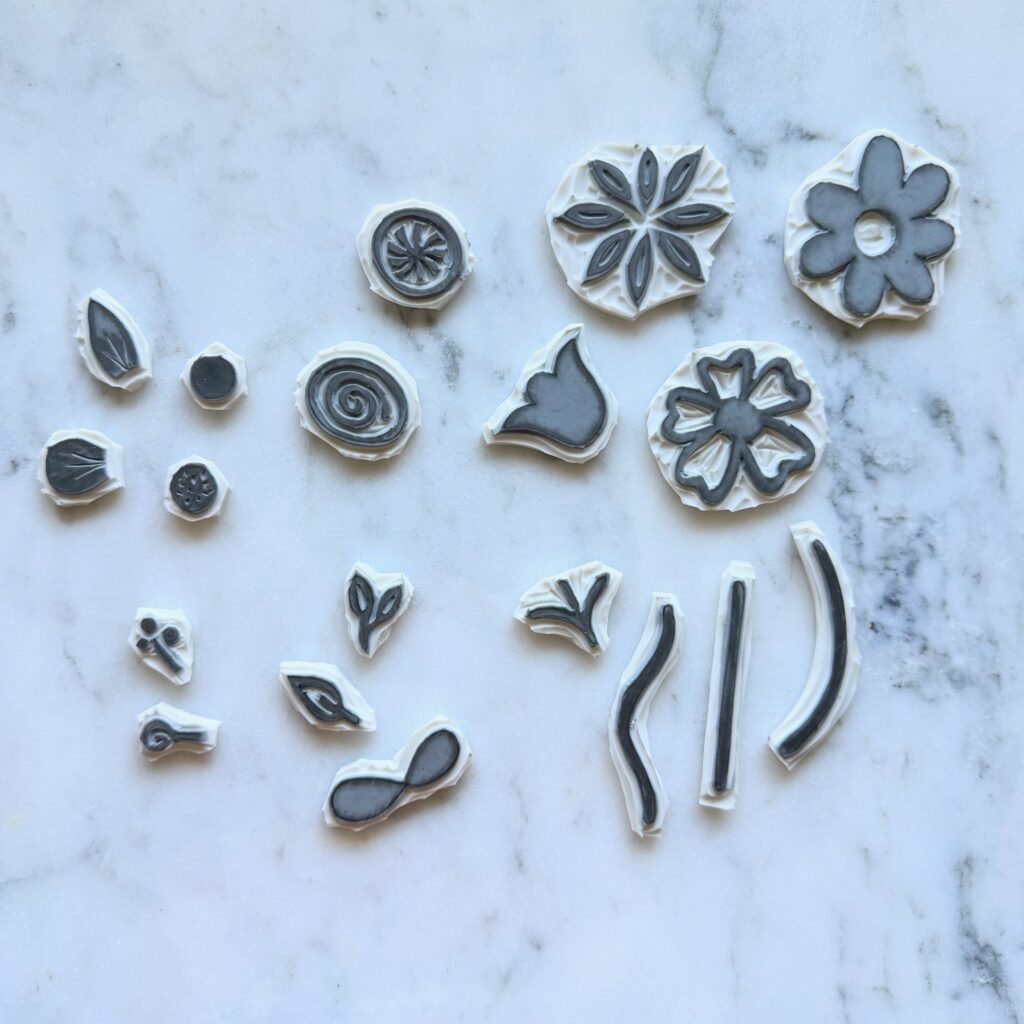
Once they are all carved, then I went through with a blade and cut them apart.
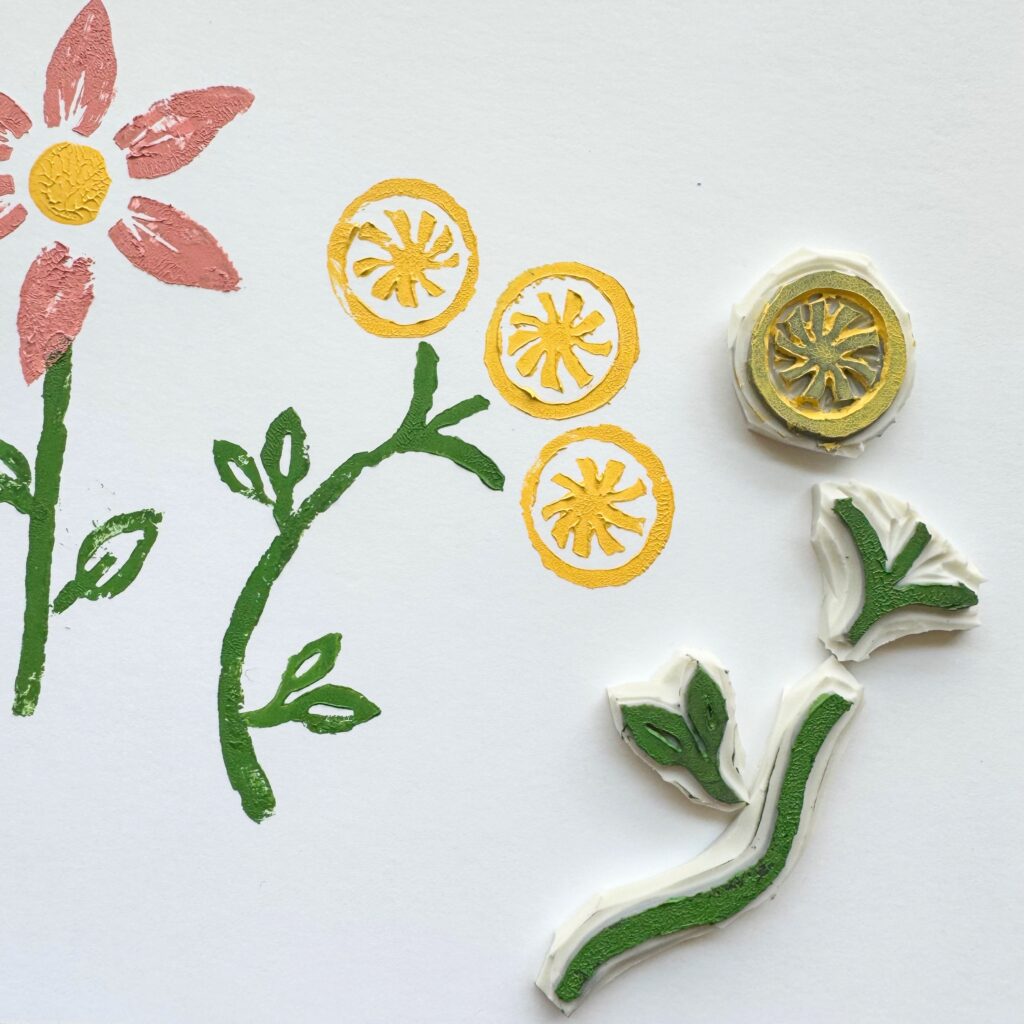
Using the Flower Garden Stamps
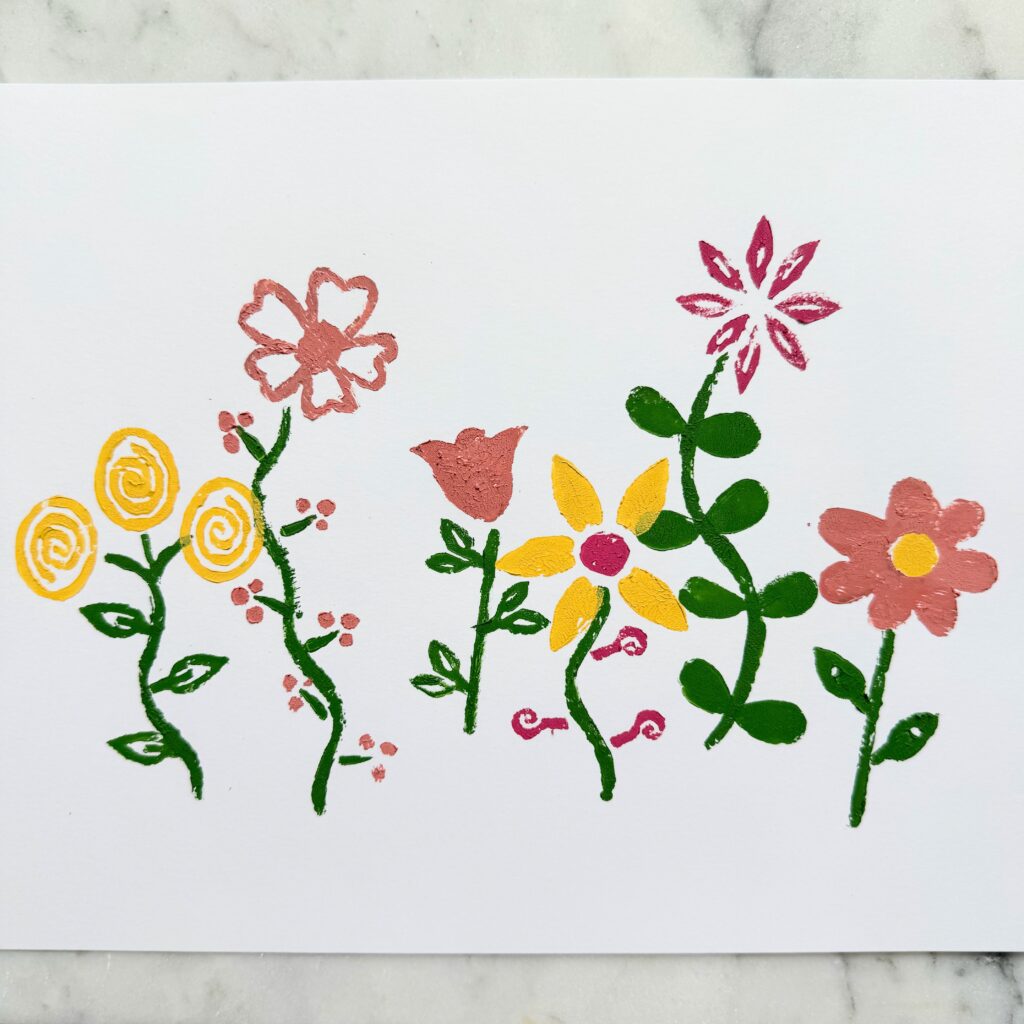
I’ve found that there are a limited number of colored ink pads. When I used these stamps I chose to use simple acrylic craft paint. I painted each stamp with a thin layer of paint before placing them. It process was pretty easy and I liked how I could use the paint brush for touch ups.
I suggest placing stems first, then layering whatever flowers or leaves you want in the foreground or to stand out the most. It is fun to also add a bit of layering, but I found that the first layer of paint does bleed through the second.
Uses for Flower Garden Stamps
I love the versatility of these stamps since they are made so you can build upon them. Perfect for projects big or small! Here are a few of my favorite ideas:
- Use them on name cards during a spring or Easter brunch
- Embellish cards and letters with them
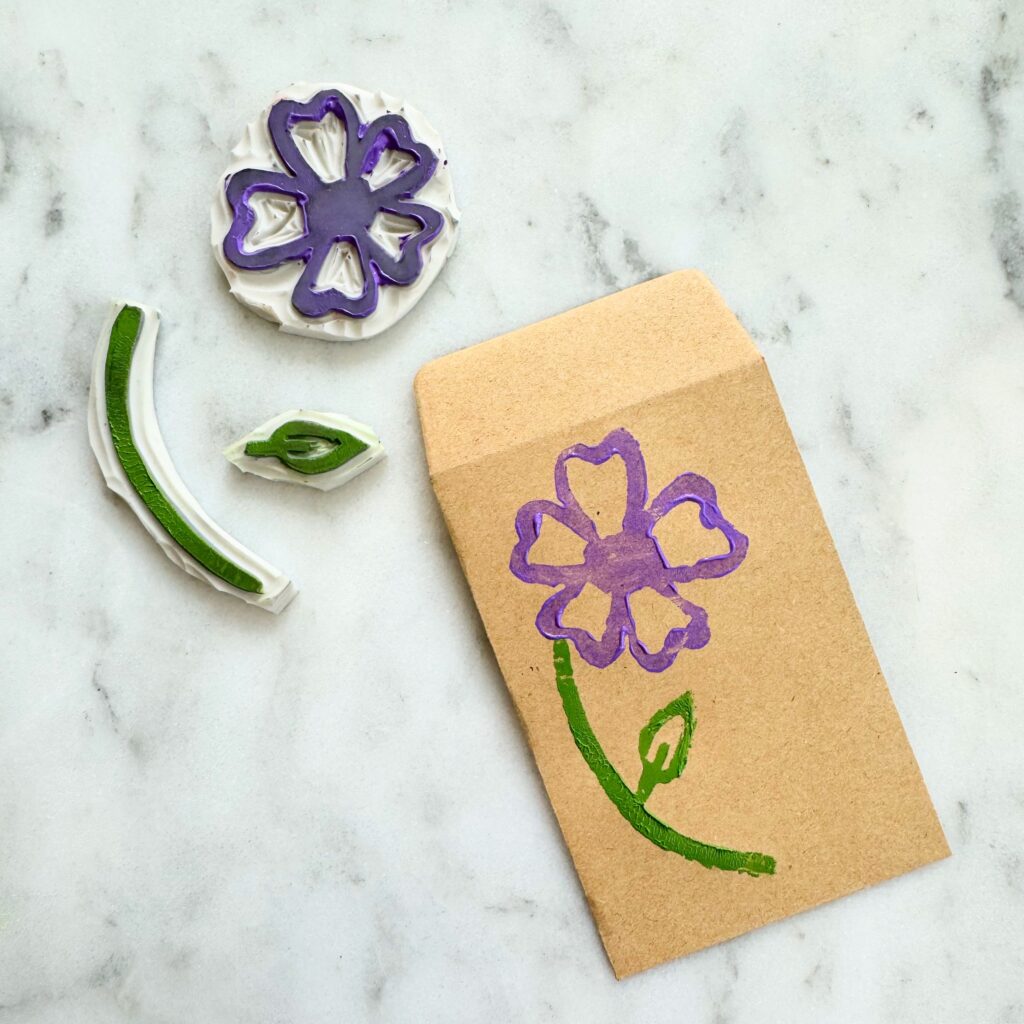
- Place a small flower stamp on a seed packet if you are gifting seeds
- Decorate the cover of a paper notebook
- Make floral wrapping paper by stamping brown packing paper
- Create a piece of art to display in your home