How to Make an 8 Point Star Quilted Pillow Cover
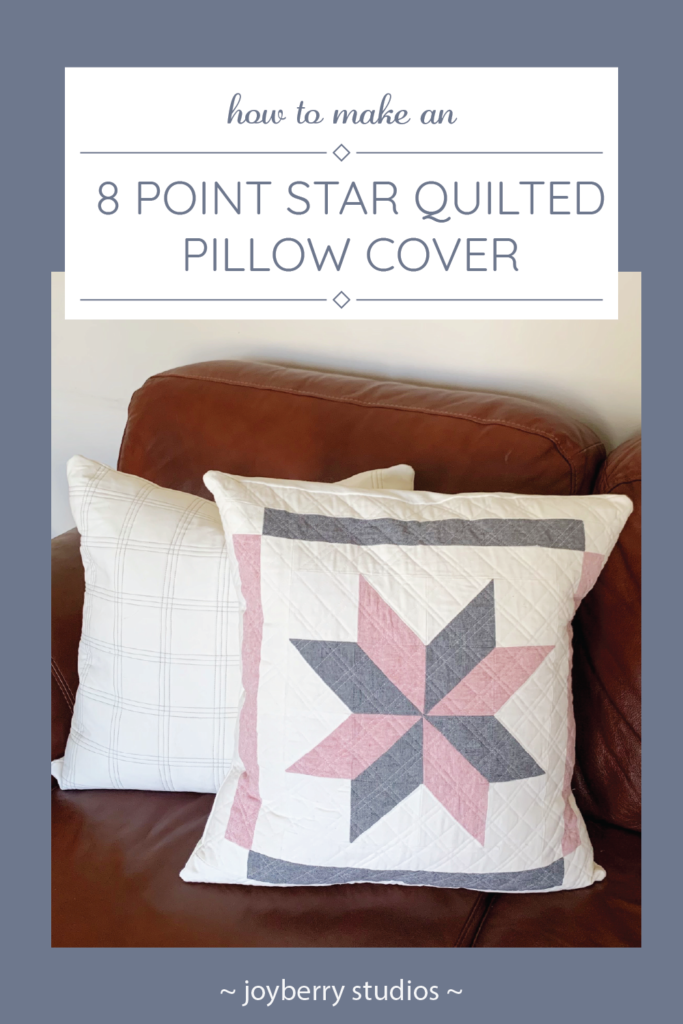
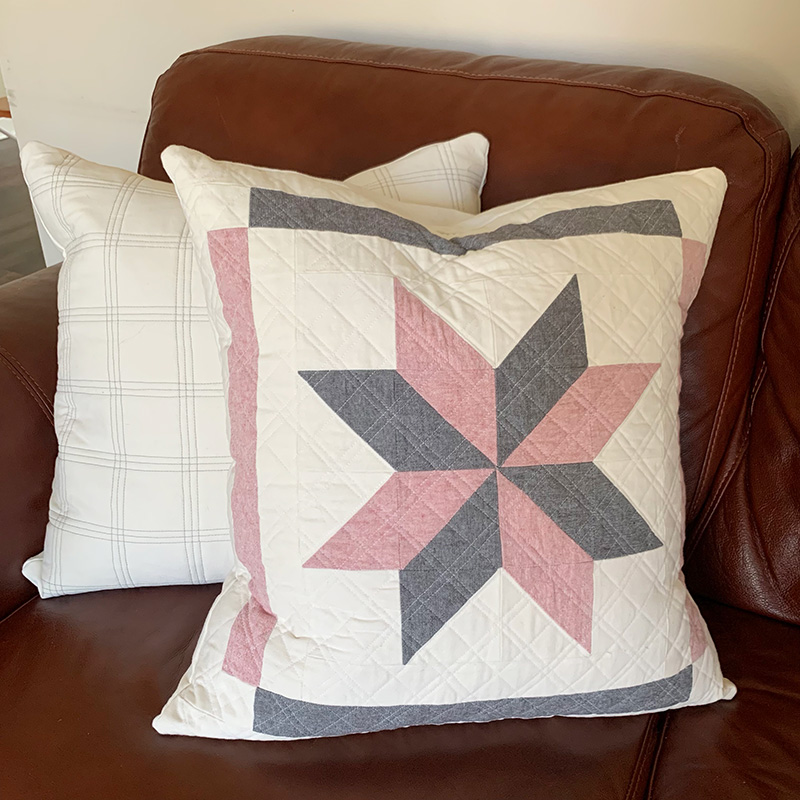
Eight Point Star Quilted Pillow Cover
I love a good quilted pillow cover. They are great for changing out home decor for the different seasons/holidays and they are a practical project for using up extra scrap fabric.

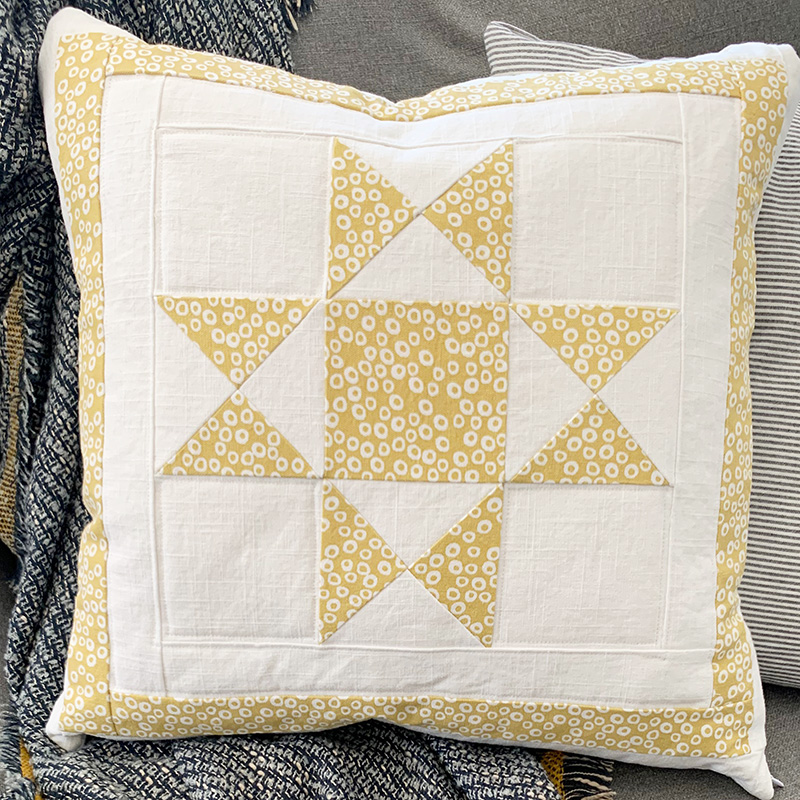
I made a set of Ohio Star Quilt Block pillows last spring. They were so fun to pull together and a great beginner quilting project!
I love the simple star shaped quilt blocks, which is why I wanted to make a set of post-holiday winter pillows with the classic eight pointed star. I love the way they turned out!
Sizing
I wrote this pattern for an 18” pillow. If you have a slightly smaller pillow, you can change the size of the border pieces for a quick and simple pattern change.
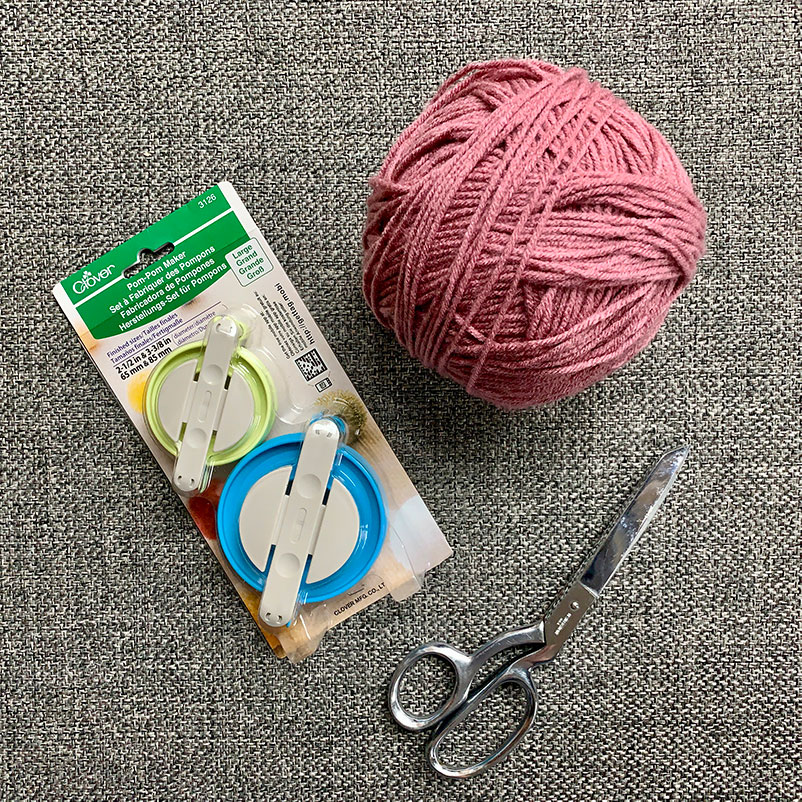
Fabric
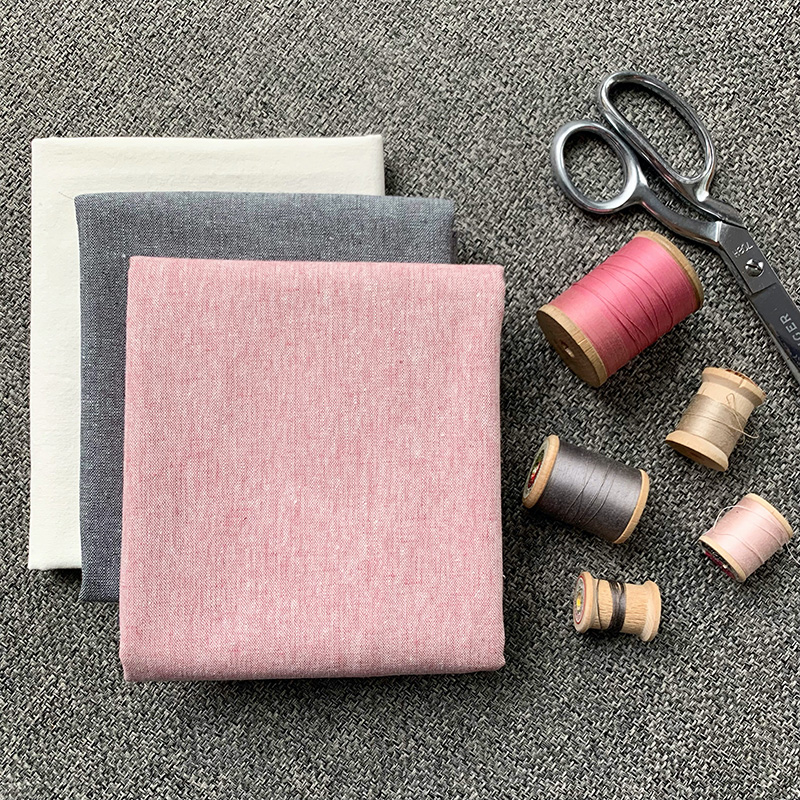
You will need two different fabrics for your star and a background fabric.
I used Robert Kaufman Essex (linen & cotton blend) in shale and berry for the star and part of an old curtain that I was no longer using for the background.
It is important to try to match fabric weights for this pillow. Any quilting cotton or mid weight fabric is a great choice!
Cut List
Eight Point Star Blocks – Half Square Triangles
Star Fabric 1: cut four 4.25” squares
Star Fabric 2: cut four 4.25” squares
Background: cut four 4.25” squares AND four 3.5” squares
Border:
Star Fabric 1: two 15” x 1.5” rectangles
Star Fabric 2: two 15.5” x 1.5” rectangles
Background: two 12.5” x 1.5” rectangles, two 15” x 1.5” rectangles, four 1.5” x 1.5” squares, two 20.5” x 1.5” rectangles, two 22.5” x 1.5” rectangles
Envelope Pillow Back
Background: two 18.5” x 12” rectangles
Piecing the HSTs
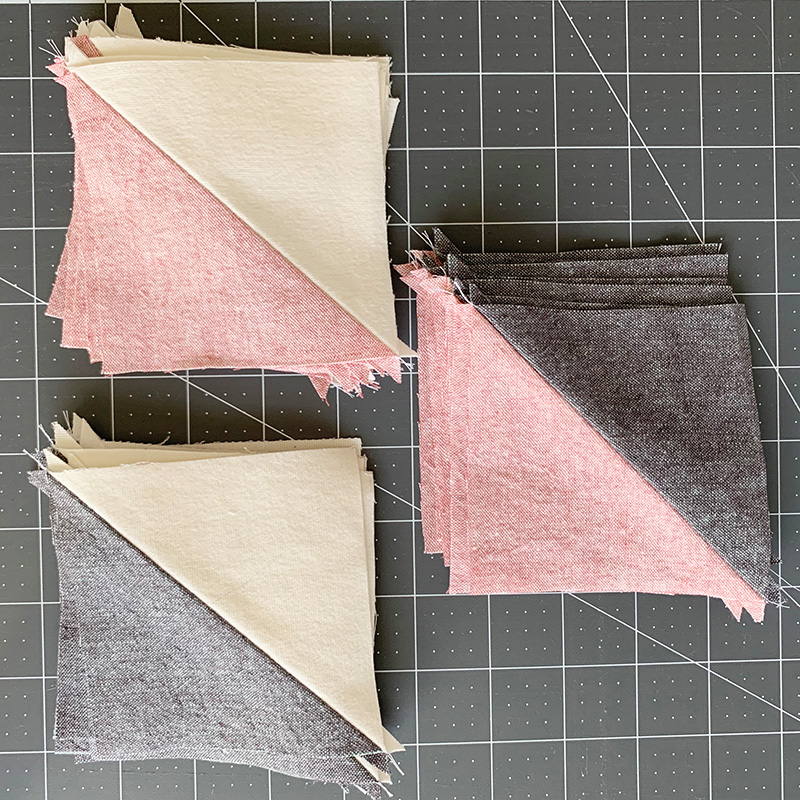
Making the Half Square Triangles
Make: 2 HSTs (half square triangles) with star 1 and star 2 fabric, 2 HSTs with star 1 and 4.25” background fabric, and 2 HSTs with star 2 and 4.25” background fabric.
Press seams open and trim each block to 3.5” squares
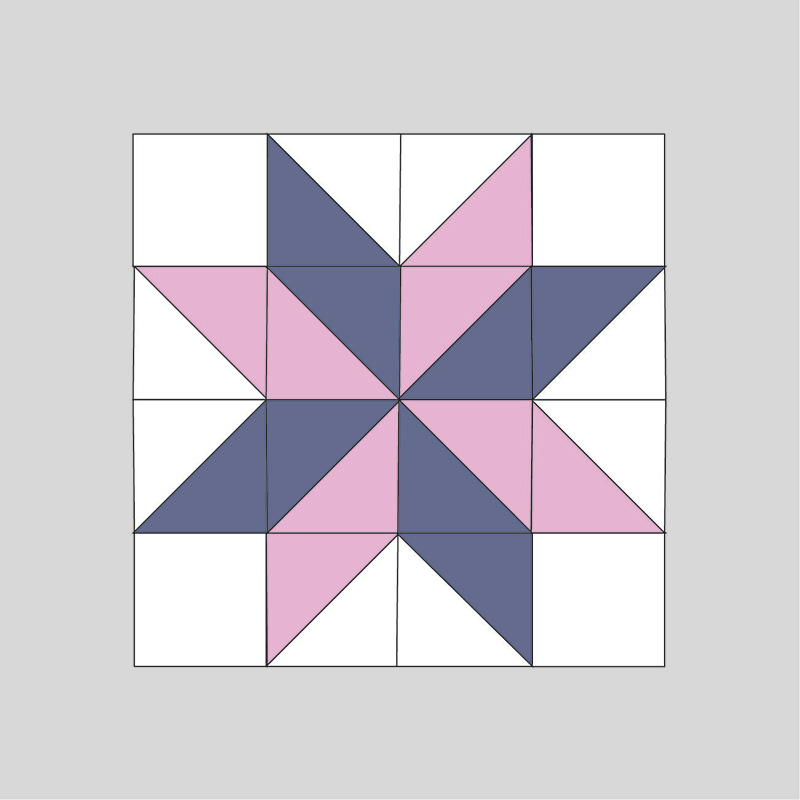
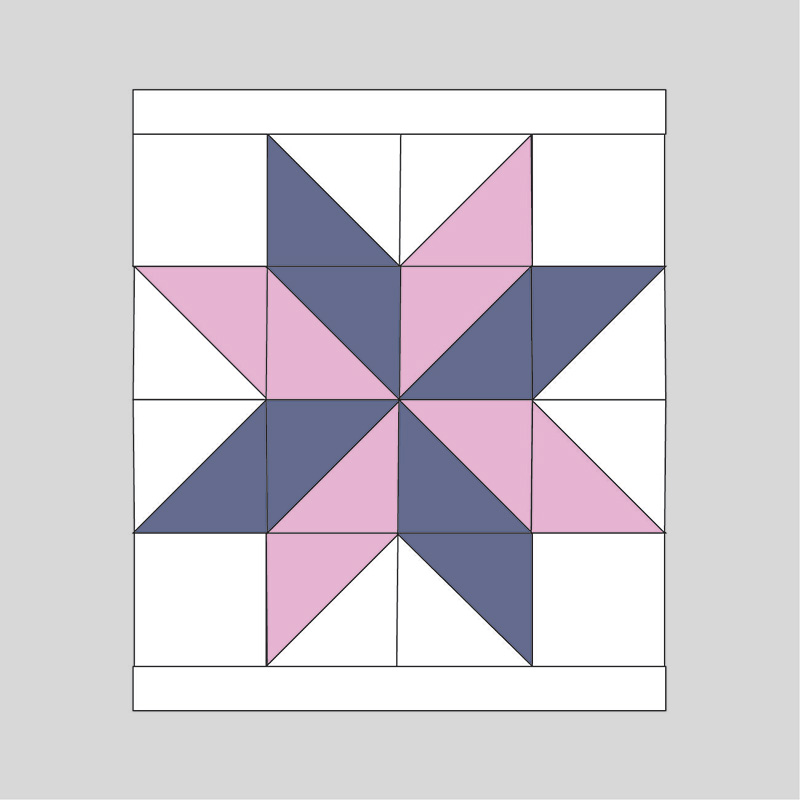
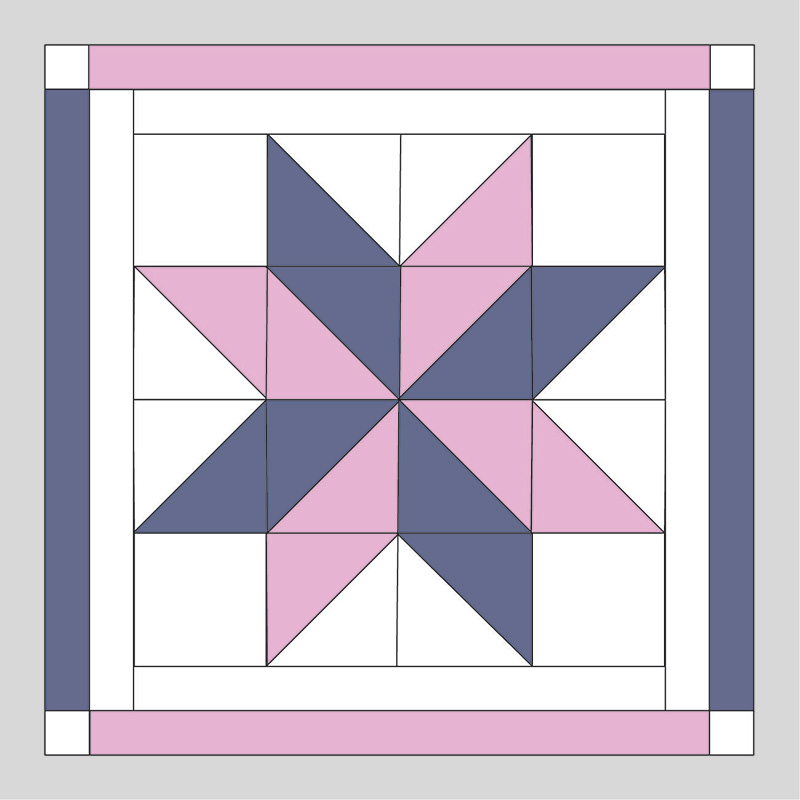
Arrange your squares as shown in the diagram below:
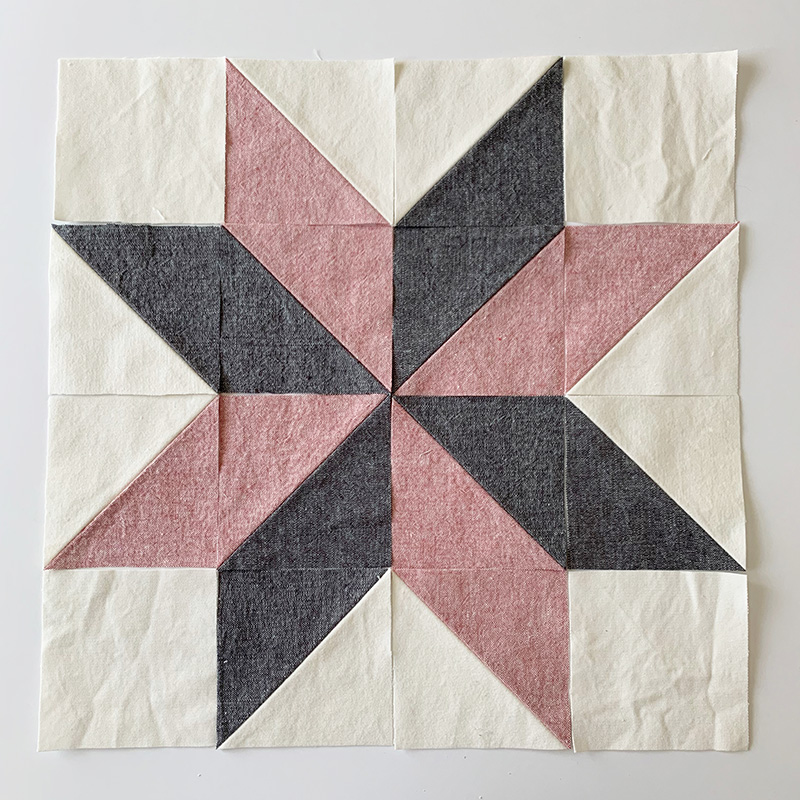
HST with star fabrics are in the center, HST with star fabrics and background color are in the middle top, bottom, left, and right, and 3.5” background squares are in the corners.
Take each row of squares and piece them together with ¼ inch seam allowance. This will make four rows.
Press each seam open.
Piece together the four rows to create your eight pointed star quilt block. Press all seams open and give it a good press on both sides! Trim the block to 12.5”x12.5”.
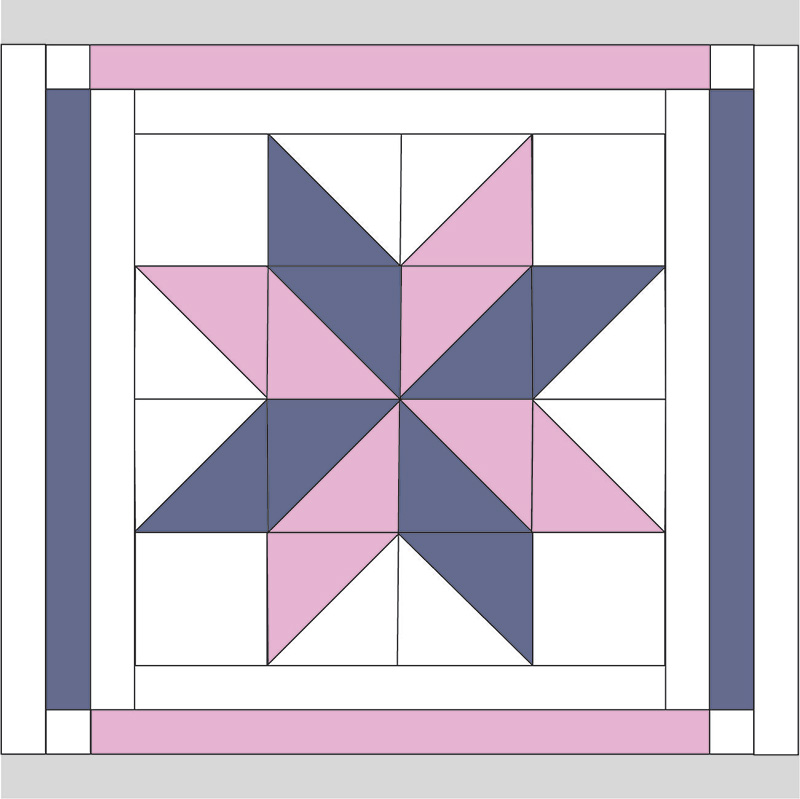
Assembling the Border
1.Sew the 12.5” x 1.5” background rectangles to the top and bottom of the star quilt block.
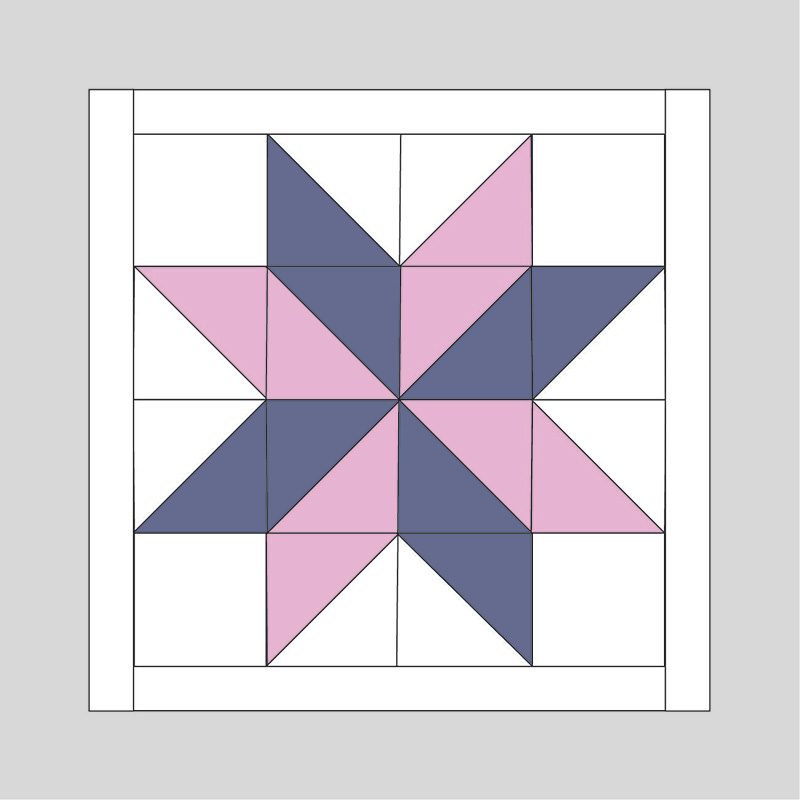
2.Sew the 14.5” x 1.5” background rectangles to the left and right of the star quilt block. Trim to make a 14.5” square. Press seams
3.Sew the 14.5” x 1.5” rectangles of star fabric 1 to the left and right sides of the blocks.
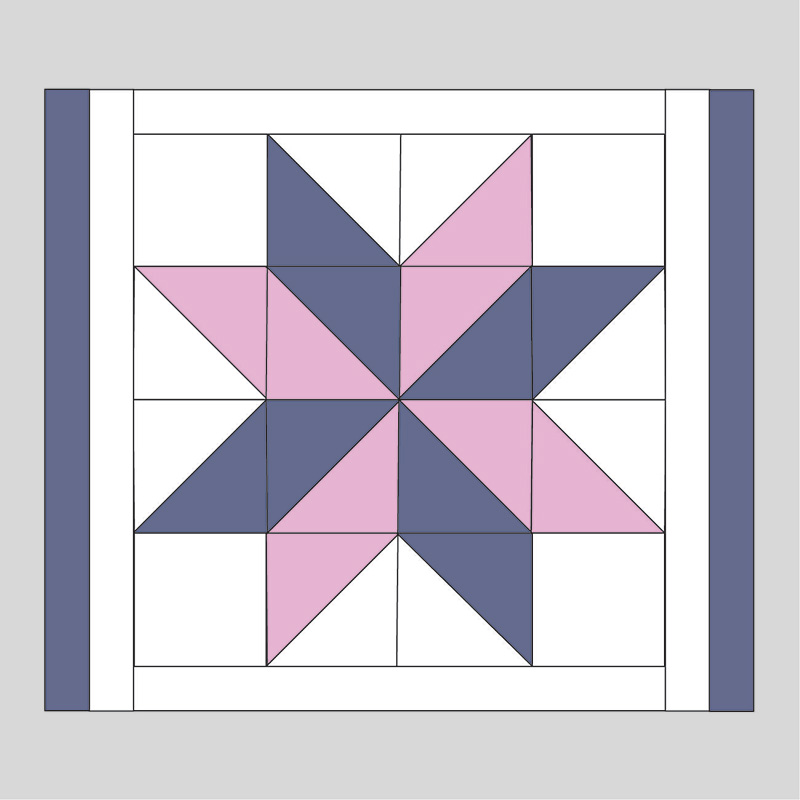
4.Sew a 1.5” background square to each side of the 14.5” x 1.5” rectangles of star fabric 2.
5.Sew the rectangles you just made in step 4 to the top and bottom of the quilt block. Press and trim to make a 16.5” square.
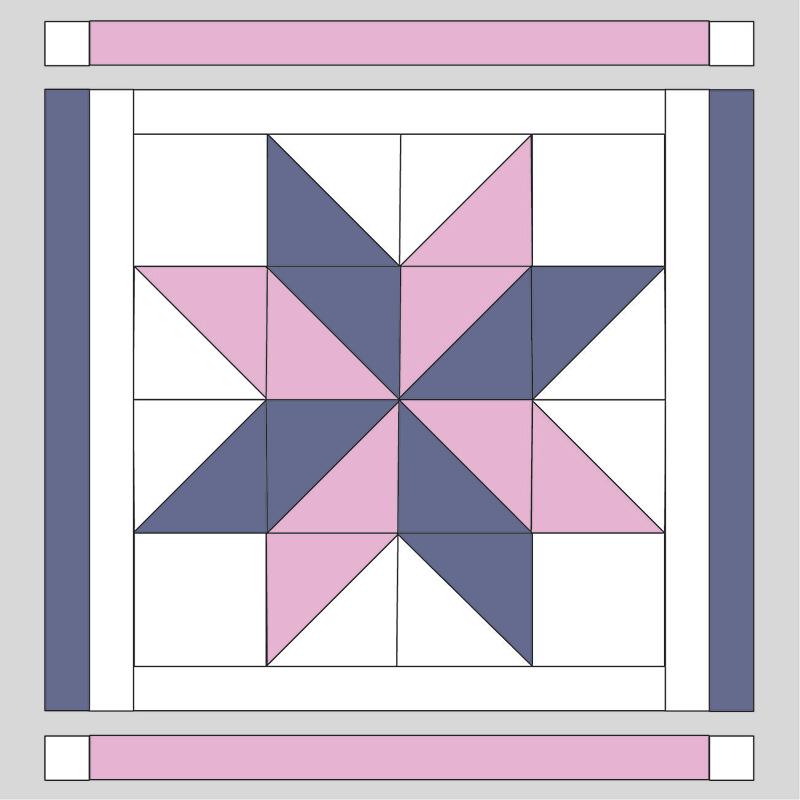
6.Sew the 16.5” x 1.5” background rectangles to the left and right sides of the quilt block.
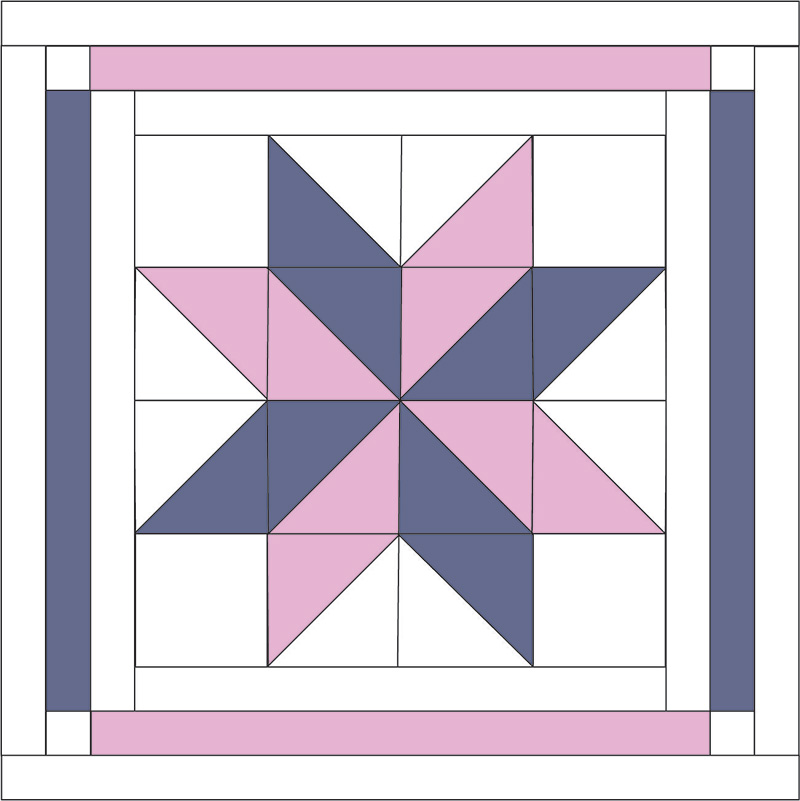
7.Sew the 18.5” x 1.5” background rectangles to the top and bottom of the quilt block. Press and trim to make a 18.5” square.
Quilted Pillow Top Sandwich
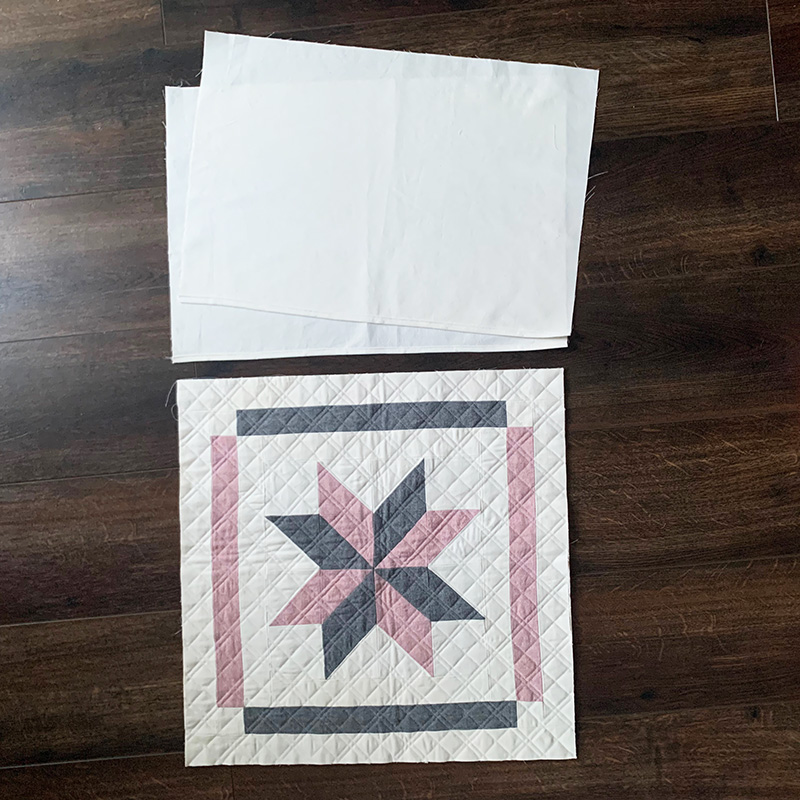
I always utilize scrap fabric for the backs of my quilted pillow tops. They sit inside the pillow, are never seen, and a great way to utilize leftover fabric. Cut your quilt backing just a bit bigger than the quilted pillow top, ~ 19” x 19”.
Place the quilt backing right side down on your table. Place a piece of quilt batting around the same size as the background fabric down next. Then finally place your quilted pillow top in the center.
Double check that there aren’t any wrinkles in your fabric or batting and secure the quilt sandwich together with some pins or basting spray.
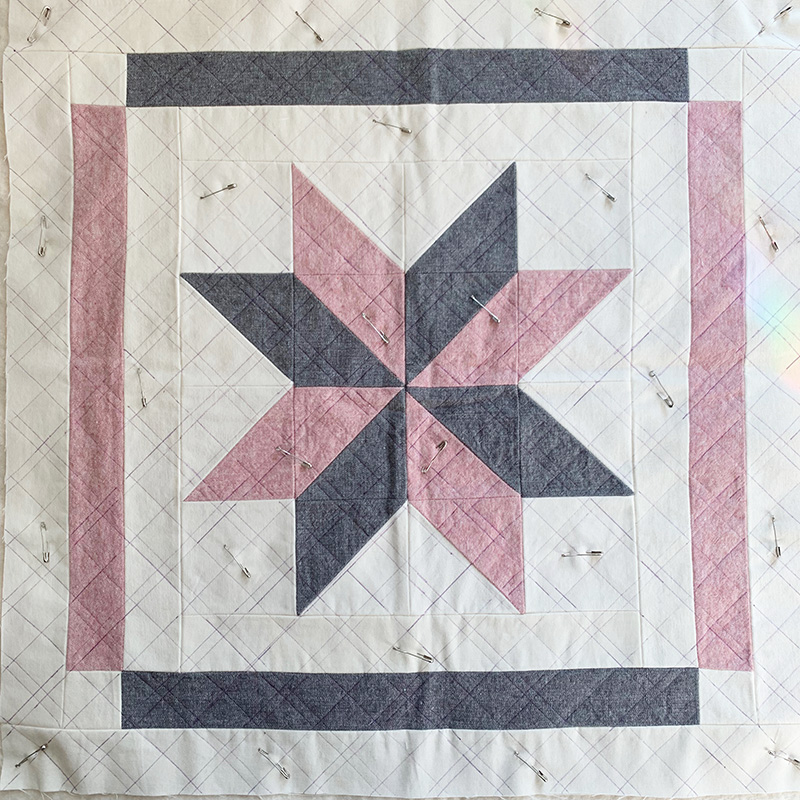
Marking & Quilting the Pillow Top
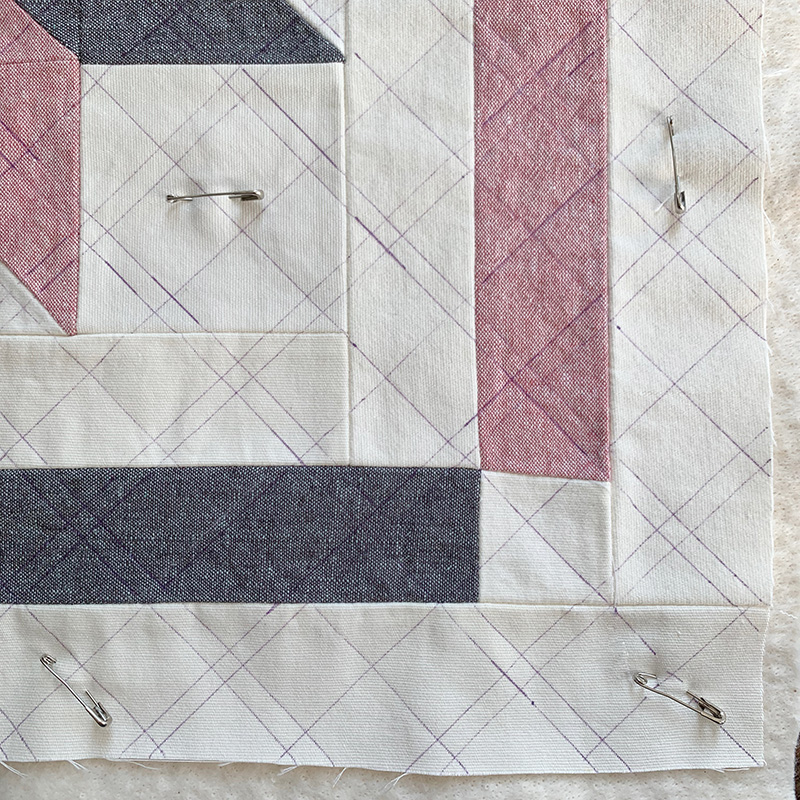
Feel free to quilt your pillow top in any way that you would like! I like to try to find a way to quilt the pillow top that complements the quilt block. For this pillow, I did diagonal quilting lines that alternated between one and two lines. I really like how it turned out!
I marked my first diagonal lines through the center. Then I marked my next quilting lines 1 inch and 1/4 inch away from each other.
Assembling the Envelope Pillow
For a more in depth description of how to make an envelope pillow, check out my other blog post here.
To assemble an envelope pillow, fold and press ¼” to one of the 18.5” sides of each pillow back. Fold and press ½” to the same side to create a hem. The hemmed side is the middle of your pillow. Sew to secure the hem.
Place the pillow backs right side together with quilted pillow top, make sure hemmed edges overlap.
Sew pillow backs and pillow top together with a 1/4 “ seam allowance. Finish edges with serger, overcast, or zigzag stitch.
Turn pillow right side out and enjoy!
Making a quilted pillow cover is such a fun and quick project!