How to Sew a Pillow with an Invisible Zipper
Pillows are such a great beginner sewing project. Add an invisible zipper and your pillow will look professional!
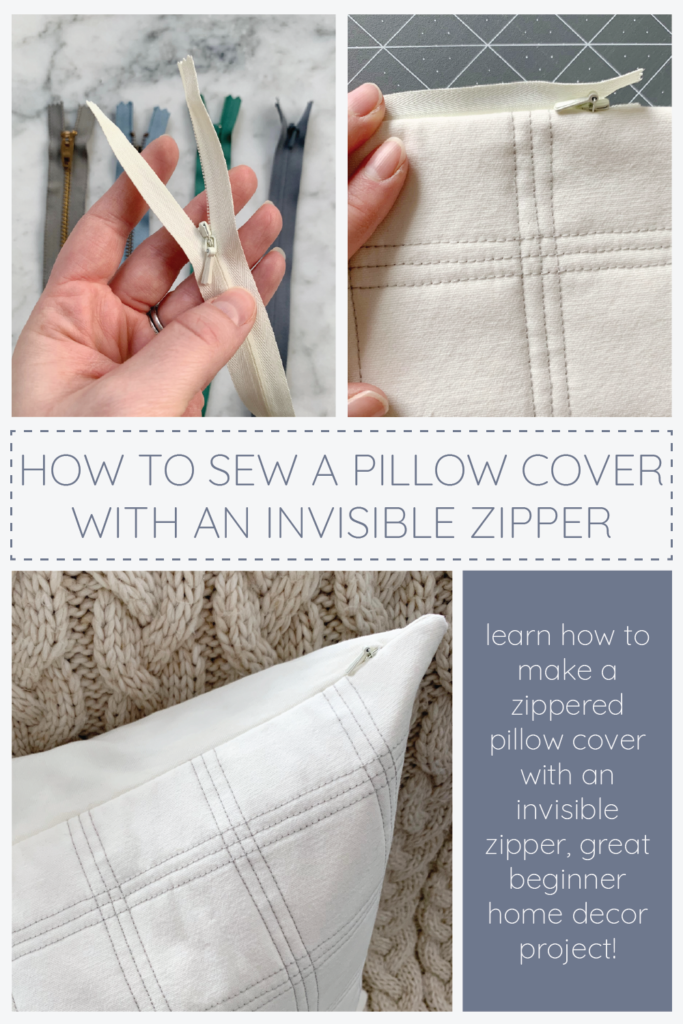
Learn How to Sew a Pillow with an Invisible Zipper
Pillow covers are a great way to change up your home decor. They can easily spruce up your home for the different seasons and holidays. When not in use, they easily fold up and barely take up any space! If you don’t have any, don’t worry. You can easily learn how to sew a pillow with an invisible zipper!
Pillow covers are a great beginner friendly project. With just a few short seams you can create your own custom pillow. It is also a great use for fun fabrics that you may fall in love with at your local fabric/craft store.
If you’re also looking to learn more sewing techniques, pillow covers are a great way to dip your toes in. Want to get into quilting, but not ready to jump into a blanket, quilted pillow covers are a great project! Want to learn how to insert zippers? Well, you’ve come to the right place!
Choosing a Zipper for your Pillowcase
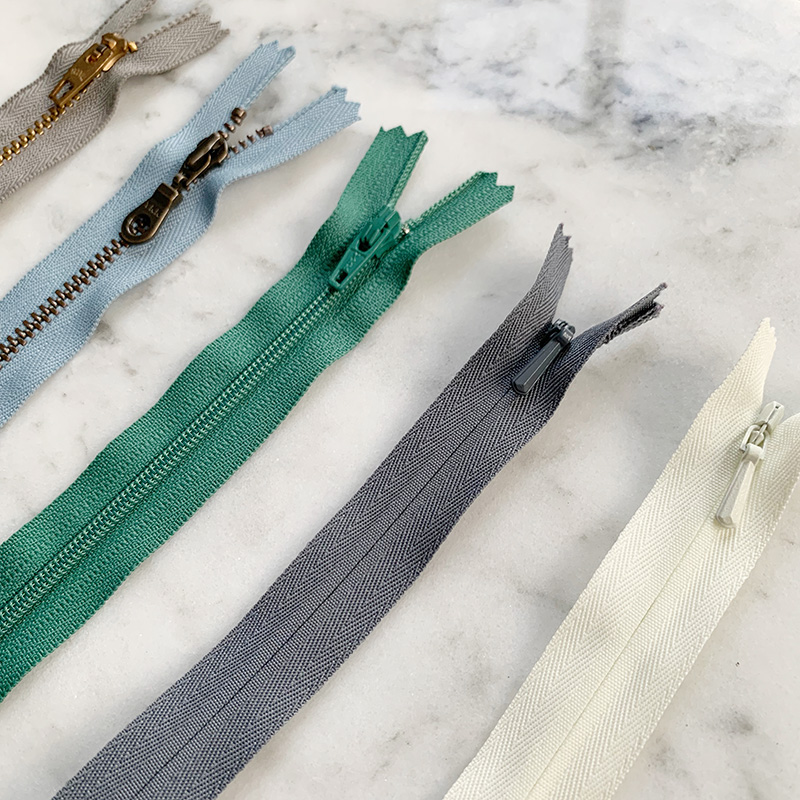
There are so many different kinds of zippers: invisible, metal, coiled, molded plastic, separating, and the list goes on.
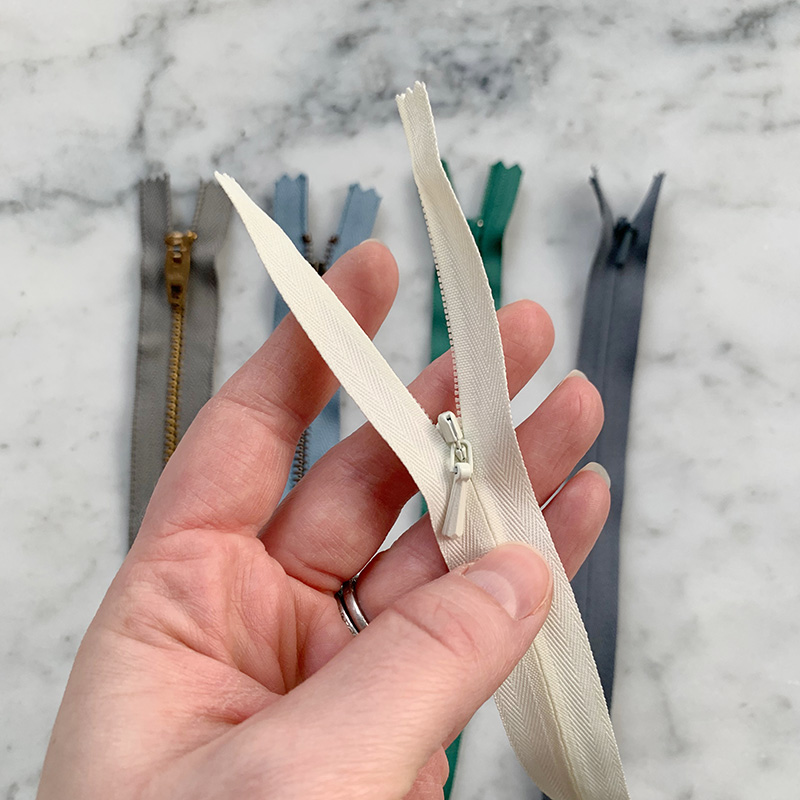
If you don’t want to be able to see your zipper, you should choose an invisible zipper. I think this gives the pillow the most clean lines. Since the zipper is hidden, it also doesn’t rub on whoever is snuggling with the pillow.
Select a zipper with the closest matching color to your fabric. You shouldn’t be able to see the zipper once it is inserted, but if your sewing isn’t perfect it may peek out a bit.
The size of your zipper absolutely matters. You want your zipper to be as close to the length of the pillow as possible. Most invisible zippers come with plastic teeth that you can cut to size. Whenever I purchase invisible zippers, I always buy long ones in bulk from Zipit on Etsy so I can cut them down to match whatever project I’m working on.
This pillow I am using is quite large, it is made out of two 21.5 inch squares. I have a stash of 22 inch invisible zippers in neutral colors. You can always easily shorten invisible zippers!
Choosing Fabric for Your Pillow
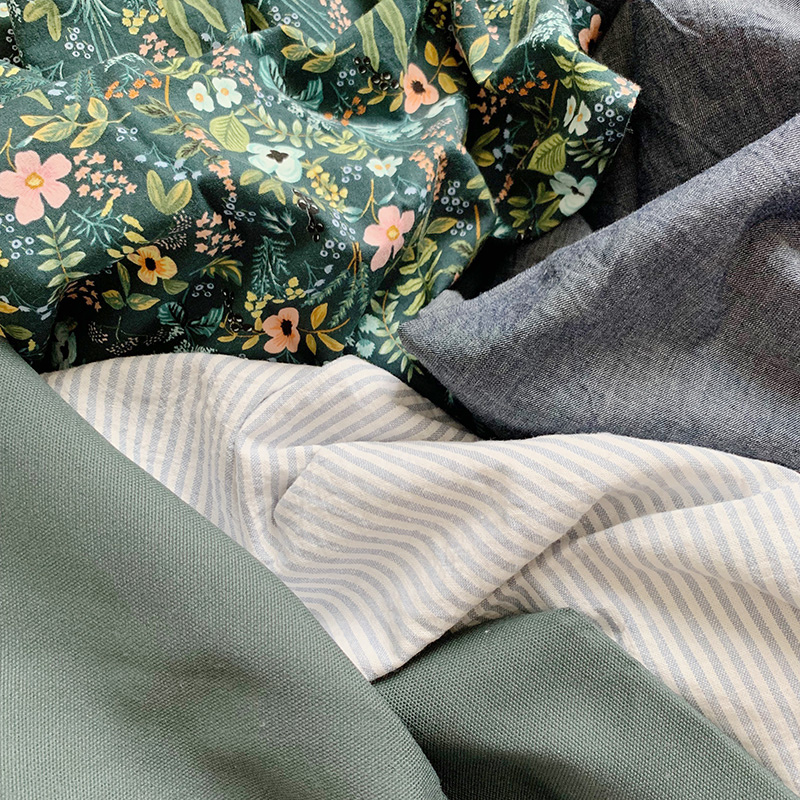
Nearly any middle to heavy weight woven fabric will work well for pillow covers. This includes cotton, linen, velvet, denim, canvas, home decor fabric, and upholstery fabric. Stay away from knits.
Upholstery fabric and canvas will result in a pillow with less give that isn’t as cozy, but it will be incredibly durable.
Quilting cottons come in a wide range of quality. Cheaper ones may be a little thin and require a lining. If you fell in love with a quilting cotton that feels a little thin, you could consider making a quilted pillow or even a whole cloth quilted pillow.
I find that pillows are a great opportunity to upcycle fabric. Do you have a set of old sheets, curtains, fabric shower curtains, maybe a larger woven shirt that you no longer use? This would be a great opportunity to give that fabric another life!
Cutting Your Pillow Cover
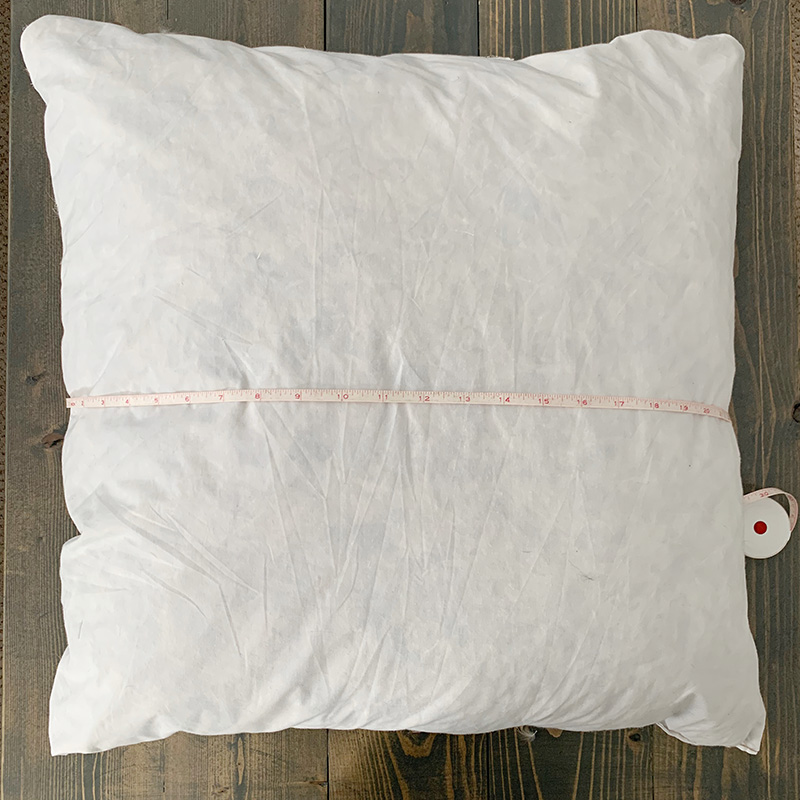
Next you will need to figure out what size rectangle or square to cut out for the two sides of your pillow.
You may have just purchased a pillow insert, in which case you are given its dimensions. If you don’t know the size of your pillow take a flexible measuring tape and measure across the pillow or at the top seam.
If you don’t have a flexible measuring tape you can use a piece of string or twine to lay across the pillow, mark the length, and then measure the length of the string.
Cut the front and back of your pillow to the exact dimensions of your pillow. You will lose some of the length and width of your pillow when you sew, but you actually want your pillow cover to be a bit smaller than your pillow. This ensures a fuller looking pillow.
Sew a Pillow With an Invisible Zipper
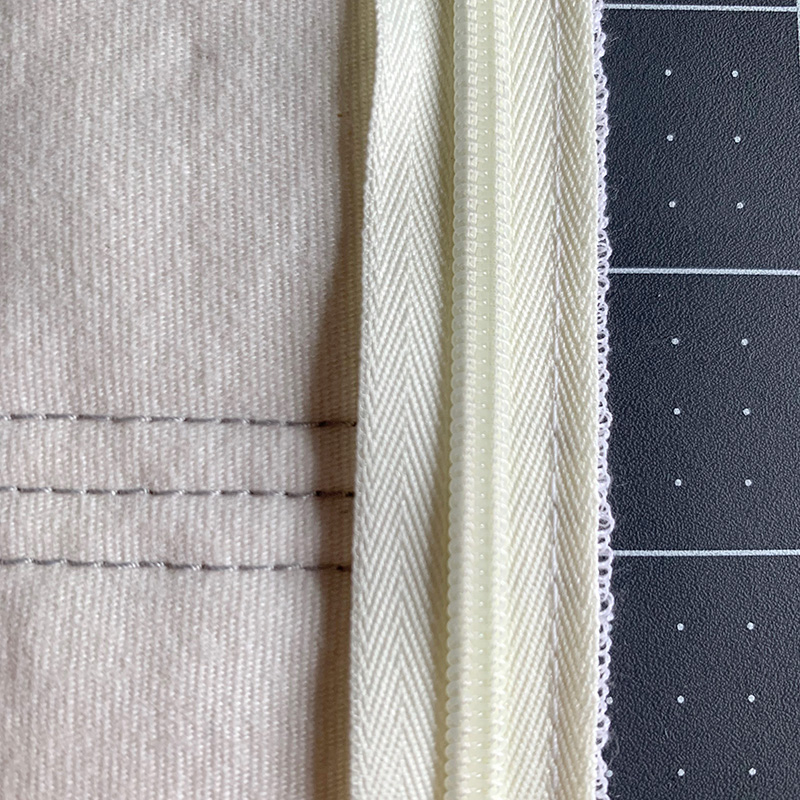
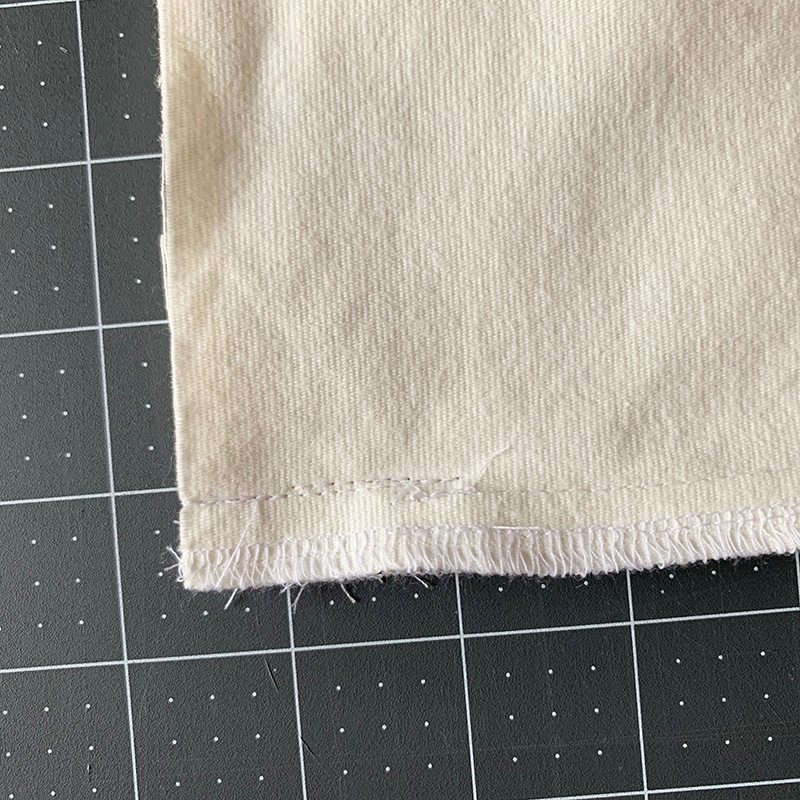
1. Finish Top Seams
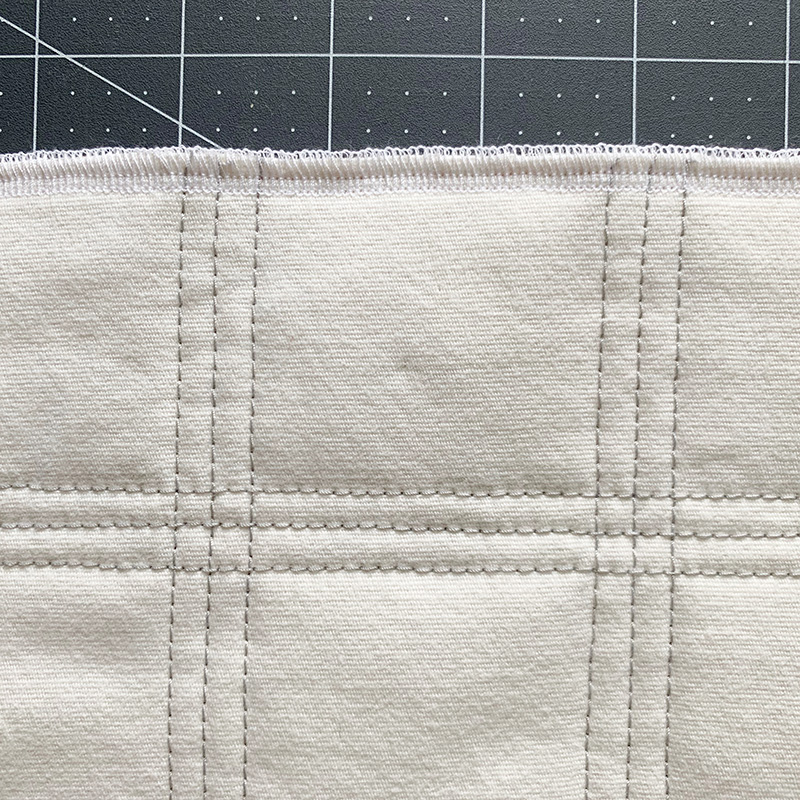
Okay, let’s get onto the sewing. The first thing you will want to do is finish the top edges of your fabric where you are going to put the zipper. This will prevent your fabric from fraying and will make your pillow stronger (and less messy!) in the long run.
I wrote a blog post with different ways to finish seams with a traditional sewing machine! My favorite is the overcast stitch. Finishing inside seams that will never be seen is also a great way to use up scrap thread.
For my birthday I got a Juki Serger, which I love, but absolutely is not needed for this project. That is how I finished the seams in the photo above. (Still working on figuring out the tension as you can probably see)
2. Adjust Size of Zipper
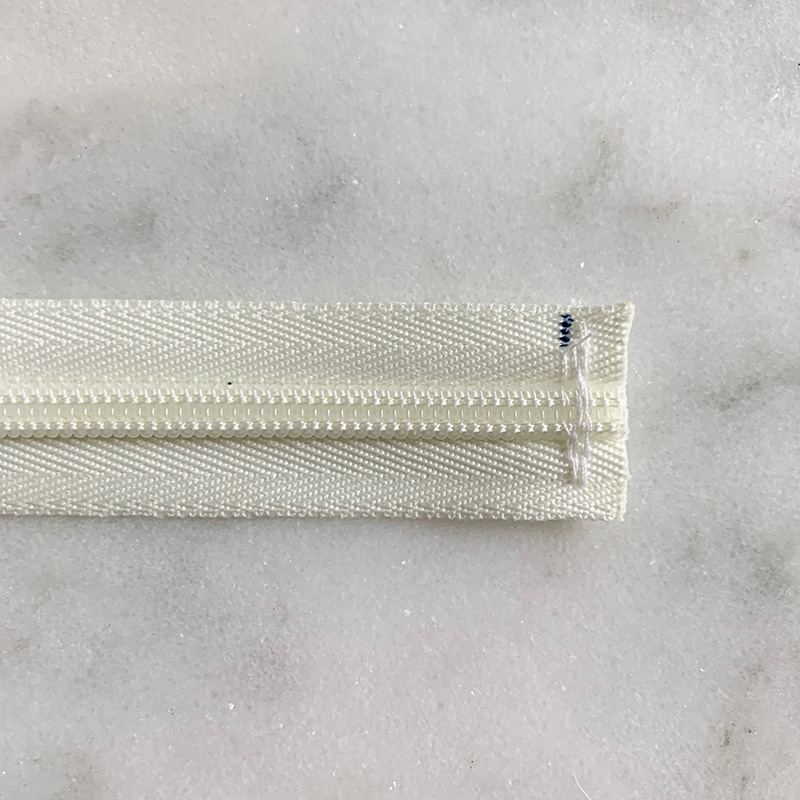
You want there to be 1-3 inches of fabric on either side of your zipper. If your zipper has plastic teeth and is too long cut it with a pair of normal scissors and sew across the teeth a few times to prevent the zipper pull from falling off. If your zipper has metal teeth you will need to use pliers and another technique to shorten it.
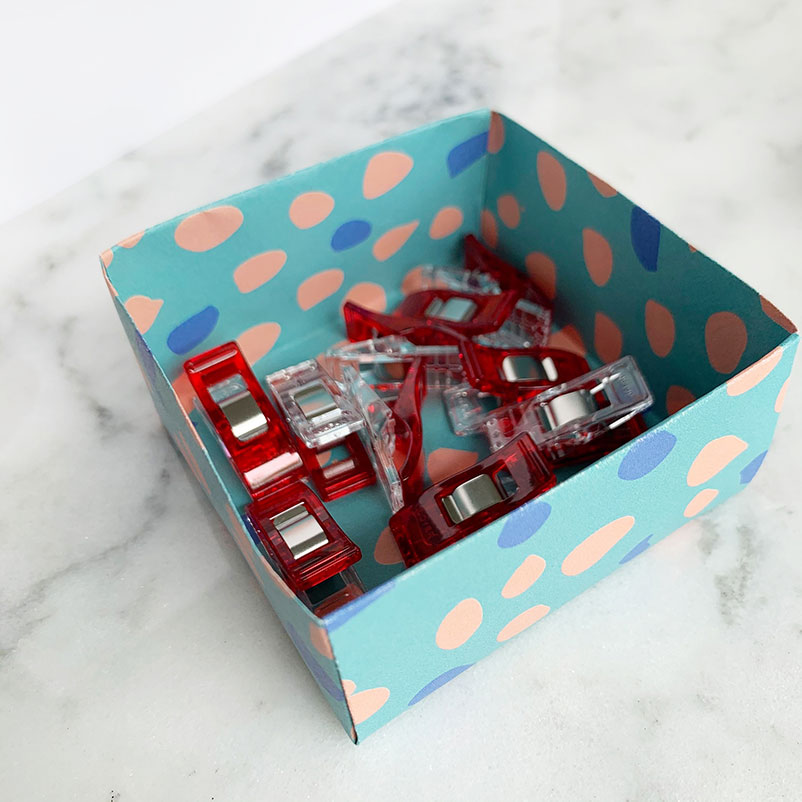
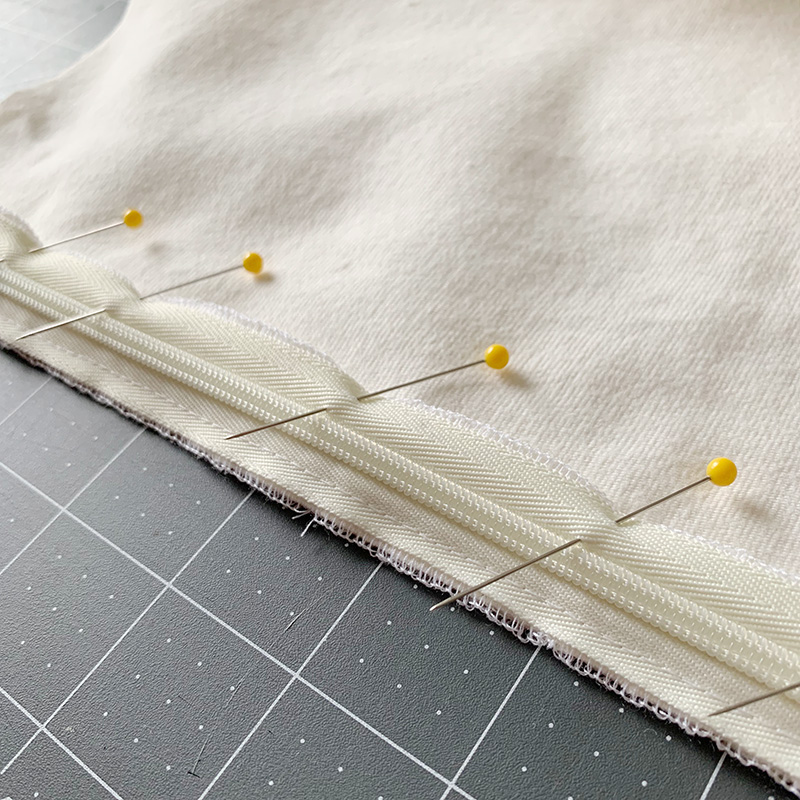
3. Pin in Zipper
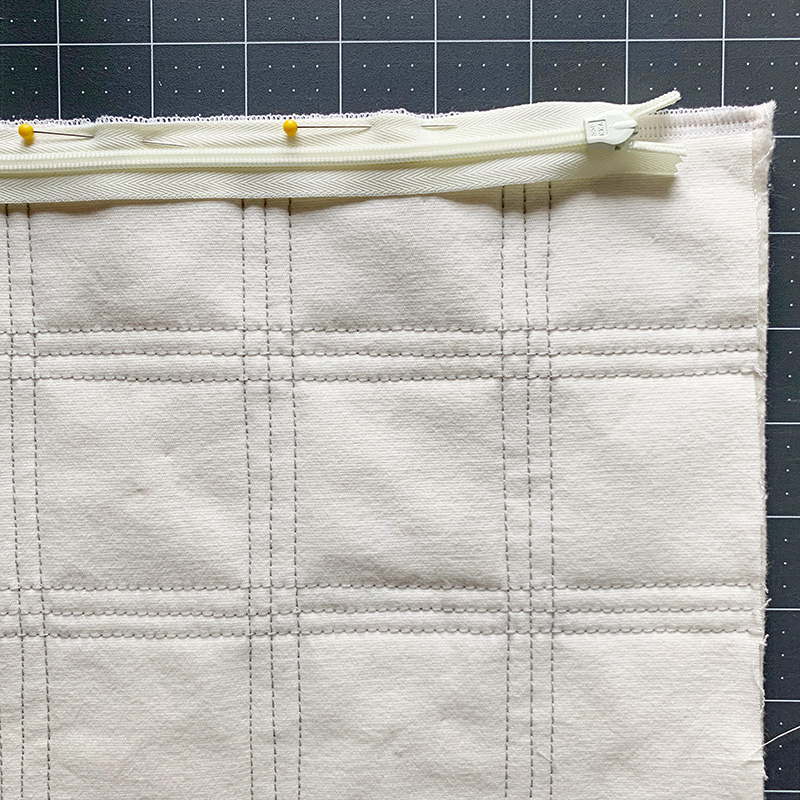
Next, take one piece of your pillow fabric and place it RIGHT SIDE UP (exterior of pillow faces up) on your table. Take your zipper and place it RIGHT SIDE DOWN (the pull tab is facing down, invisible zipper teeth are facing up) onto the finished seam that you just made. Center your zipper.
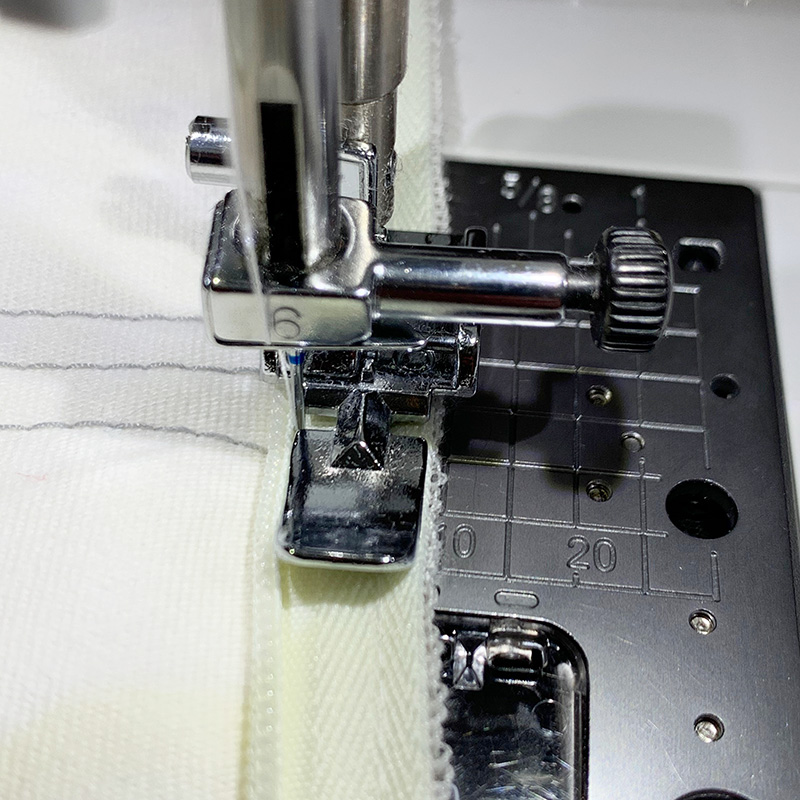
4. Baste in the Zipper
You are actually going to sew in your zipper twice. Basting in the zipper may seem like an extra step, but it will give you a much better end result and the final sew in of your zipper will be so much easier. It gives it a better hold and allows you to sew closer to the teeth. I always regret skipping in basting zippers.
Attach your zipper foot to your machine and baste in the zipper. When you are basting in the zipper you want to make sure that the zipper and the pillow top are aligned. There is no need to get close to the teeth here or worry about sewing super straight lines at this step.
5. Sew in the Zipper
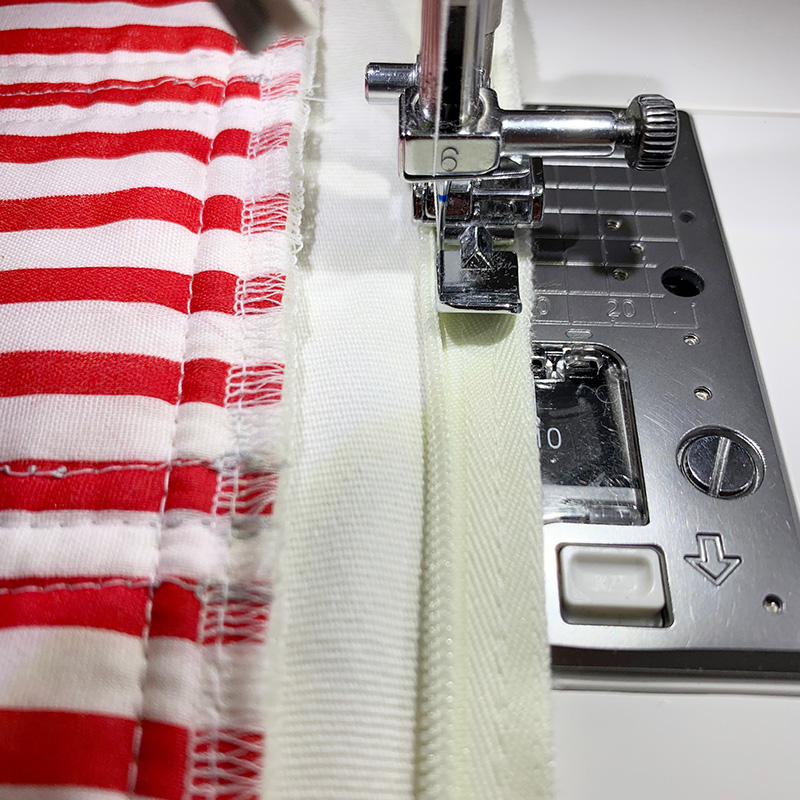
Now that your zipper is held firmly in place you want to do the final sew for the zipper. You can use an invisible zipper foot for this step, but I will show you how to do it with a traditional zipper foot.
Unzip your zipper and push the zipper teeth toward the inside of the pillow. You will notice the zipper teeth go onto their side a bit. Place the pillow/zipper into your sewing machine so the zipper foot holds the invisible zipper on its side like this.
You want to sew as close to the zipper teeth as possible, but do not sew into the zipper teeth. If you sew into zipper teeth the zipper pull will not be able to pass through this portion of the zipper and your pillow won’t work. Go slowly!
6. Align Second Side of the Pillow to the Zipper
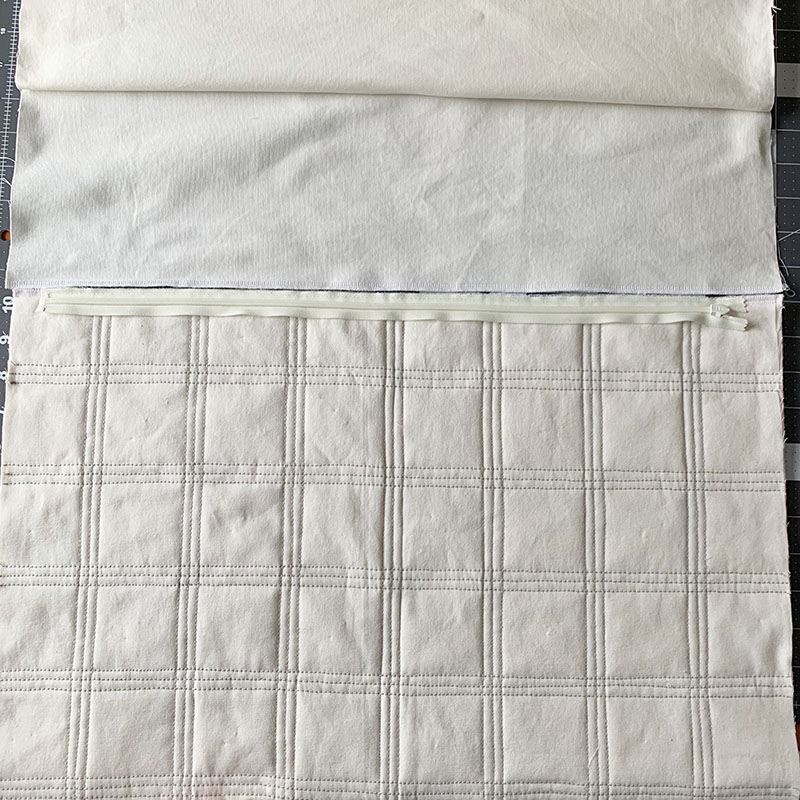
Align the second side of your pillow with the zipper.
Once again, pin zipper and fabric together, RIGHT SIDES TOGETHER.
7. Sew Second Side of Zipper
Repeat steps 3 and 4 to baste and sew in the second side of your zipper. You may want to open the zipper to sew it a little easier.
(Yes, you do see bright red and white stripped fabric on the inside of my pillow. I always use scrap fabric on the inside of my quilted pillow cases. No one (except for you) usually sees it!)
8. Sew Remaining Top sides of Pillow
Once the zipper is sewn in place you will need to sew the short sides on each side of the zipper. Keep your zipper foot on your machine and sew along each side, until ½ inch into each side of the zipper, getting as close to the zipper teeth as possible. This will ensure that you zipper stays hidden.
9. Sew & Finish Seams of Remaining Three Sides

The hard part is over! This next step will feel like it barely takes any time at all. Pin the remaining three sides of the pillow cover WRONG SIDES together and sew them with a 1/2 inch seam allowance.
If you want to reduce bulk in the corners, take your scissors and cut little triangles out of each corner. Be sure not to cut through your stitching. I skipped this step, but I kind of regret it. When you turn a pillowcase with clipped corners rightside out there will be sharper looking corners.
Then go back and finish these seams, just like you did in step one.
Turn your pillow right side out and give it a nice press (be careful with a hot iron on your plastic zipper!) and enjoy!
Now you Know how to Sew a Pillow with an Invisible Zipper!
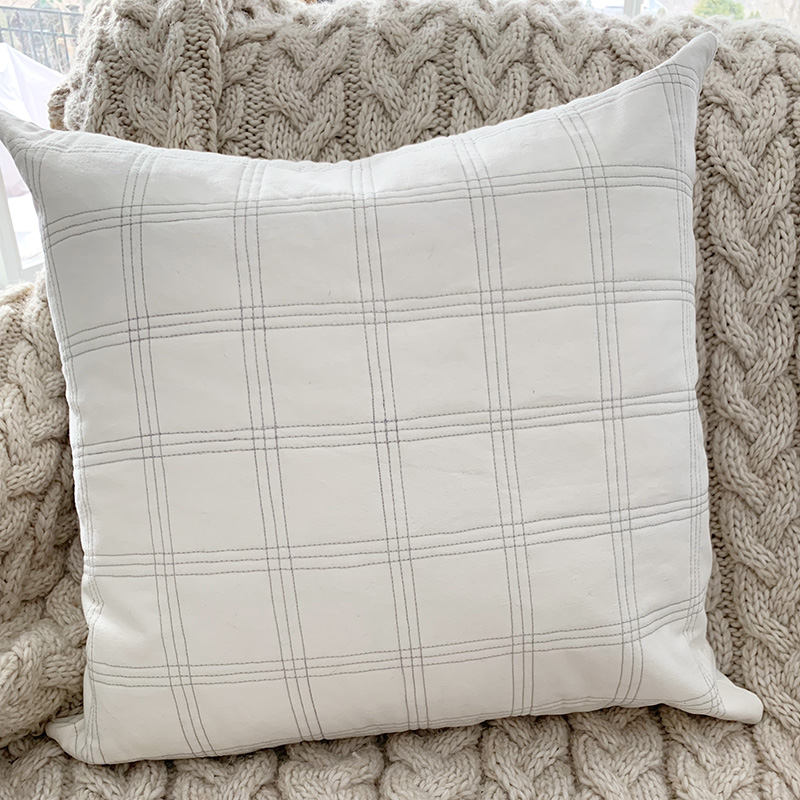
Once you learn how to sew a pillow with an invisible zipper it may become your preferred method for sewing pillows. I love how it gives the pillow a professional look and it doesn’t warp the pillow like an envelope closure does.
I hope you enjoyed this tutorial. If you ever have questions, please feel free to send me a message on Instagram or comment down below!