DIY Reusable Cotton Rounds – No Sewing Machine!
A Sustainable Swap for Your Skincare Routine
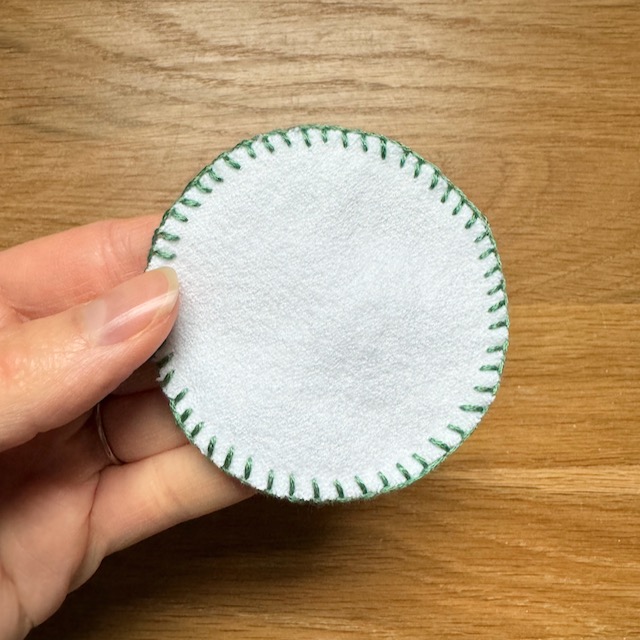
Switching to reusable cotton rounds is a simple and effective way to reduce waste in your daily skincare routine. These eco-friendly alternatives are not only kind to the planet but they are also easy to make at home. With just a few supplies and basic hand sewing or embroidery skills, you can create DIY reusable cotton rounds that are soft, durable, and perfect for removing makeup, applying toner, or cleansing your skin.
In this guide, we’ll show you how to make reusable cotton rounds using flannel fabric and a decorative blanket stitch. No sewing machine required!
Why Choose DIY Reusable Cotton Rounds?
Traditional disposable cotton rounds contribute to waste and often involve resource-intensive production processes. By making your own reusable versions, you can:
- Save Money: One set of reusable rounds can last for years with proper care.
- Reduce Waste: Keep disposable cotton pads out of landfills.
- Customize: Choose fabrics that suit your skin type and aesthetic preferences.
Materials You’ll Need
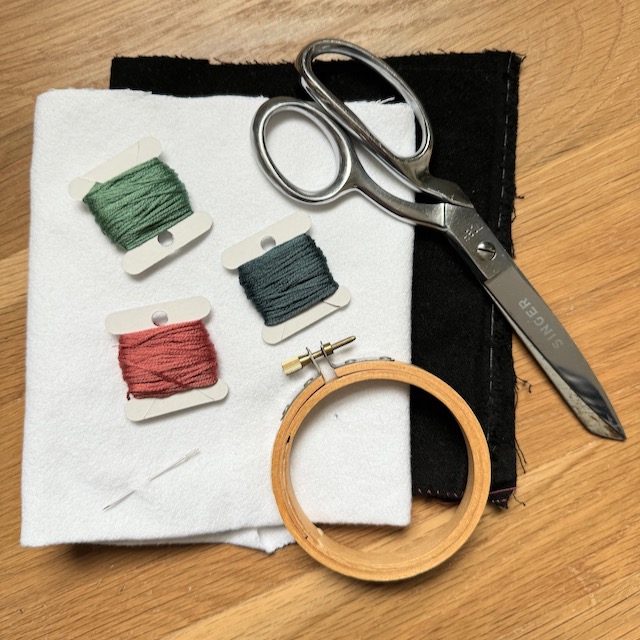
- Flannel fabric (choose soft, 100% cotton for best results)
- Fabric scissors
- Needle big enough for embroidery thread
- Embroidery thread
- Circular template (e.g., a jar lid or small bowl)
- Pen
Fabric Selection
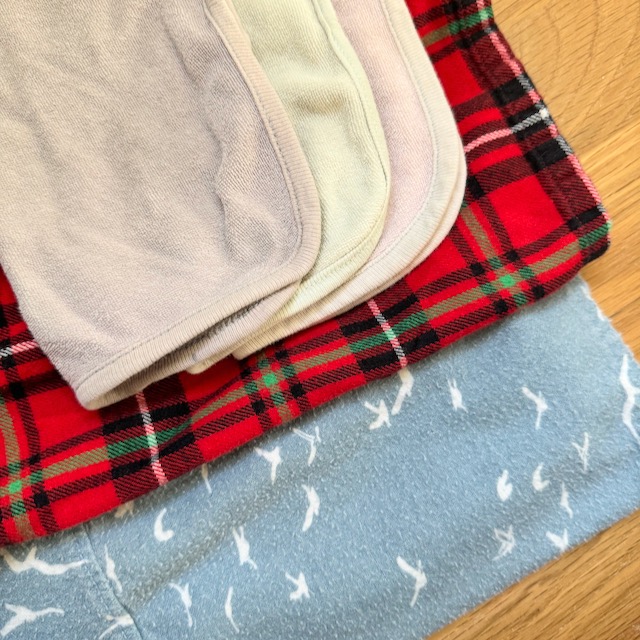
Sourcing Flannel: Since this project only uses a bit of flannel fabric, this is a great way to up-cycle flannel shirts, pajamas, or sheets.
Alternative Fabrics: If you wanted to try a different fabric you could try this project with a washcloth or softer towel. Some of the more plush towels may be more difficult to work with. Baby washcloths would be a perfect substitution.
How to Make DIY Reusable Cotton Rounds
Step 1: Prepare Your Fabric
- Wash and dry your flannel fabric to pre-shrink it and remove any sizing that comes on new fabric.
- Iron the fabric to ensure smooth cutting and stitching.
2: Cut Out Circles
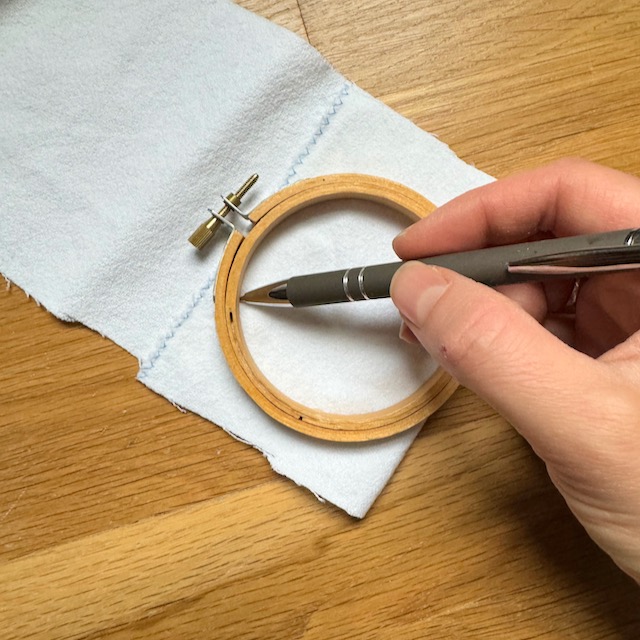
- Use a circular template, like a small bowl, cup, or even old cotton round, to trace circles onto the fabric with a pen.
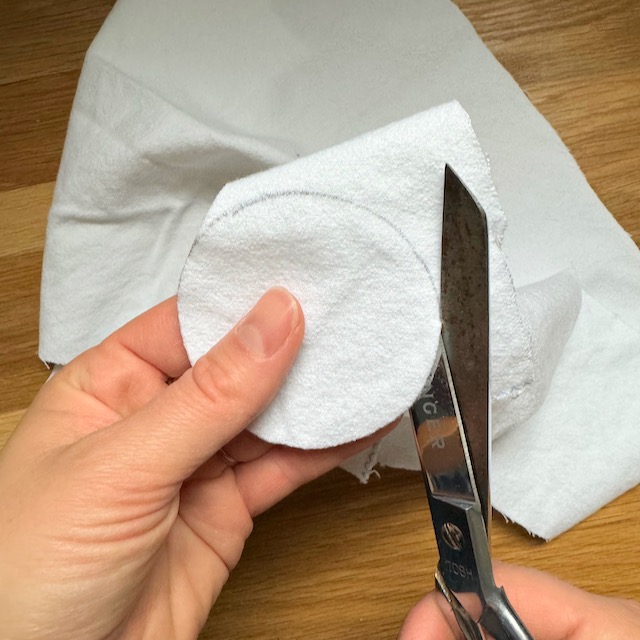
- Each round will require two fabric circles. I like to trace one circle and fold the fabric under and cut through two layers at once to ensure identical shapes.
- Cut out the circles carefully using fabric scissors or a rotary cutter. If you cut just inside the marking you can avoid having pen marks on the cotton rounds.
3: Sew with a Blanket Stitch
- Match up two fabric circles, aligning the edges. This double-layer design provides extra absorbency and durability.
- Thread your needle with about one arms length of embroidery floss. (May need more or less depending on size of cotton round.) Tie a knot at the end.
- Begin sewing the circles together with a blanket stitch.
Doing the First Blanket Stitch:
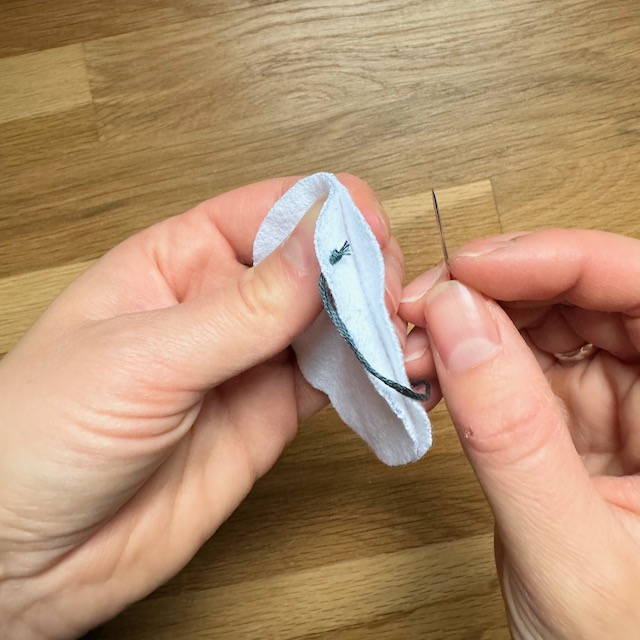
- Start by inserting the needle from the inside of the fabric layers so the knot is hidden, about a 1/4 inch away from the outside of the circles.
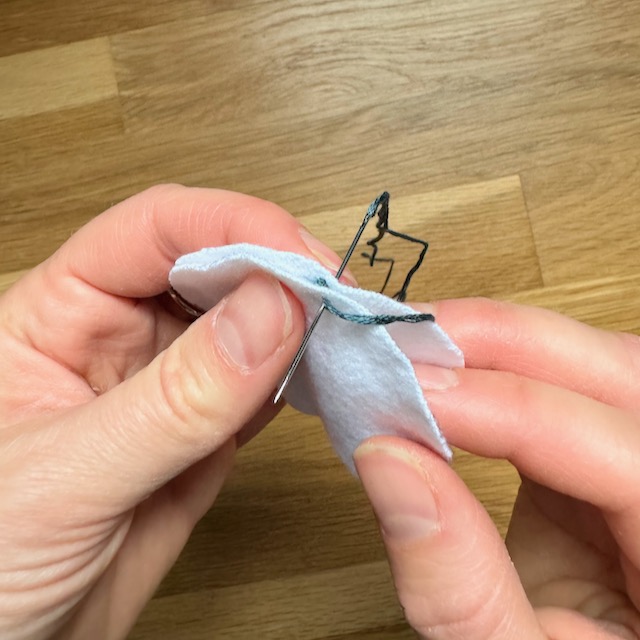
- Loop the thread to the back and up through where the initial thread came out of the top circle. This should create a loop around the edge of the circles, pull the thread, so it sits firmly against the edges, but doesn’t cause it to pucker in.
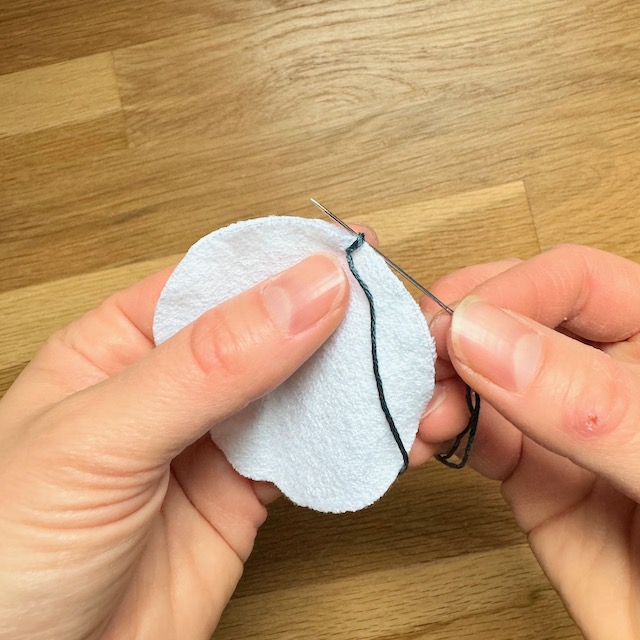
- Thread the needle through the loop you just made at the edge to anchor the thread along this loop.
Doing True Blanket Stitches
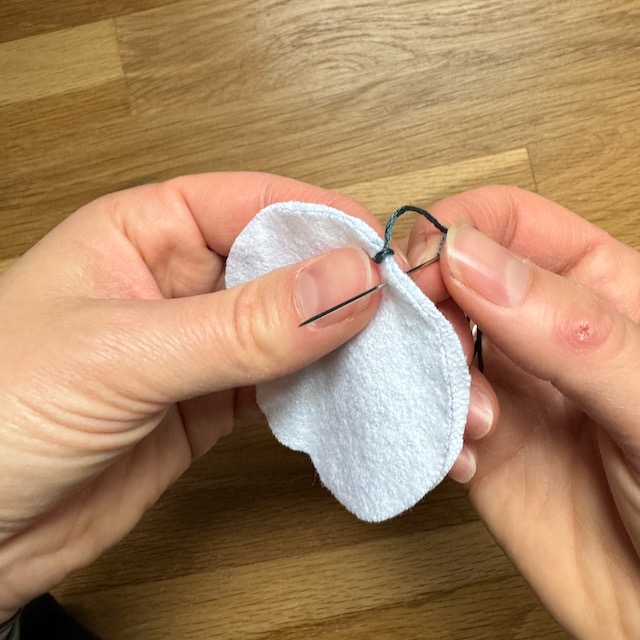
- Poke the needle UP through the fabric a 1/4 inch away from the edge and a 1/4 inch away from your last stitch.
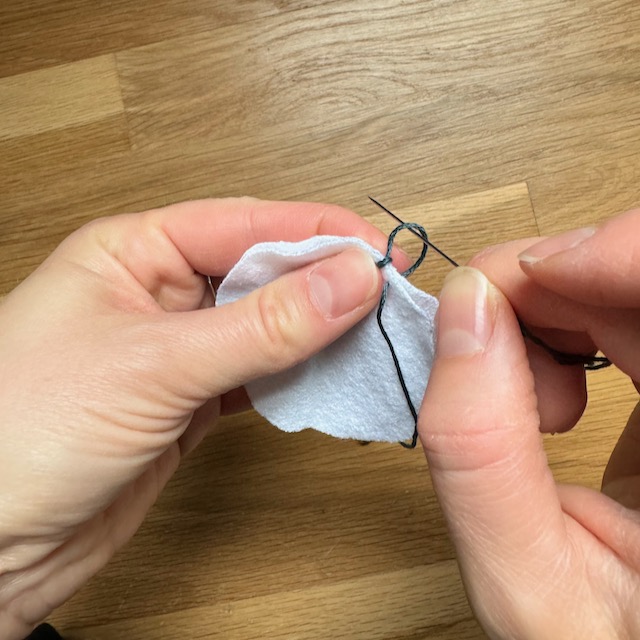
- Pull the thread through, but leave a little gap.
- Thread the needle DOWN between the thread and the fabric. (Thinking “up then down” really helps me.)
- Pull the thread taut so it holds the thread close to the edge but doesn’t cause it to pucker in.
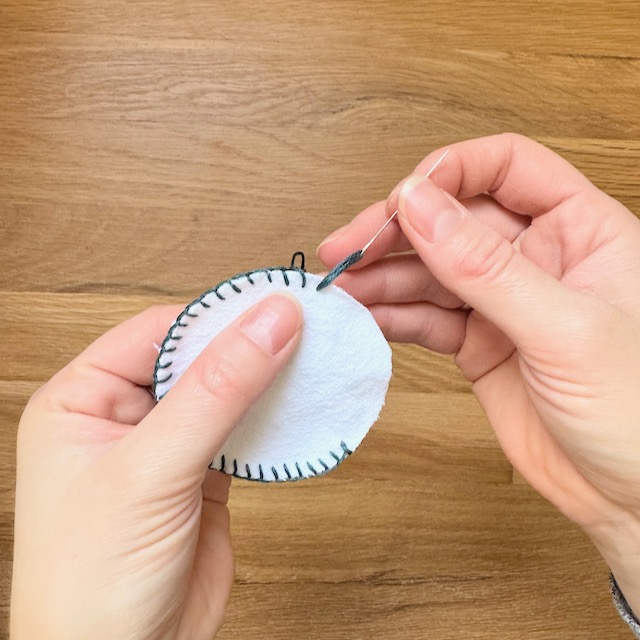
- Continue around the entire circle
Finishing a Blanket Stitch
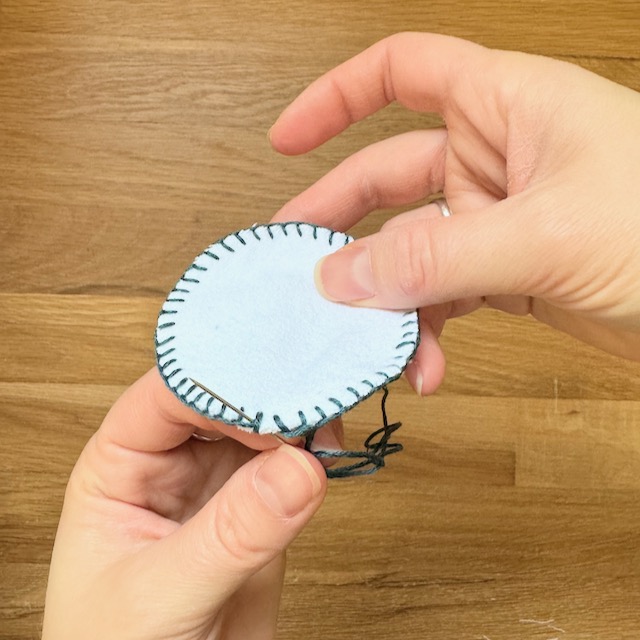
- When you work around to your first stitch, slide the needle through the first stitch near the edge. Pull till taut.
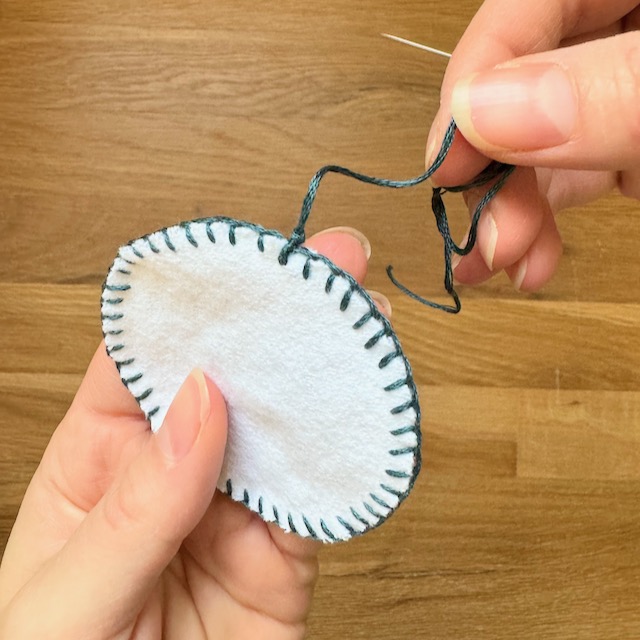
- Pull the needle back through the loop to create a double knot.
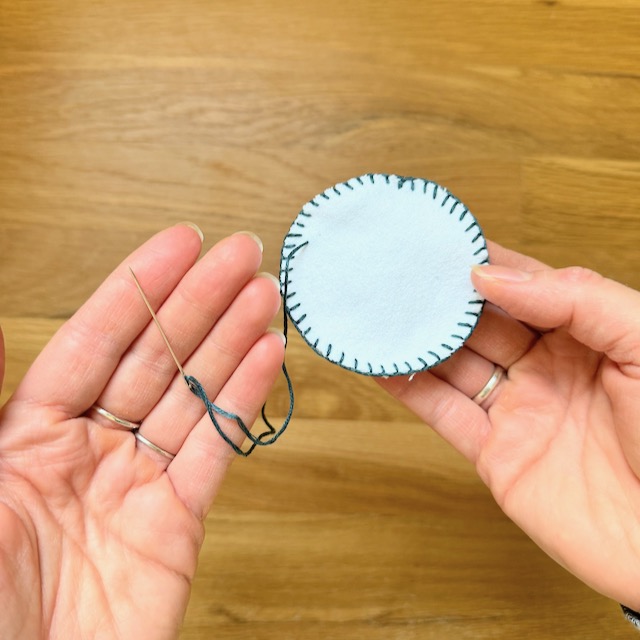
- Thread the needle between the two layers to hide the tail of the thread. Pop the needle back up through the fabric and pull the thread off of the needle. Trim the thread.
Tips for Perfect DIY Reusable Cotton Rounds
- Size: Standard cotton rounds are around 2.5–3 inches in diameter, but you can adjust the size to your preference.
- Layering: Use two layers of flannel for a soft and absorbent pad, or add a third layer for even more cushioning.
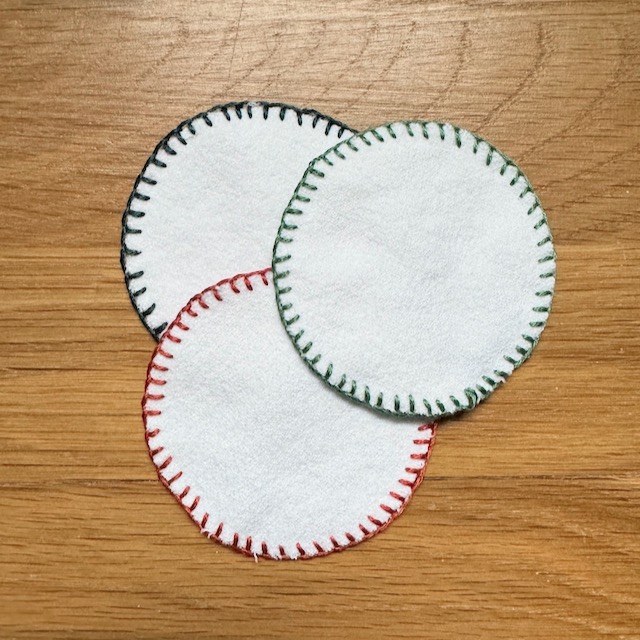
- Color Coordination: Use contrasting embroidery floss for decorative edges, or match the thread to the fabric for a seamless look.
Using and Caring for Your DIY Reusable Cotton Rounds
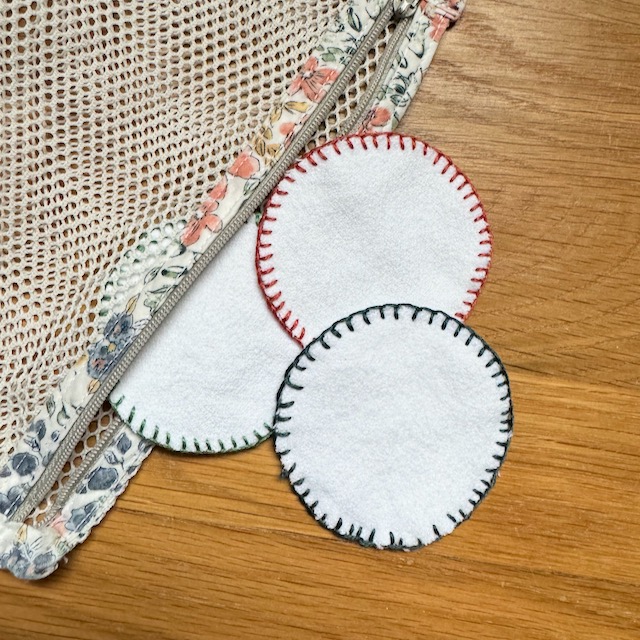
- To Use: Replace disposable rounds in your skincare routine. They work well for applying toner, removing makeup, or cleansing with micellar water.
- To Wash: After use, rinse the rounds and store them in a mesh laundry bag. Wash with your regular laundry using gentle detergent. Air dry or tumble dry on low heat. They may wrinkle a bit in the dryer, which can be fixed with a quick iron if it really bothers you.
- To Store: Keep clean rounds in a jar or basket for easy access.
Why You’ll Love DIY Reusable Cotton Rounds
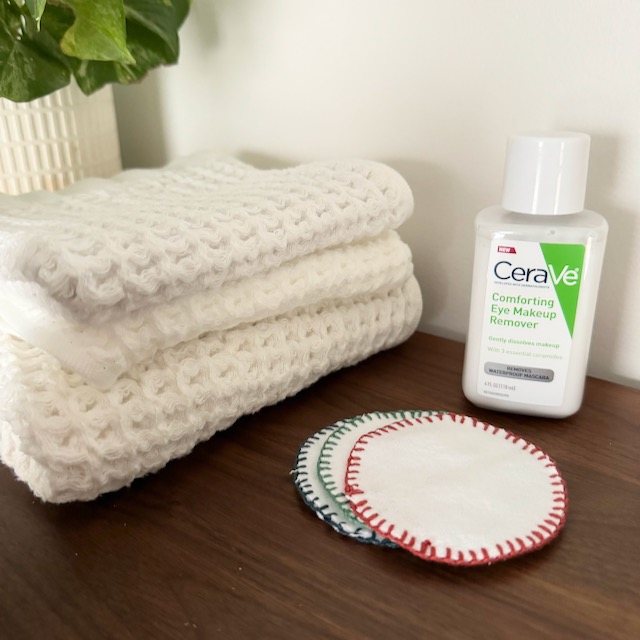
Making your own DIY reusable cotton rounds is a satisfying project that combines practicality with sustainability. These handmade rounds are gentle on your skin and the environment, making them an excellent addition to your eco-conscious lifestyle. Plus, they’re customizable to fit your needs and aesthetic preferences.
Whether you’re an avid DIY enthusiast or just beginning your journey toward reducing waste, these reusable rounds are a fantastic project to try. I love how you don’t have to have a sewing machine to make them!
