How to Make a Cutting Board
Creating a custom cutting board can be a rewarding DIY project that not only saves money but also allows you to have a piece of kitchenware that is perfectly tailored to your needs. One of the best materials for this project is a piece of hardwood. Not only is it durable and attractive, but it also offers numerous benefits over commercially available bamboo cutting boards. Here’s a step-by-step guide on how to make a simple cutting board from a piece of hardwood, particularly focusing on sourcing the wood from scrap pieces and customizing it to your preferred size.
Why Choose Hardwood Over Bamboo?
Before diving into the how-to, it’s worth understanding why hardwood is a superior choice for a cutting board compared to bamboo. While bamboo cutting boards are popular due to their affordability and eco-friendliness, they have certain drawbacks. Bamboo is technically a grass, not wood, and tends to be harder on knives, dulling them faster. Additionally, bamboo cutting boards are often glued together from smaller pieces, which can result in joints that weaken over time and harbor bacteria if not properly maintained.
Hardwood, on the other hand, is incredibly durable and knife-friendly. Species like maple, walnut, cherry, and oak are excellent choices. These woods have tight grains that resist moisture and bacteria, ensuring a long-lasting and hygienic cutting surface. Using a single piece of hardwood, especially sourced as a scrap piece, reduces waste and adds a unique touch to your kitchen.
Sourcing Your Hardwood
One of the most satisfying aspects of this project is sourcing the wood. Scrap hardwood can often be found at local lumber yards or woodworking shops.Look for a piece that is free of cracks, warps, and significant defects. Ideally, the wood should be at least 0.5 inch thick to provide a sturdy cutting surface.
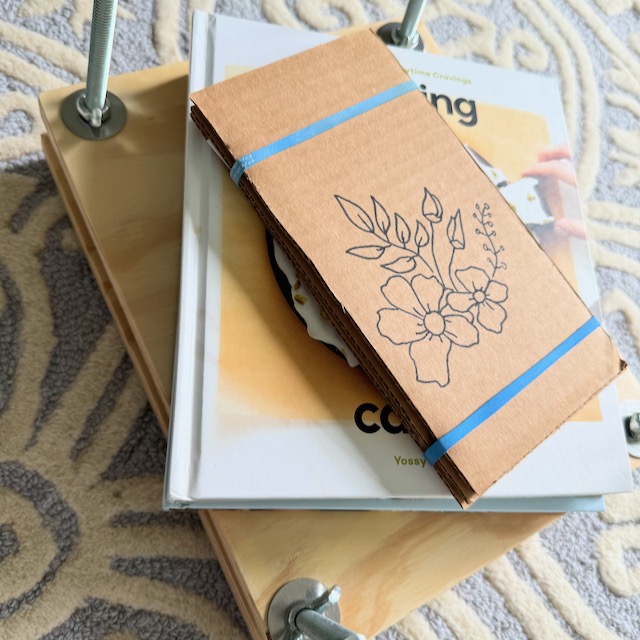
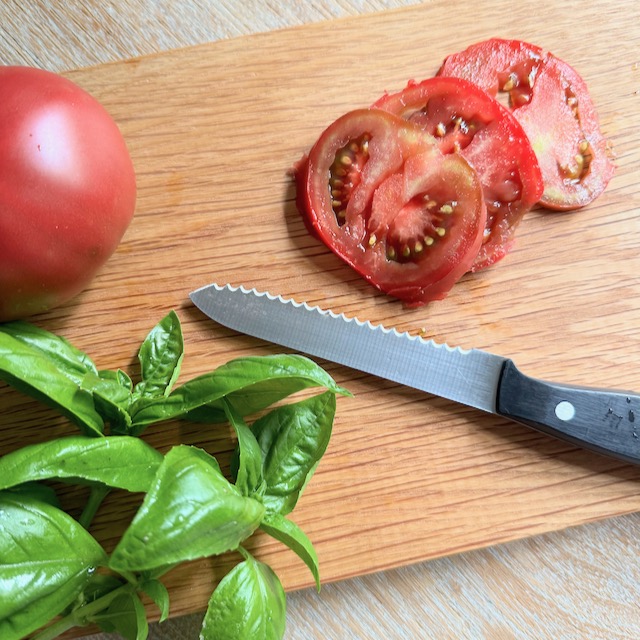
My brother used to work for a company that made custom cabinets and tables. Every Friday they would put out scrap hardwood for others to grab for projects. This piece of wood was one of those scraps. I was able to make two medium sized cutting boards out of this scrap wood. Perfect for cutting up apples, tomatoes, or a slice of bread!
Materials to Make a Cutting Board
- Scrap piece of hardwood
- Measuring tape or ruler
- Pencil
- Circular saw or hand saw
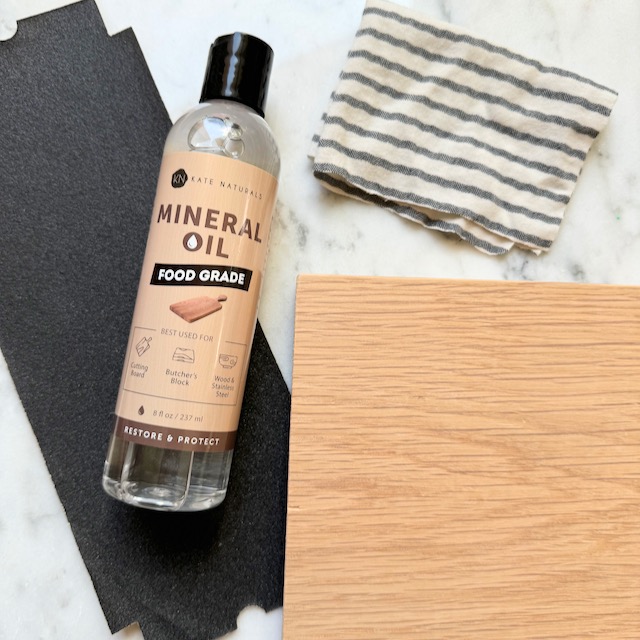
- Sandpaper (various grits, from 80 to 220)
- Food-safe mineral oil or beeswax
Instructions to Make a Cutting Board
1.Measure and Mark: Decide on the size of your cutting board. Common sizes are 15×10 inches, 12×8 inches, and 9×6 inches, but you can customize it to fit your needs. I personally love having a few smaller cutting boards on hand. They are perfect for cutting up an apple, an onion, or a piece of bread. Use a measuring tape and pencil to mark the dimensions on your piece of wood.
2.Cut the Wood: Using a circular saw, table saw, or hand saw, carefully cut along the marked lines. Ensure you follow safety precautions, such as wearing eye protection, putting back hair or any loose clothing, and working on a stable surface.
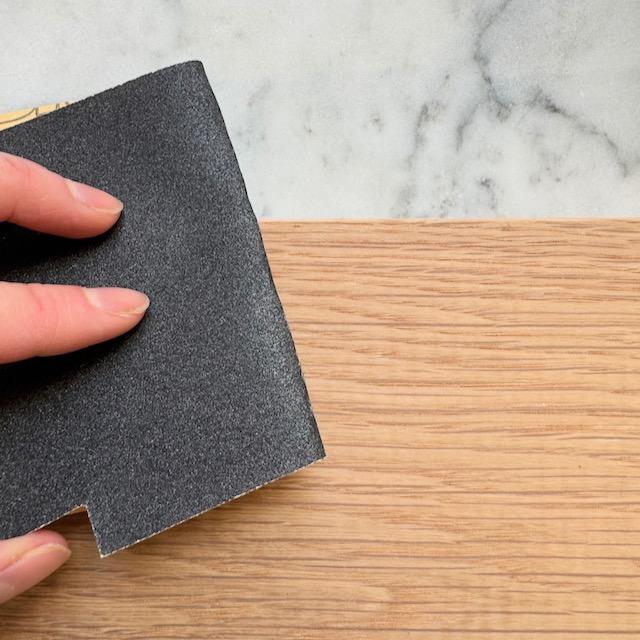
3.Smooth the Edges: After cutting, the edges of the wood may be rough. Use coarse sandpaper (80 grit) to smooth out the edges and any splinters. Follow this with finer grits (120, 180, 220) to achieve a smooth finish on both the edges and the surface.
4.Round the Corners (Optional): If you prefer rounded corners, use sandpaper or a router to gently round off the edges. This step is optional but can give your cutting board a more polished look.
5.Sand the Surface: Sand the entire surface of the cutting board, starting with 80 grit and working up to 220 grit. This will ensure the board is smooth and free of any imperfections.
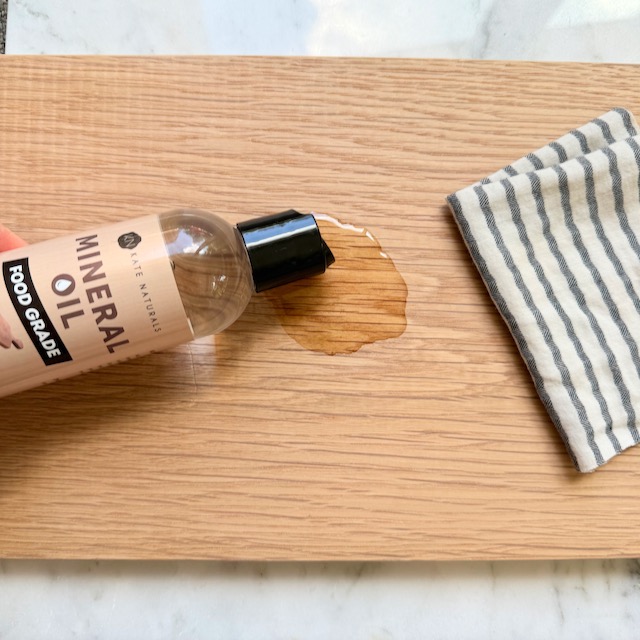
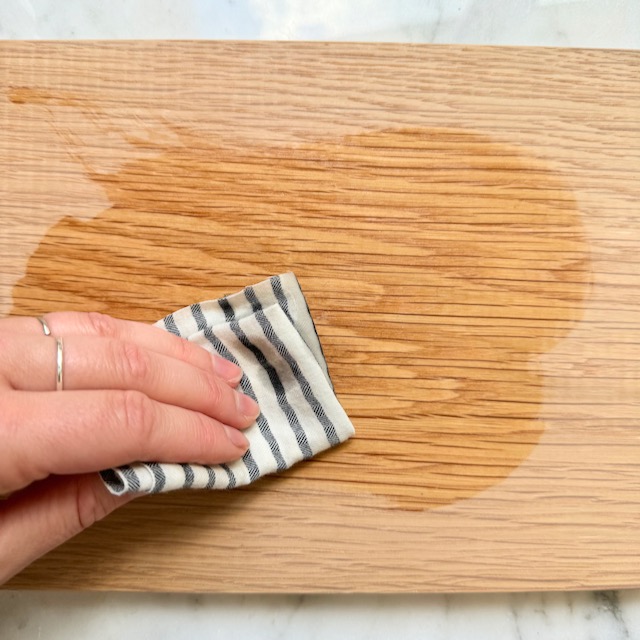
6.Condition the Wood: Apply a generous coat of food-safe mineral oil or walnut oil to the entire surface of the cutting board. This helps to protect the wood from moisture and stains. Let it soak in for a few hours, then wipe off any excess.
7.Final Touches: If needed, repeat the oiling process until the wood no longer absorbs the oil quickly. This may take two to three coats. Your cutting board is now ready to use!
Customization Ideas
One of the great advantages of making your own cutting board is the ability to customize it. You can engrave your initials or a design using a wood-burning tool. Adding non-slip feet to the bottom can provide extra stability. You could also drill a hole in one corner for hanging storage.
How to Care for your Cutting Board
Maintaining your hardwood cutting board is crucial for its longevity and performance. Regular cleaning is essential; after each use, wash the board with warm, soapy water and dry it immediately to prevent warping. Avoid soaking it in water or putting it in the dishwasher. Every few weeks, or when the wood starts to look dry, reapply a coat of food-safe mineral oil or beeswax to keep the wood hydrated and protected. For deeper cleaning and deodorizing, sprinkle coarse salt or baking soda on the surface, rub it with a lemon half, and rinse with warm water. By following these simple steps, your cutting board will remain a beautiful and functional part of your kitchen for years to come.
Conclusion

Making a cutting board from a piece of scrap hardwood is a fulfilling and practical project. Not only do you end up with a high-quality kitchen tool, but you also contribute to reducing waste by repurposing wood that might otherwise be discarded.
I love having a variety of cutting boards around. The picture above was from a quick afternoon snack that I put together on the cutting board. I frequently cut up apples or other fruit and serve them straight from these smaller cutting boards.
I used to go through the cheaper bamboo cutting boards quickly because of warping and cracking. If I stay on top of cleaning these quickly and conditioning them, these wood cutting boards can become a family heirloom.
Roll up your sleeves, source that perfect piece of wood, and start creating your own unique cutting board!