How to Hang a Letterpress Tray
Letterpress trays, originally used to hold printing type, have found a second life as charming and versatile decor pieces. Their unique compartments provide the perfect opportunity to display an array of small treasures and collections. Here’s a guide on how to hang a letterpress tray and a few creative ideas for what to put inside it.
What is a Letterpress Tray?
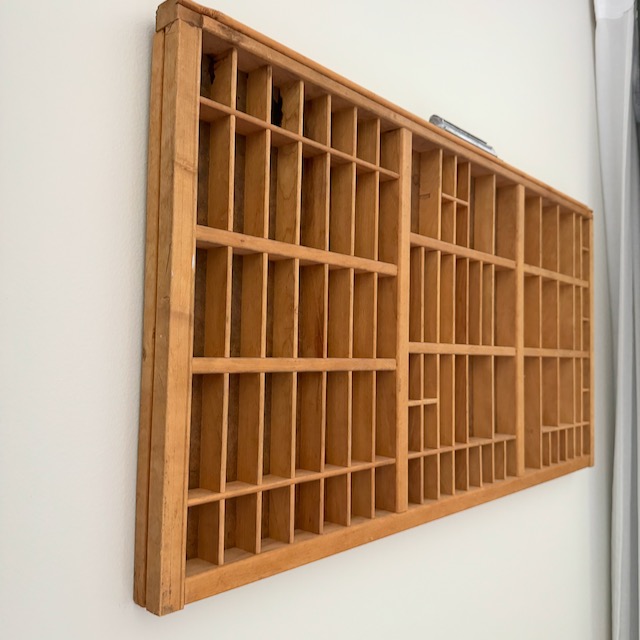
A letterpress tray, also known as a type case or printer’s tray, is a compartmentalized wooden drawer traditionally used by letterpress printers to organize and store movable type. Each compartment within the tray holds a specific type of character, such as letters, numbers, and punctuation marks. Today, letterpress trays are often repurposed for decorative or storage purposes, appreciated for their historical significance and craftsmanship.
Where to Find Letterpress Trays
You’re not going to find a letterpress tray at Target. You’re better off scouring antique malls and shops for them. Thrift stores, like Goodwill, most likely won’t have them. You are better off trying a more curated antique store. There are a few on Etsy, but shipping a large item can make them a bit expensive. These are unfortunately treasures you just have to keep an eye out for!
Hanging a Letterpress Tray
1. Select the Perfect Spot:
- Choose a location where your letterpress tray can be a focal point. Consider areas like living rooms, hallways, or above desks. Make sure the wall space is large enough to accommodate the tray and allow it to stand out.
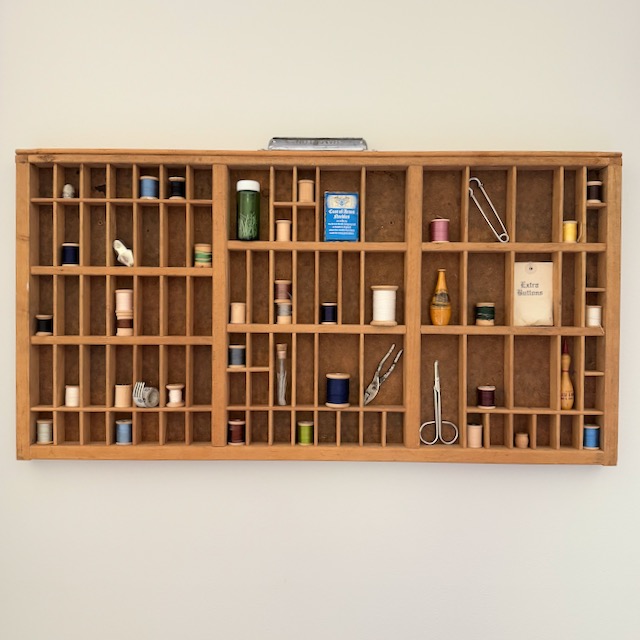
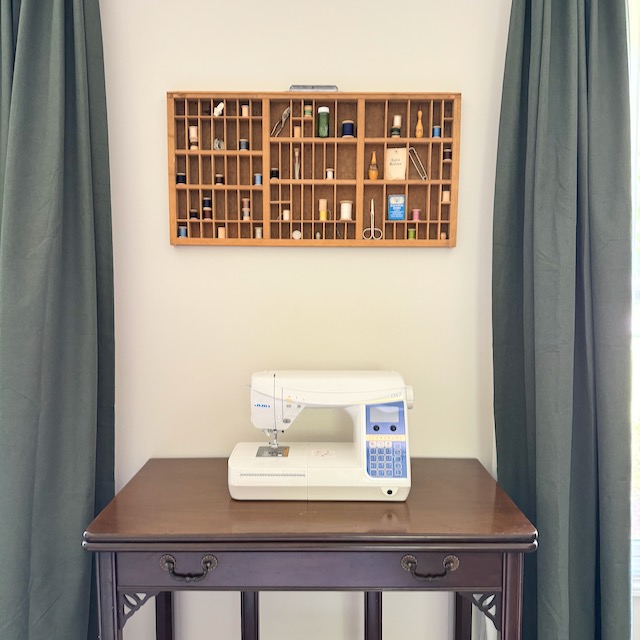
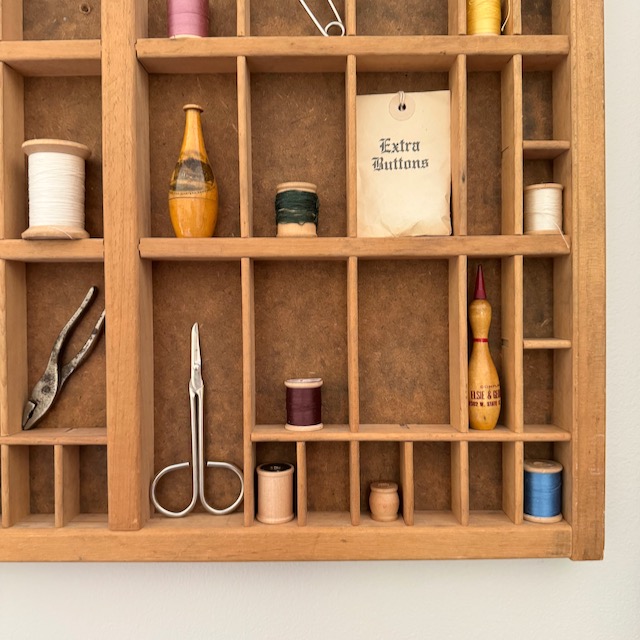
- Consider putting it in a spot that will coordinate with what you plan to fill it with. I placed my letterpress tray above my sewing machine and filled it with all of my grandmothers’ vintage sewing supplies.
2. Prepare the Tray
- Clean the tray to remove any dust or debris. Ensure the tray is completely dry before hanging.
3. Gather Tools and Materials:
- You’ll need a hammer, a level, two D-ring hangers, wire, two dry wall anchors, and their corresponding screws.
- Since letterpress trays tend to be on the heavier side, it is important to securely hang them from the walls with drywall anchors, which you can find at nearly any store.
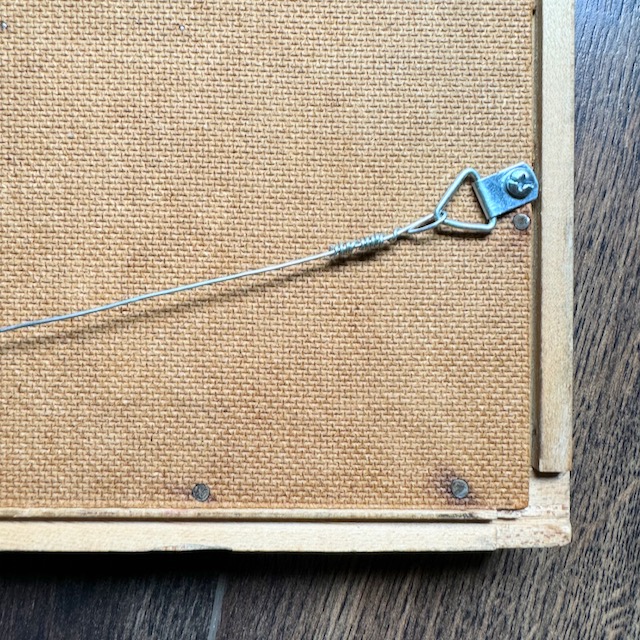
4. Attach Hangers
- On the back of the tray, measure and mark equal distances from the top corners to attach D-ring hangers. Be sure that you are screwing into the wood and not just the back panel. I placed my screws on the sides about 2-3 inches down from the top. Screw the D-rings into place.
- Thread the wire through one D-ring and wrap it around itself. Pull the wire taught, thread it through the other D-ring, and wrap it again. Cut wire. (You want the wire to seem almost straight, it will lengthen a bit when you hang it and you don’t want the wire to peek out the top of the tray.)

5. Mark Walls for Hanging the Letterpress Tray
- Hold the tray against the wall. With a pencil, lightly mark the top corners of the tray. Place the tray down.
- On the wall, measure and mark the top middle point of the letter press tray.
- Measure the distance between the top of the tray and the wire when the wire is pulled as if it were hanging.
- Make two marks on the wall that are two inches on either side of the middle and whatever height you measured in the last step down. (Two anchor points helps the letterpress tray sit level and distributes its weight for a more secure hang.)
- Use a level to double check that your marks are level.
6. Install Wall Anchors
- Drill holes for wall anchors at the marked positions. Insert the anchors and screw their corresponding screws in until they are almost flush with the wall. They should peek out a 1/4 inch or so.
7. Hang the Letterpress Tray:
- Hang the letterpress tray by the wire, checking again with a level to make sure it is even.
Filling Your Letterpress Tray
Once you hang your letter press tray there are so many possibilities for filling it. The compartments are rather small, so it is a perfect spot for special trinkets. Here are a few ideas what you could fill yours with.
1. Craft Supplies
- Store and showcase your crafting essentials like buttons, spools of thread, beads, and washi tape. Not only does this keep your supplies organized, but it also turns them into decorative elements.
2. Natural Elements
- Incorporate items from nature like polished stones, pinecones, twigs, dried flowers, or feathers. This brings a bit of the outdoors inside and can be a beautiful, organic touch.
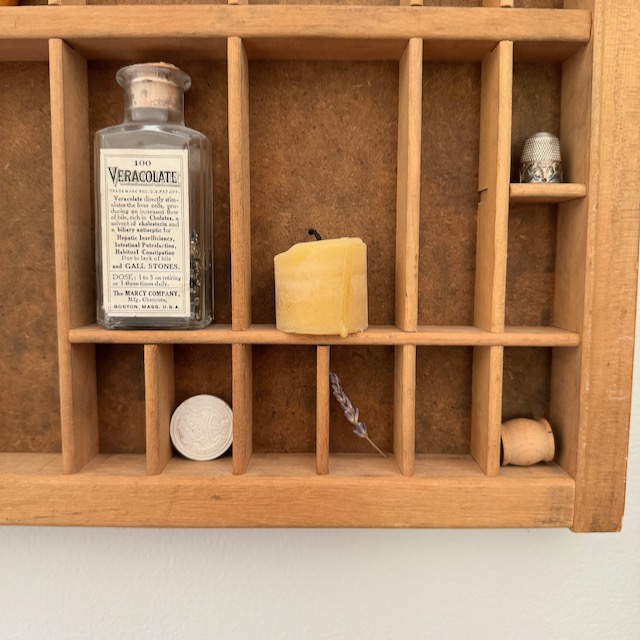
3. Antique Finds
- Fill the compartments with vintage keys, pocket watches, old stamps, or thimbles. These items add a nostalgic touch and can often be found at flea markets or antique shops.
5. Educational Display for Kids
- Create an educational display for children by filling the compartments with small educational items like alphabet blocks, tiny animal figurines, or your children’s treasures.
6. Travel Souvenirs
- Display miniatures and mementos from your travels such as small statues, shells, or foreign coins. This creates a visual travel diary.
7. Mini Art Gallery
- Showcase tiny works of art, such as mini sketches, sculptures, or photographs. This allows you to rotate pieces and keeps your decor fresh and dynamic.
8. Seasonal Decorations
- Change the contents of your tray with the seasons. For example, fill it with mini pumpkins and gourds in the fall, ornaments and pinecones in the winter, flowers and pastels in the spring, and seashells in the summer.
9. Jewelry Display
- Turn your tray into a unique jewelry organizer by placing earrings, rings, and bracelets within the compartments. This keeps your jewelry accessible and beautifully displayed.
Now Fill Your Own with Treasures!
Learning how to hang a letterpress tray as decor is a creative way to display your cherished items. By thoughtfully selecting and arranging the contents, you can create a personalized and visually appealing focal point in your home. Whether you’re showcasing mementos, natural elements, or everyday items, a letterpress tray adds charm and character to any space.
If you have your own letterpress tray, please comment below with what you plan to fill it with!