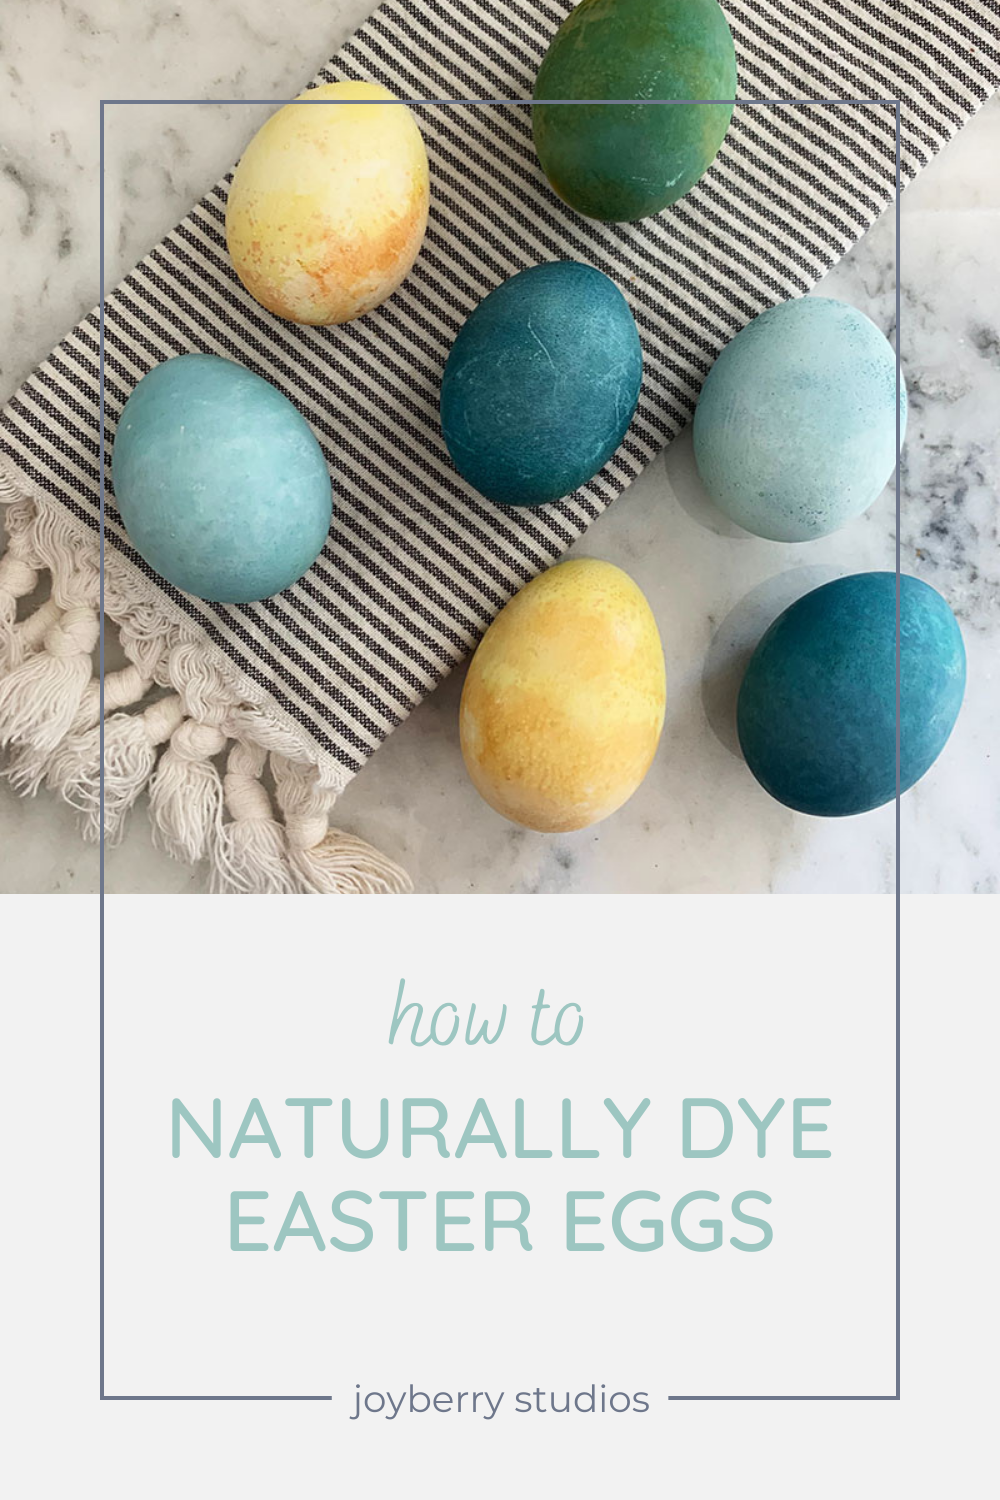
How to Naturally Dye Easter Eggs
with red cabbage and turmeric
Learning how to naturally dye Easter eggs is a complete experiment. Even if your high school science classes gave you a bit of anxiety, this experiment is pure fun and you won’t need to record any data.
Naturally dyes are a lot of fun to play with! Just keep in mind that if you want vibrant colors the eggs will need to soak for several days, so you may need to plan ahead.
Hard Boiling the Eggs
Instant Pot
When my mom gave me an instant pot a few years ago for Christmas I wasn’t super excited for another bulky kitchen appliance. I almost asked her to return it. Thank goodness I didn’t because I use it almost every day. The Instant Pot is perfect for oatmeal, rice, beans, quinoa, roasts, and of course hard boiled eggs.
Simply put a cup of water, the tray, and however many eggs you wish in the Instant Pot. Close it up and put it on high for 5 minutes. Once it is done, depressurize and place eggs in ice water.
Store your eggs in the fridge until you’re ready to use them!
Stove Top
No Instant Pot? No worries!
Add eggs and cold water to the saucepan. Make sure the eggs are covered by at least an inch of water. Turn your stove on high and bring the water to a boil.
Once boiling, turn off the heat, cover them, and let them sit for 10-12 minutes.
Use tongs to pick out the eggs and place them in ice water.
Store your eggs in the fridge until you’re ready to use them!
Alternative Method – Blowing out the Eggs
If you want to dye the eggs and have them on display for an extended period of time without making your home smell like sulfur you can also blow out the eggs. This method involves poking little holes into the eggs and blowing out the insides.
If you want more details, check out my marbled Easter egg post.
Adding Vinegar
Whatever dye you make, it is a good idea to add 1 teaspoon of vinegar per cup of dye. The vinegar helps the dye bind to the egg shell.
Red Cabbage Dye – to Naturally Dye Easter Eggs
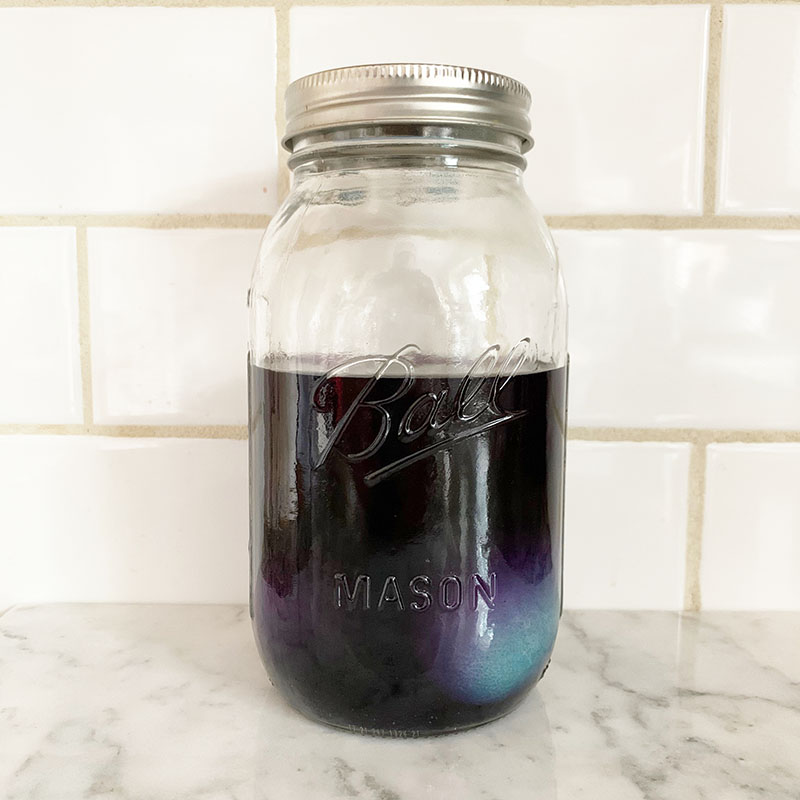
Fill whatever jar you would like to dye your eggs in to the top with cold water. (I used a Mason Jar.) Dump the water into a pot. Add about another ¼ – ½ of the vessel full of water again to the pot.
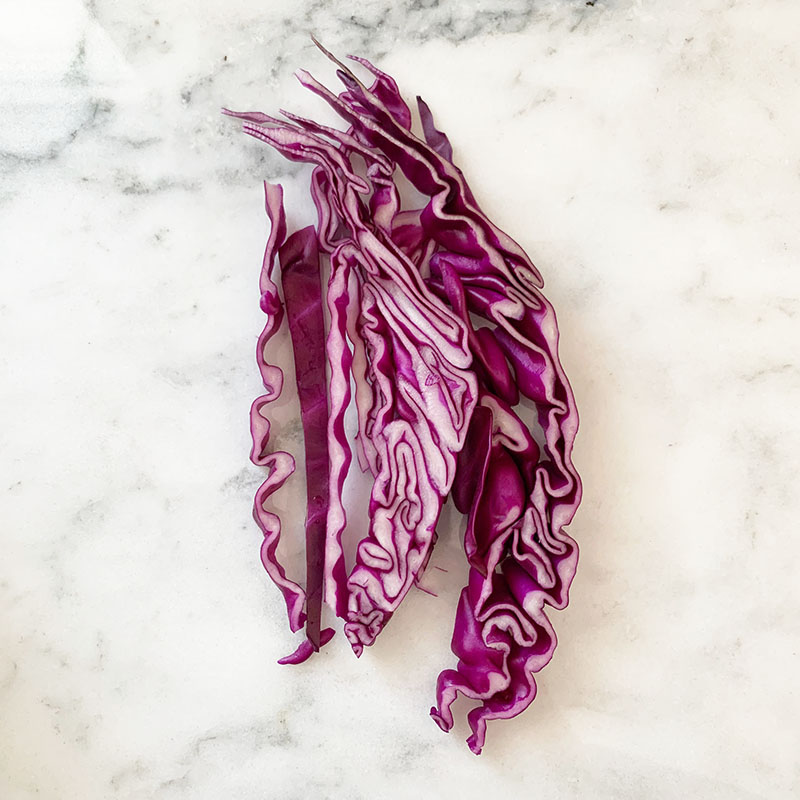
Thinly slice red cabbage and continue to add it to the top of water until it comes level with the water when packed down. (It should be around ¼ head of cabbage per 2 cups of water.)
Bring your pot of cabbage and water to a low simmer. Let it continue to simmer for 1-2 hours. The more you let it simmer the more concentrated it will be.
Let the dye cool.
Drain the cabbage and fill your soaking jar with the dye. During the simmering process some of the water should have boiled off. It’s okay if there is extra room in the jar! The eggs will displace some of the water.
Tumeric Dye – to Naturally Dye Easter Eggs

This one is much easier. Just simply add a tablespoon of turmeric per cup of water into your soaking jar. Put on the lid and give it a good shake to mix it up!
Other Kinds of Natural Dye
I have read about other people using beets and red onion skins to make natural dyes. I tried both of these and they made my eggs brown and splotchy. Perhaps I didn’t have enough concentration? If you’ve had success, please comment and let me know!
Soaking the Eggs
The exciting (and time consuming) part! Soaking your eggs. Simply place the hard boiled eggs into the dye and place them back in the fridge.
The longer you soak the more concentrated your color will be.
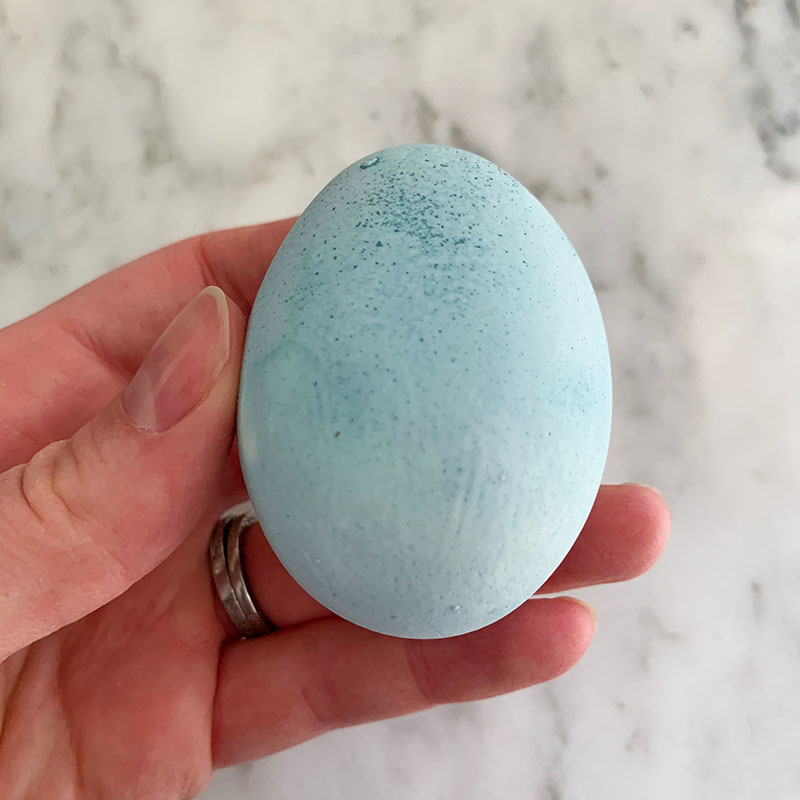
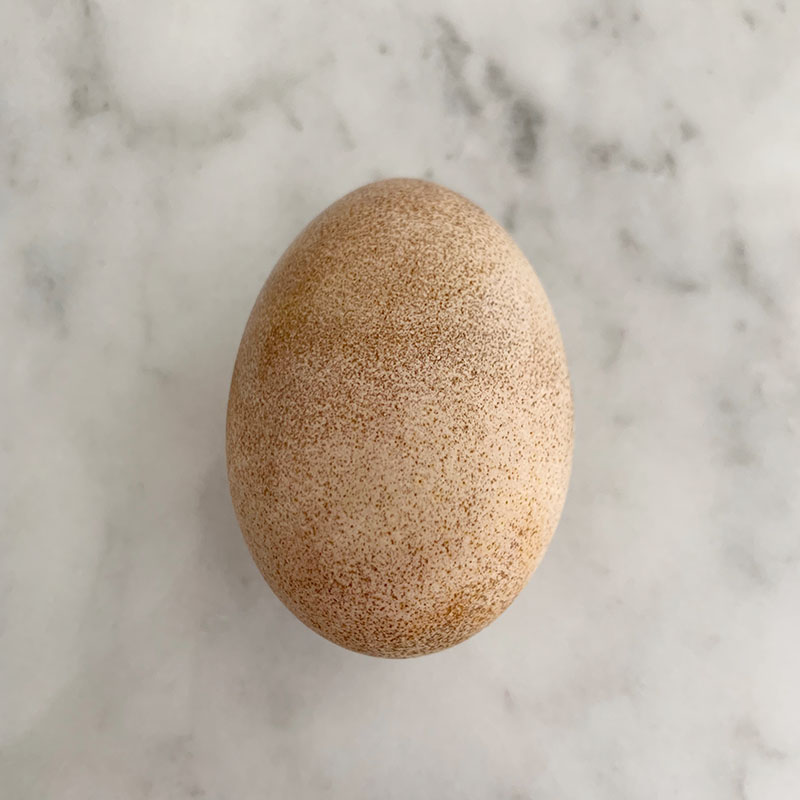
This is an egg that I soaked in the red cabbage dye for about a day.
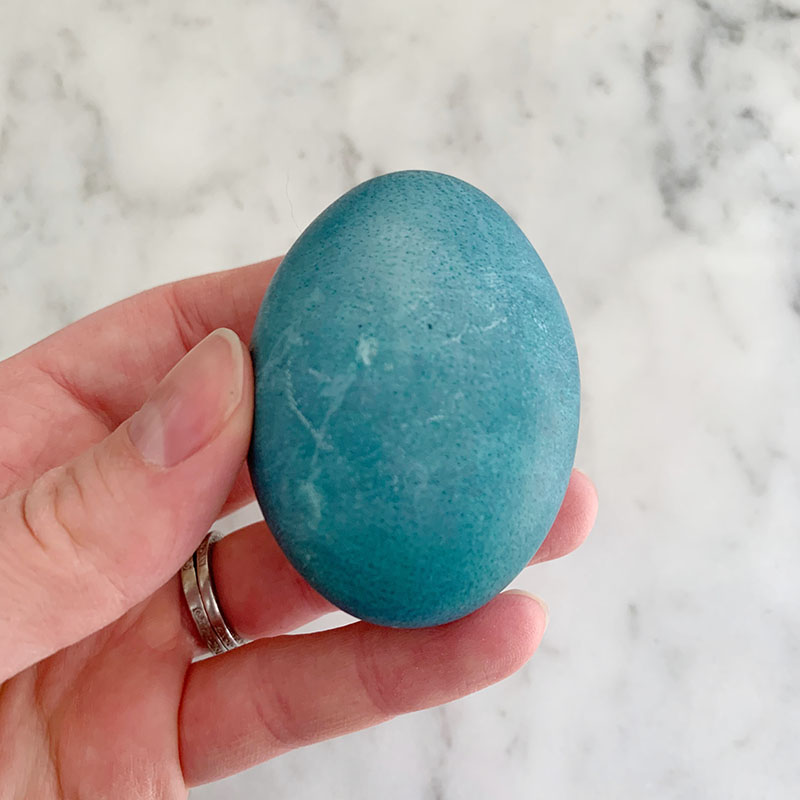
And this egg I soaked in the red cabbage dye for about a week. Big difference!
I do suggest gently rolling around the eggs every so often. Sometimes the eggs will have light spots where they touch the walls of the jar and the other eggs.
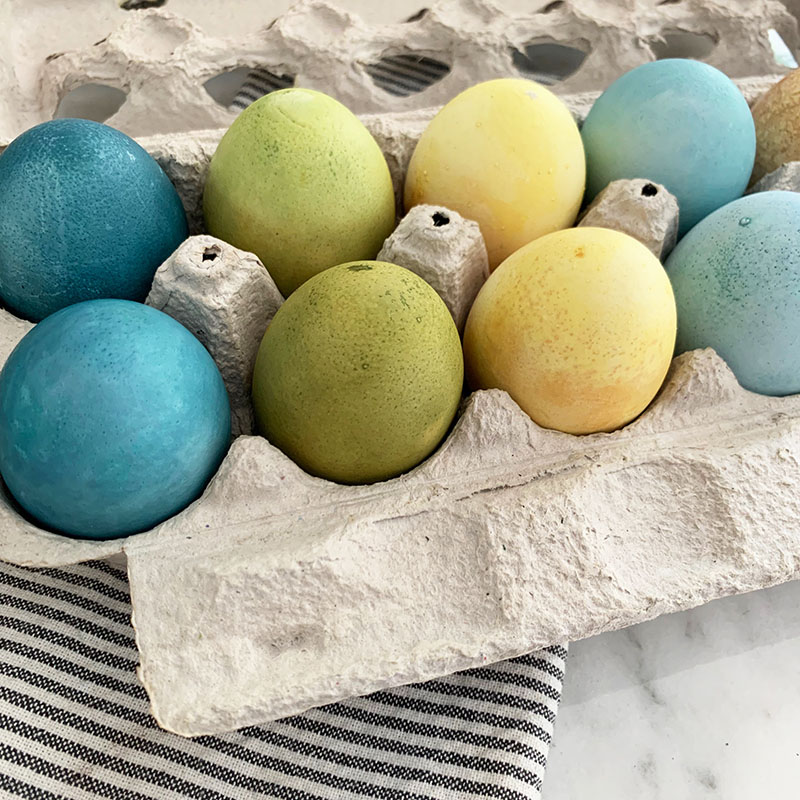
Mixing Dyes

To create this green/teal color I simply soaked the egg in the red cabbage dye and then in the turmeric dye. I love how the yellow deepens the color!
If you make other kinds of natural dyes for your eggs, try experimenting with soaking the eggs in more than one dye!
Displaying and Eating
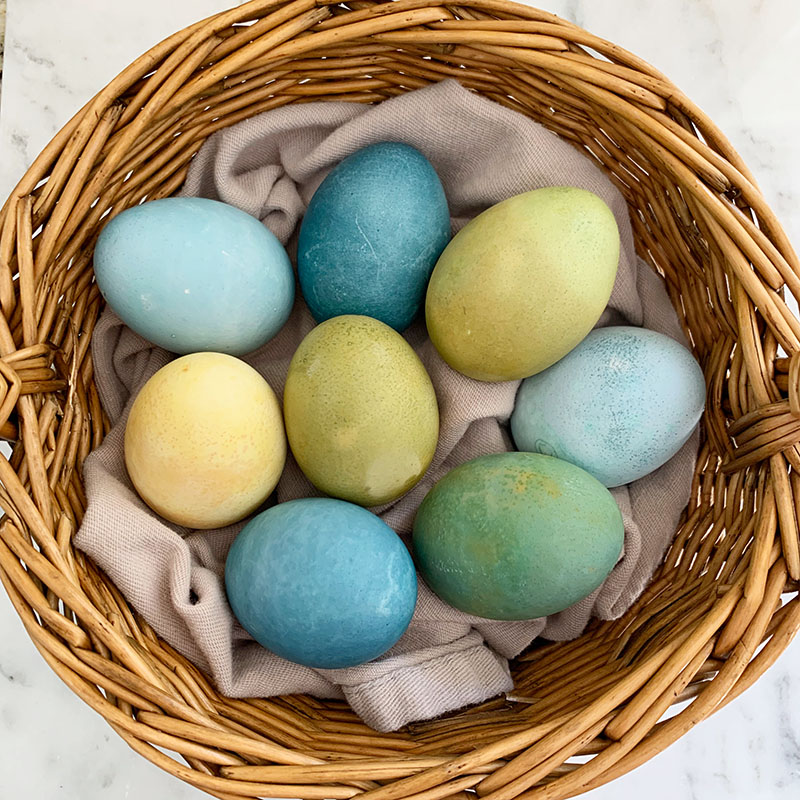
These eggs are so beautiful and would look so nice displayed out during Easter or a spring brunch! I think they look adorable displayed in a basket. A little faux bird’s nest would be equally cute!
If you plan on eating your dyed Easter eggs, just be sure that the eggs are safe to eat. They shouldn’t sit out for more than one hour or be in the fridge for more than one week. For more information, check out the FDA’s page on egg safety here.