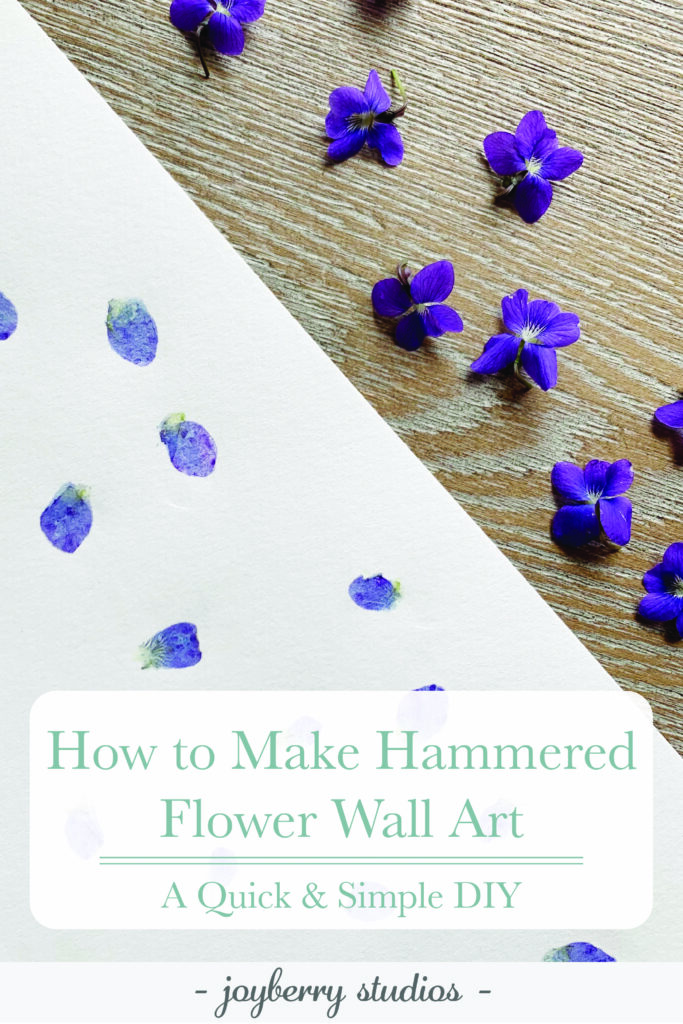
How to Make Hammered Flower Art
Hammered Flower Art
Hammered flower art is an easy and fun DIY that can be done in under an hour and with things that you may already have lying around the house. (AKA the BEST kind of DIY.)
Like many people, I’m trying to incorporate more art around my house. I love purchasing prints and direct downloads from artists off of Etsy. Sometimes I want something that has a little more texture or is different.
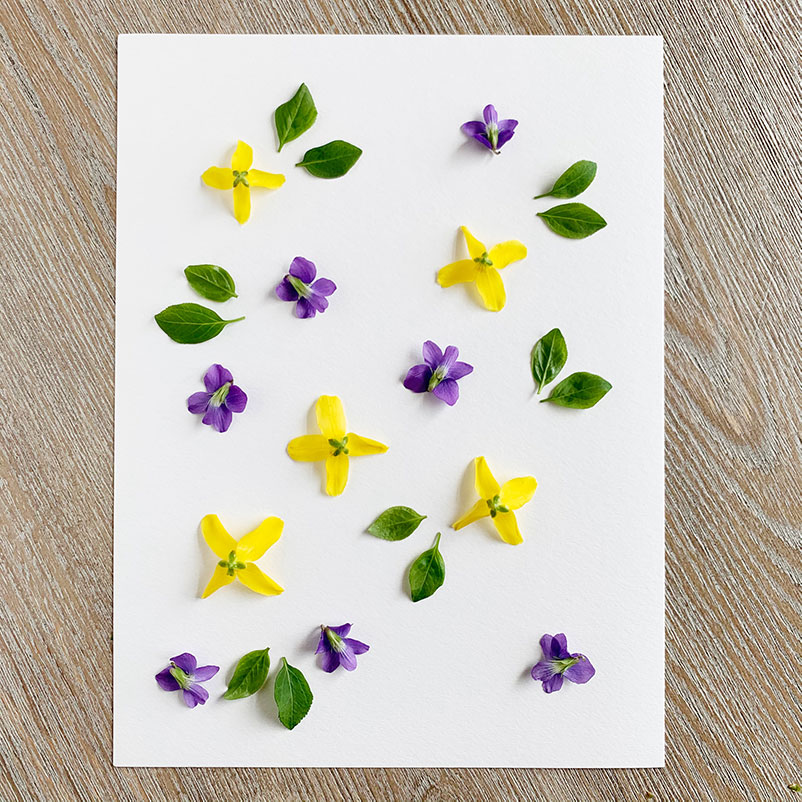
Creating hammered flower art is a simple, quick, and creative project. You can simply scatter petals like I did or do a geometric arrangement. This would also be a great activity to do with kids outside!
Supplies
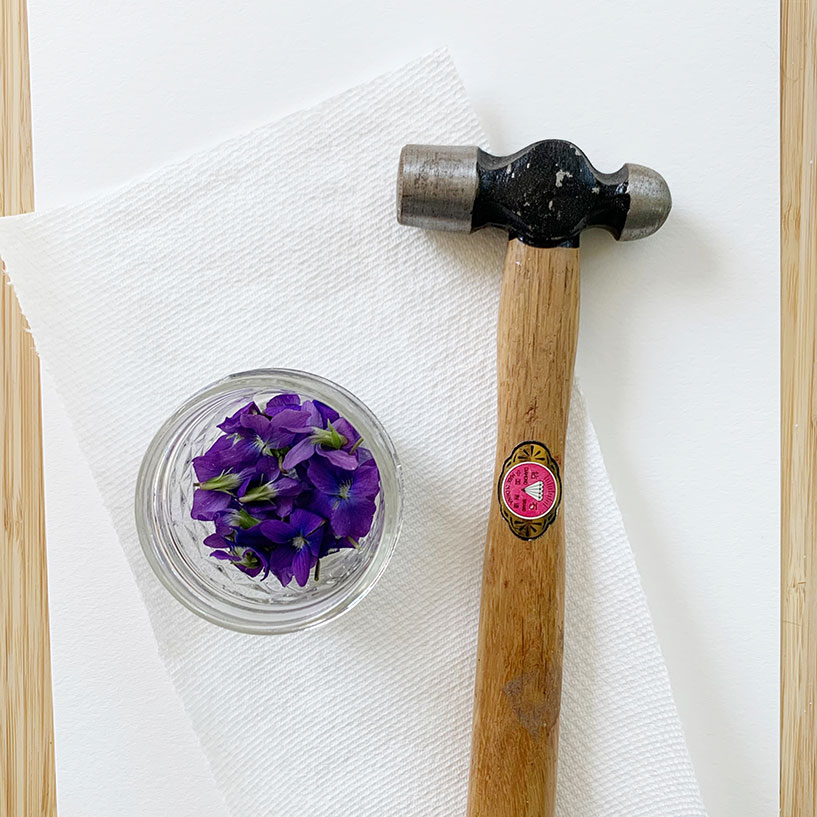
- Thick Paper (cardstock or watercolor paper)
- Hammer
- Paper Towel
- Flowers (Try getting a variety! Some flowers work better than others.)
Testing Before Your Final Piece
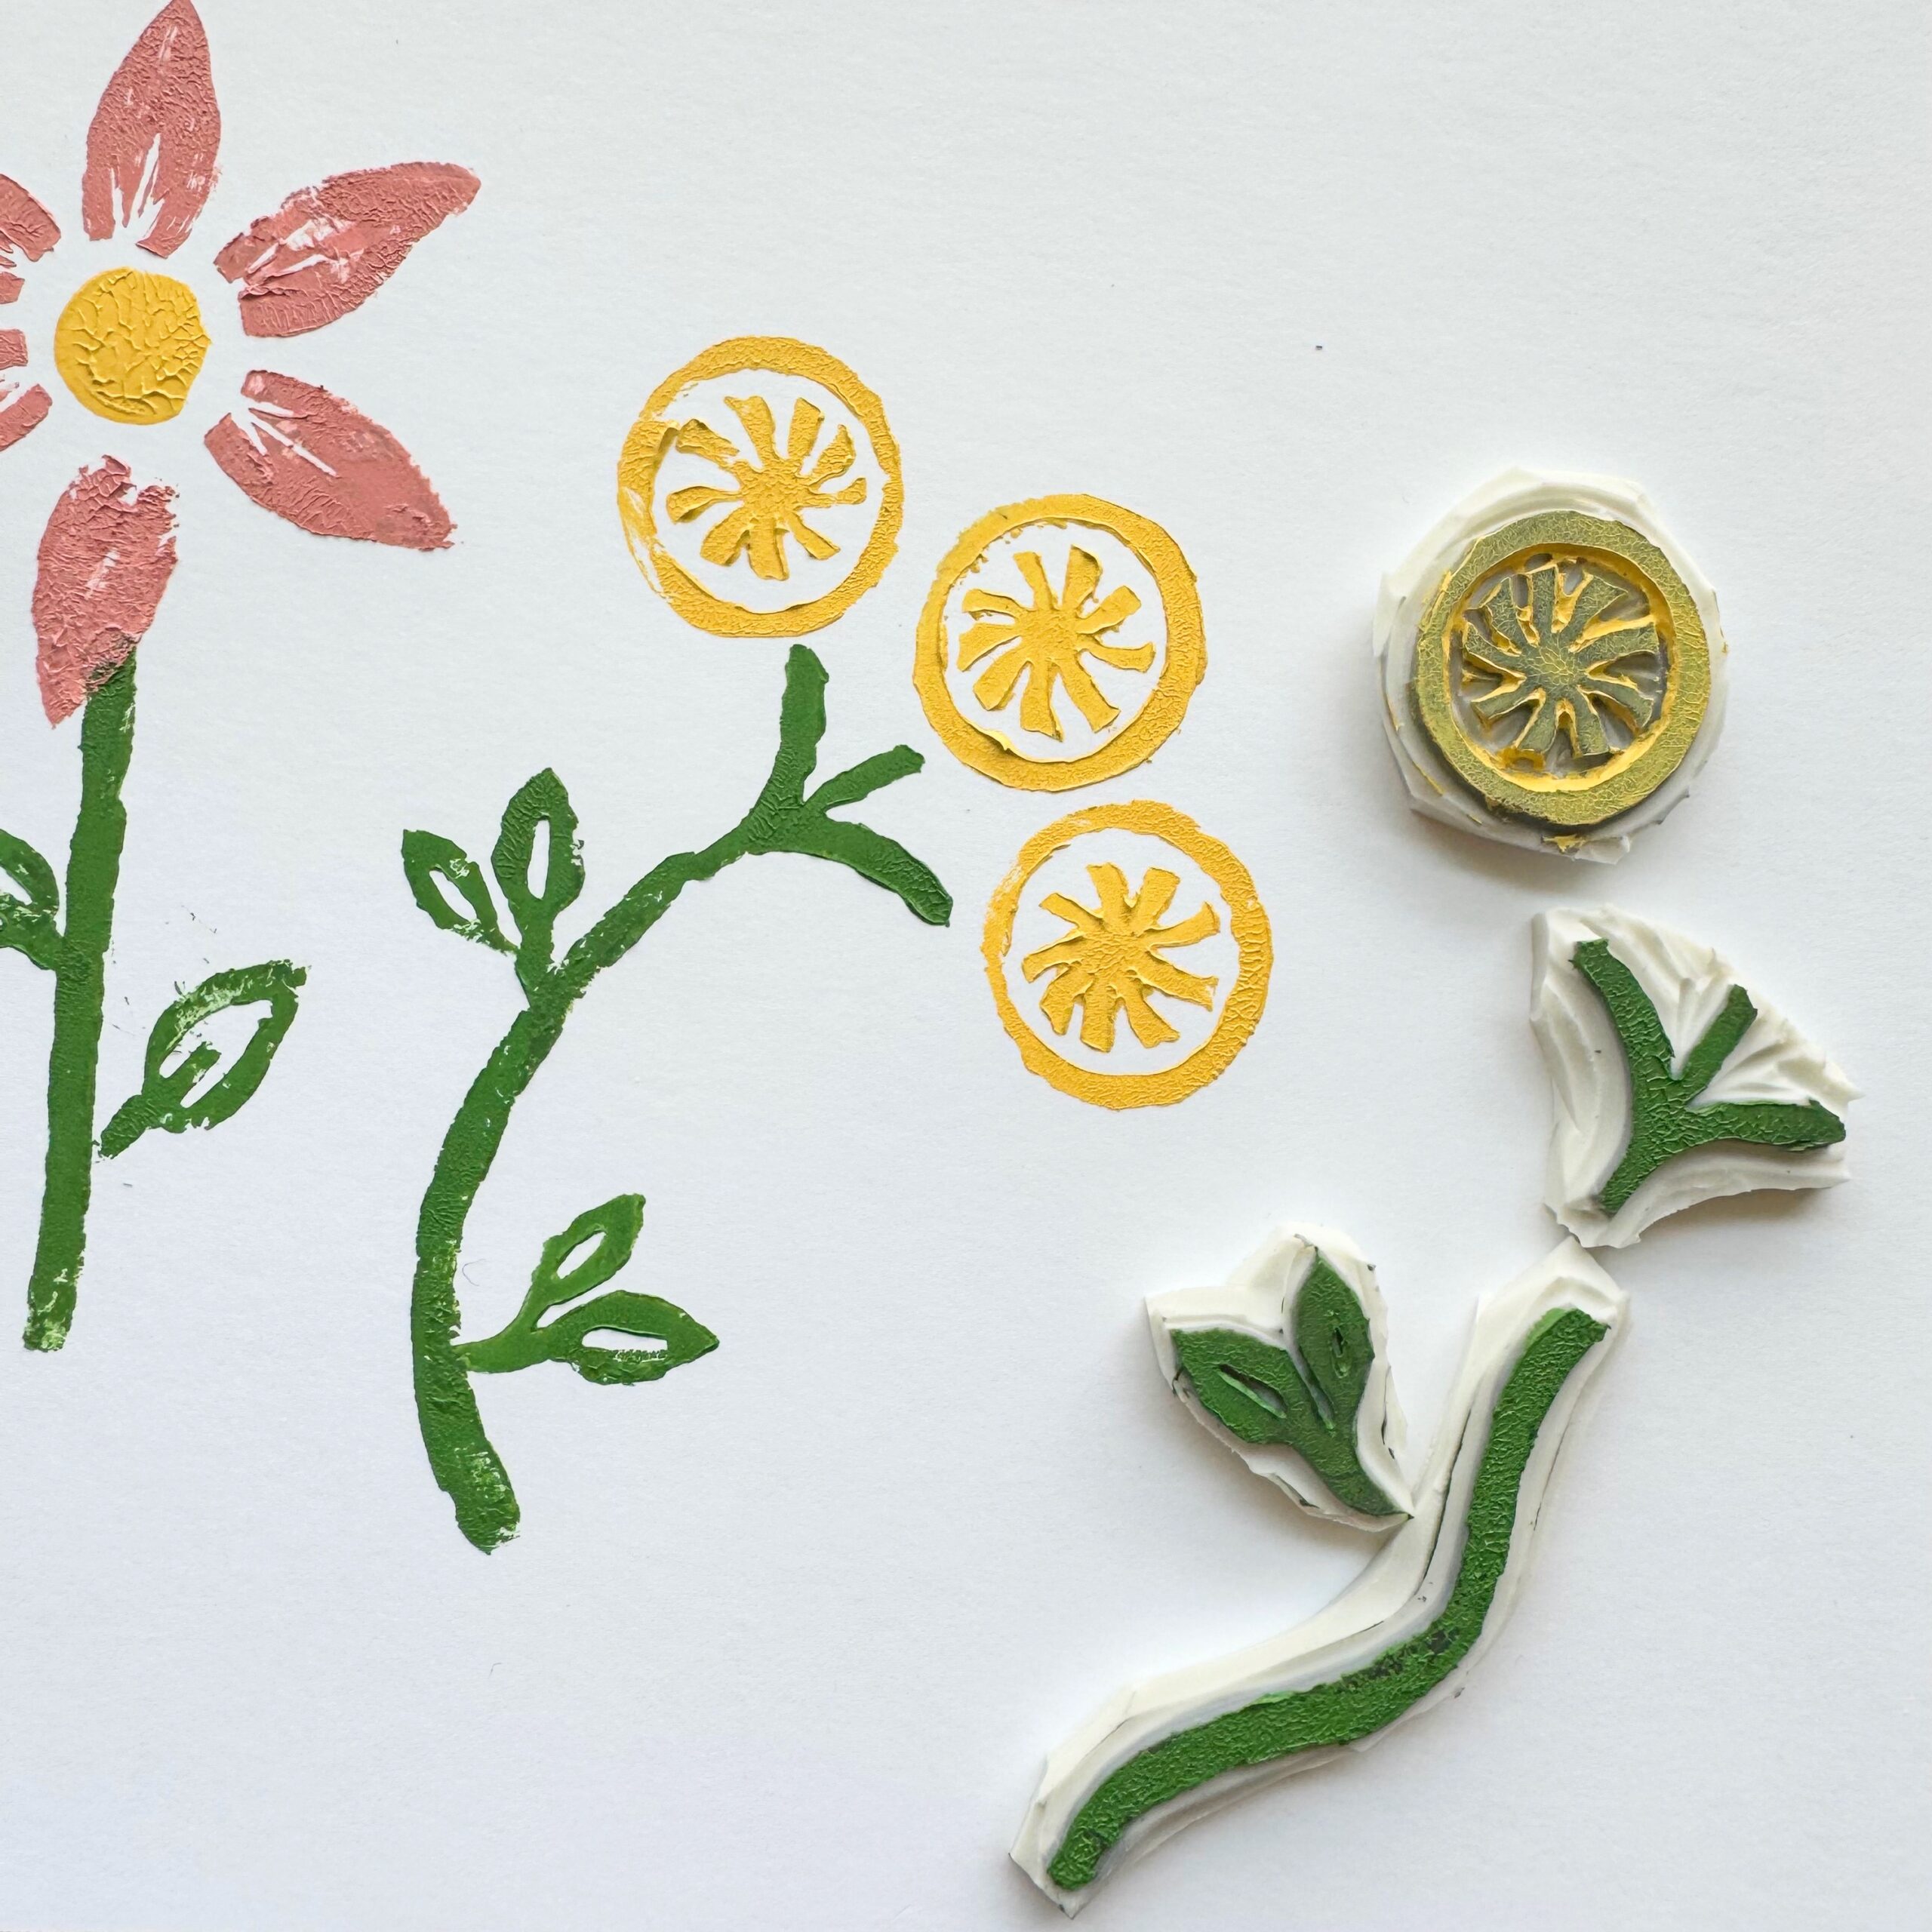
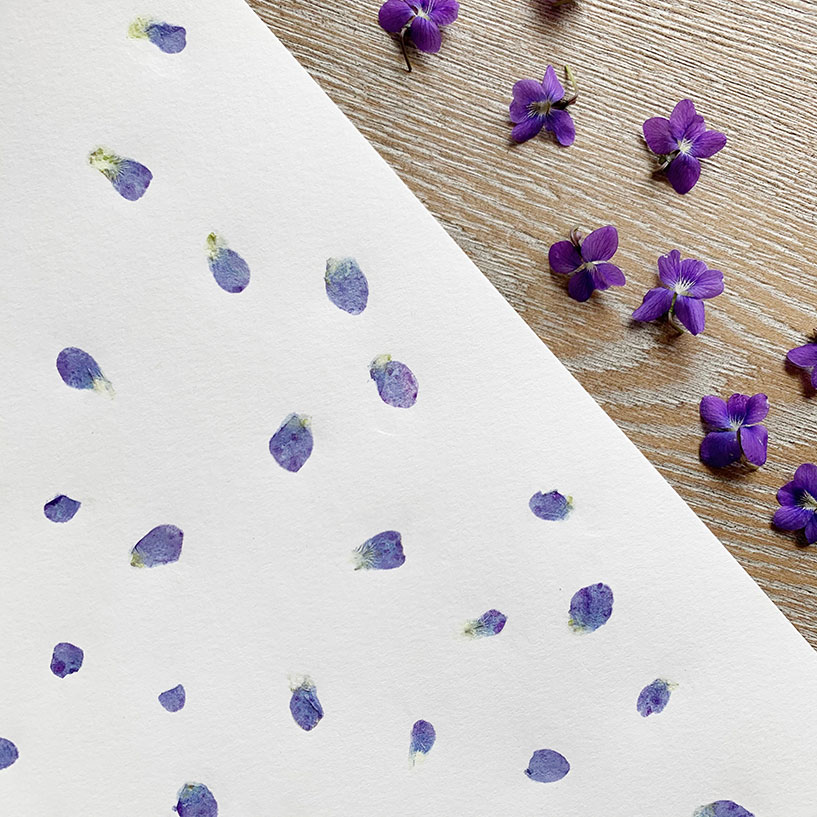
Before you dive into your final project, I encourage you to test some different flowers and leaves. With my first attempt I used leaves, forsythia flowers, and wild violets that are currently taking over my backyard.
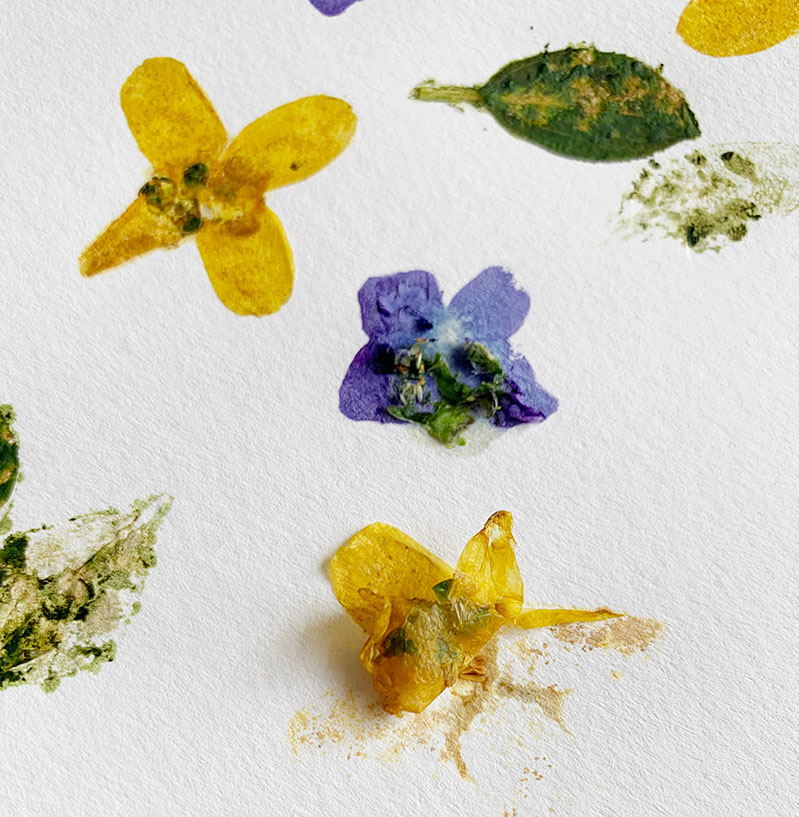
The forsythia didn’t really transfer color well and the leaves turned a muddy green color that I didn’t like. But the violets transferred a vivid purple that was gorgeous.
I also found through testing that it is best to remove any stem part and just use the petals of the flowers. If you squish a part that has a lot of moisture, it doesn’t look great.
How to Make Hammered Flower Art
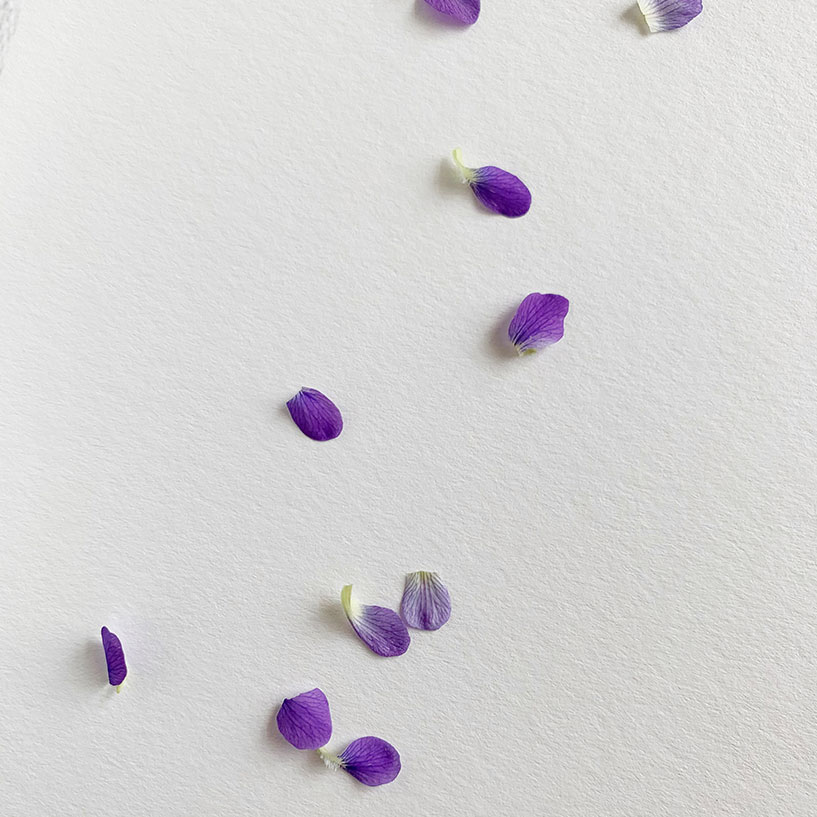
Peel off just the petals of the flowers you want to work with and lay them across your paper. You can position them wherever you want, but don’t be too precious. When you move onto the next few steps, the petals shift a bit.
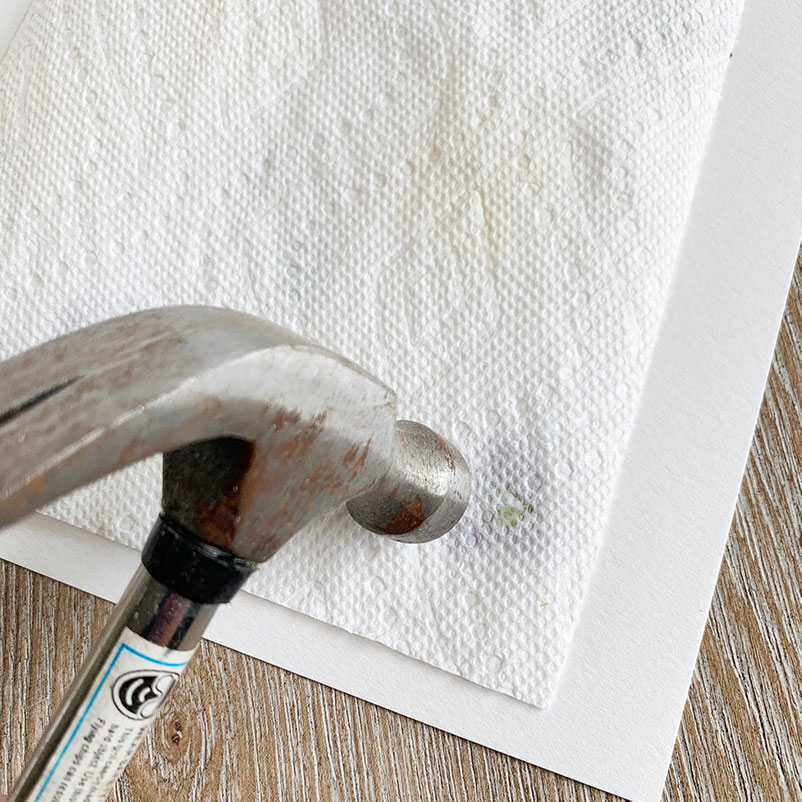
Gently lay a paper towel over the florals and lightly hammer them. You want to make sure you are working on a very firm and durable surface, like concrete. I don’t suggest hammering on your precious wood table or marble countertops! (Yes, this photo is taken on my table. Do as I say, not as I do.)
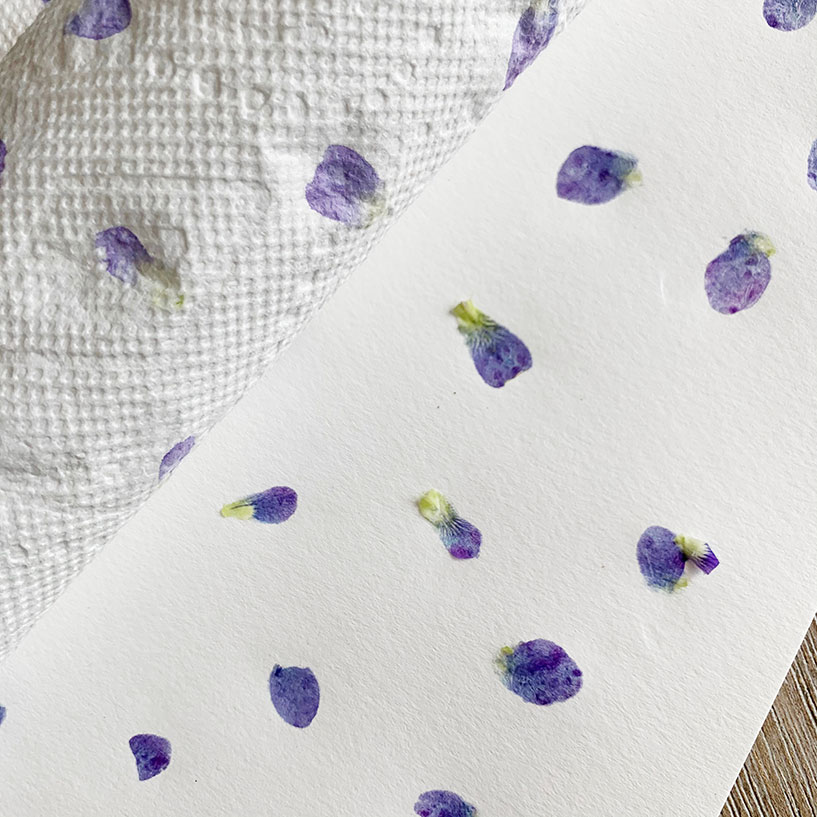
When you hammer you will start to notice that some of the color comes through the paper towel. How pretty! Once you are done, peel away the paper towel and you will be left with your hammered flowers.
At this point you can look over your flowers and pick out anything weird. I noticed that some of the petals stuck to the paper. I let them dry there instead of picking them off. It helps add a bit of fun texture.

Take it Further?
There are a ton of different ways you can modify this project. Here are just a few of my ideas!
- Use a colored contrasting paper
- Insert a bit of gold leaf
- Add some paint for a mixed media look
- Test different flowers and leaves
- Try layering the florals
Share on Social!
If you try this DIY please let me know how it went in the comments below or on Instagram. I would love to see how it turns out!