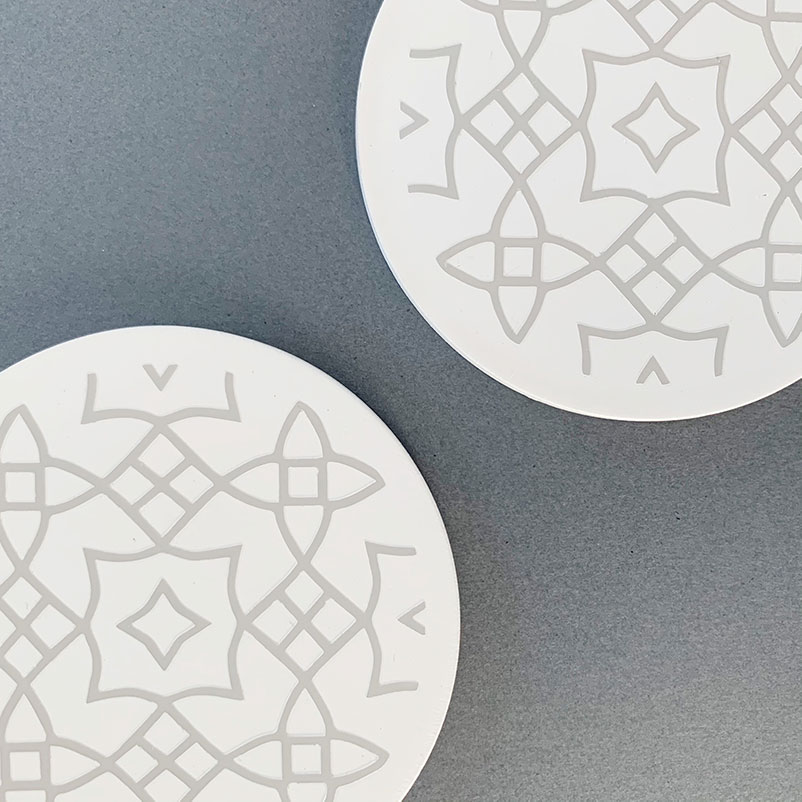
DIY Stenciled Coasters
Paint Flawless Stenciled Coasters
Who doesn’t love a good DIY that also looks professional? These stenciled coasters turned out so well and I have so many tips on how to get a flawless stencil. (Which you can apply to other projects!)
Materials
- coaster blanks (can you buy them on Etsy, Amazon, local craft store, or cut them on a Cricut/Glowforge)
- spray paint
- vinyl & transfer tape
- cutting machine (cricut, silhouette, etc)
Safety Tip – Wear a Mask While Spray Painting!
Masks aren’t just for Covid.
Whenever you are using spray paint or any other product (like other aerosols, resin, polyurethane, etc.) you need to wear a mask. Not just any mask, a N95 or ventilator that is rated for the product you are working with. You don’t want to inhale paint.
You should always spray paint outside or in a well ventilated area (like an open garage).
Primer
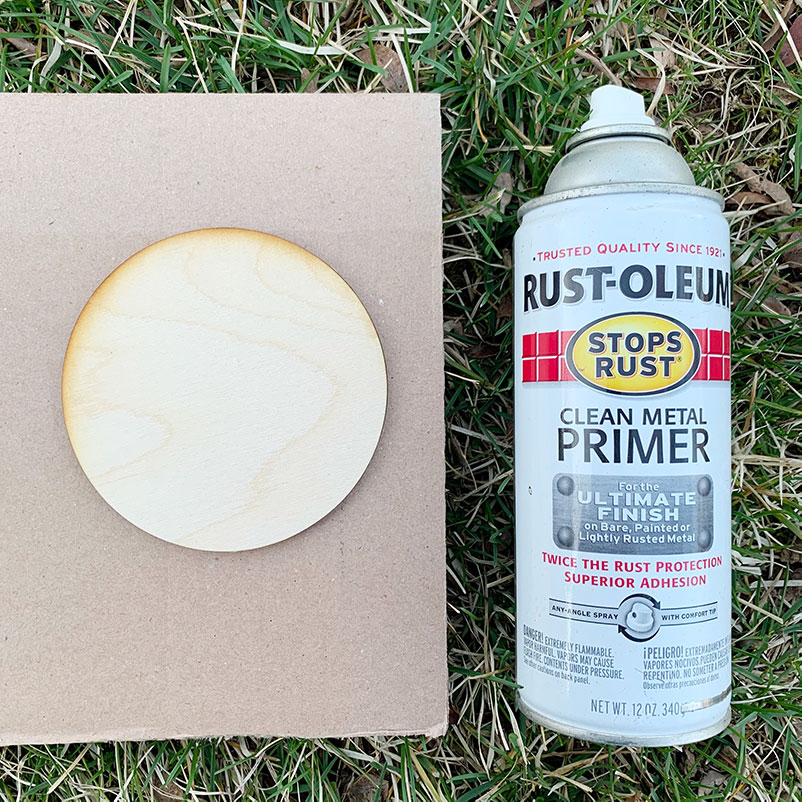
Sometimes when wood is spray painted, the grain can show through and it doesn’t look as smooth as you may want it to. This is a totally optional step, but if you’re going to spray paint other things in the future and you want a smooth finish, you can purchase this Rust-oleum Clean Metal Primer.
Give your wood a solid coat and wait a few hours for it to dry.
After it is dry, sand it until it is smooth. I used a 220 grit here. Just don’t go too crazy and sand all of the primer off. If needed, you can do a second coat of primer
Let your primer dry for the suggested amount of time.
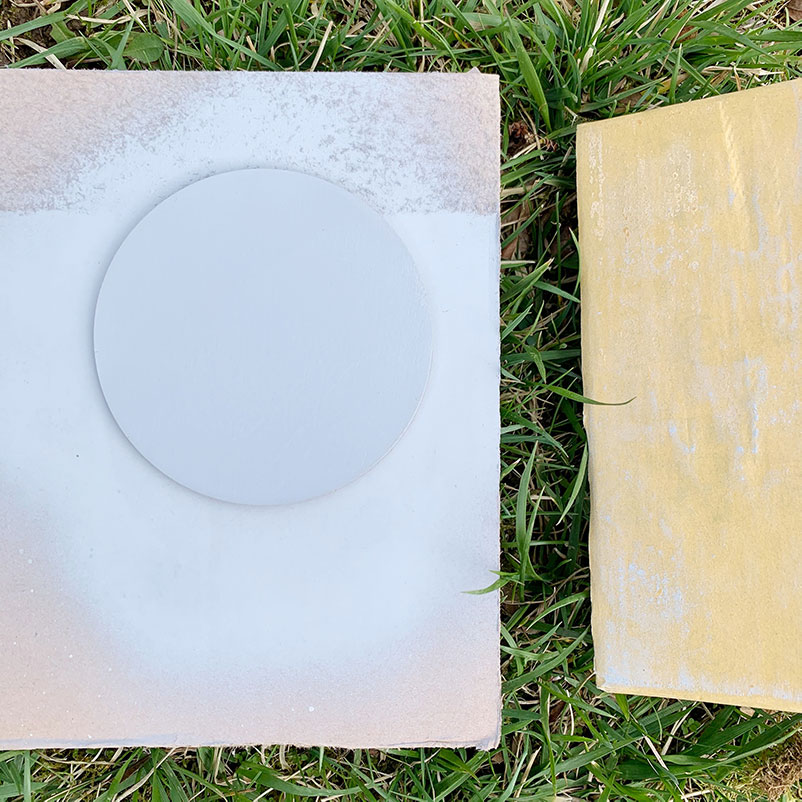
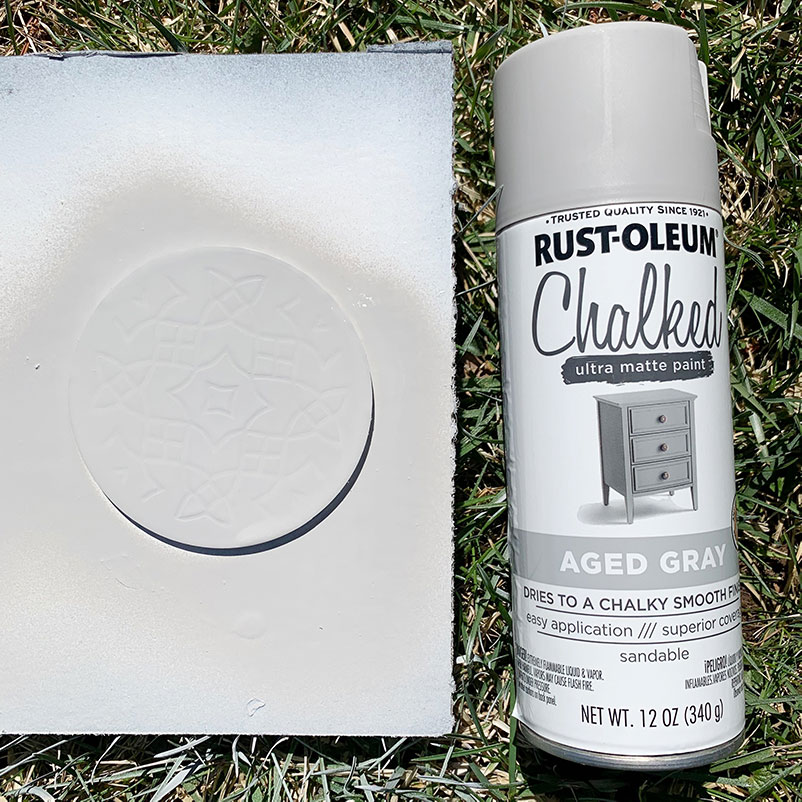
Base Coat of Paint
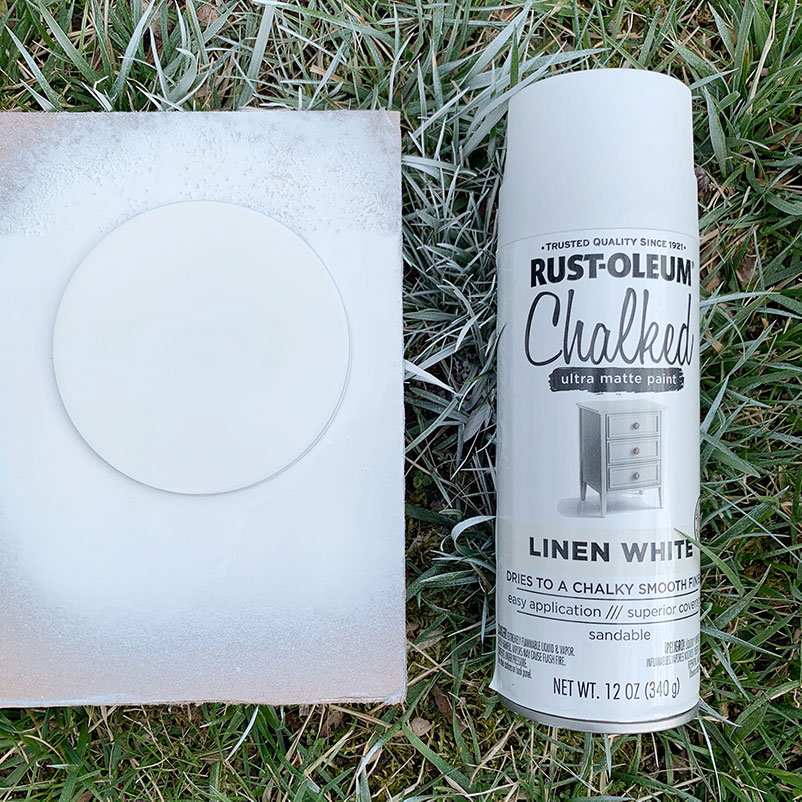
Once it is dry and ready, apply a coat of your base color (white in my example). I suggest focusing on spray painting the edges, and the over spray will be more than enough for the top.
Read the label on your paint and see when you can apply a second coat. In order to get a smooth finish on your coasters, you need to follow the suggested dry times on your paint!
Prep Stencil
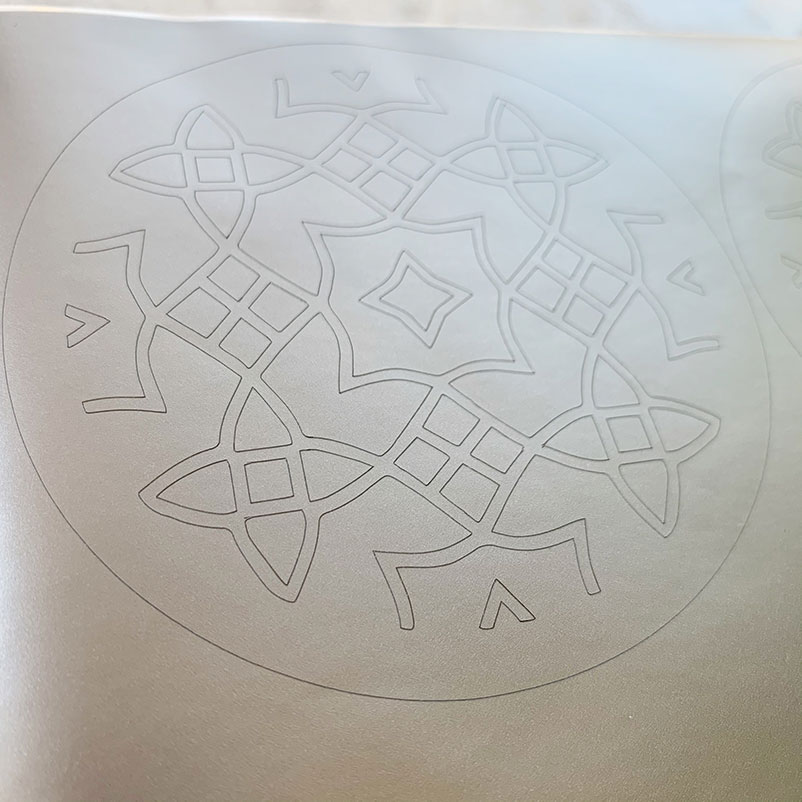
If you subscribe to my email list you will gain access to my downloadable freebies, which includes this stencil!
Upload the file to whatever cutting software you are using. (I used a Cricut). You may need to resize the file. My coasters are 3.5 inches. If yours are bigger or smaller, just simply resize in the program.
Cut out the stencil in vinyl. Vinyl works really well because it has a tight bond to the coasters when we go to spray paint them! Weed out all of the parts of the stencil that you want to paint in.
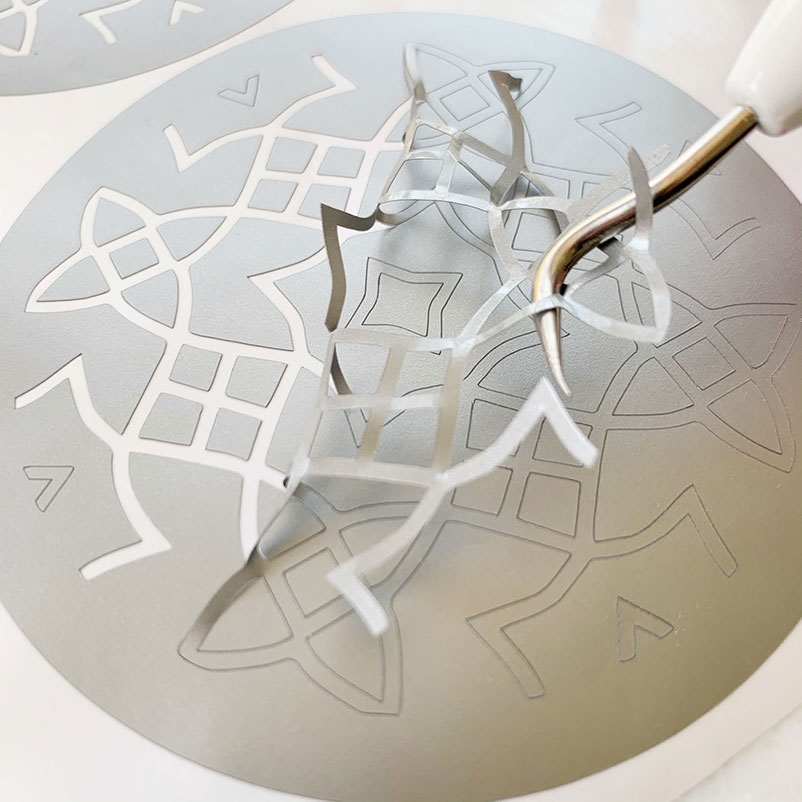
Transfer your weeded vinyl to transfer tape, peel off the vinyl backing, and stick it onto your coaster. Peel off your transfer tape by pulling it parallel to the surface. This sharp angle helps prevent the vinyl from coming off.
Make sure there aren’t any bubbles within the vinyl stencil and that everything has a good seal to the coaster.
Painting The Stencil
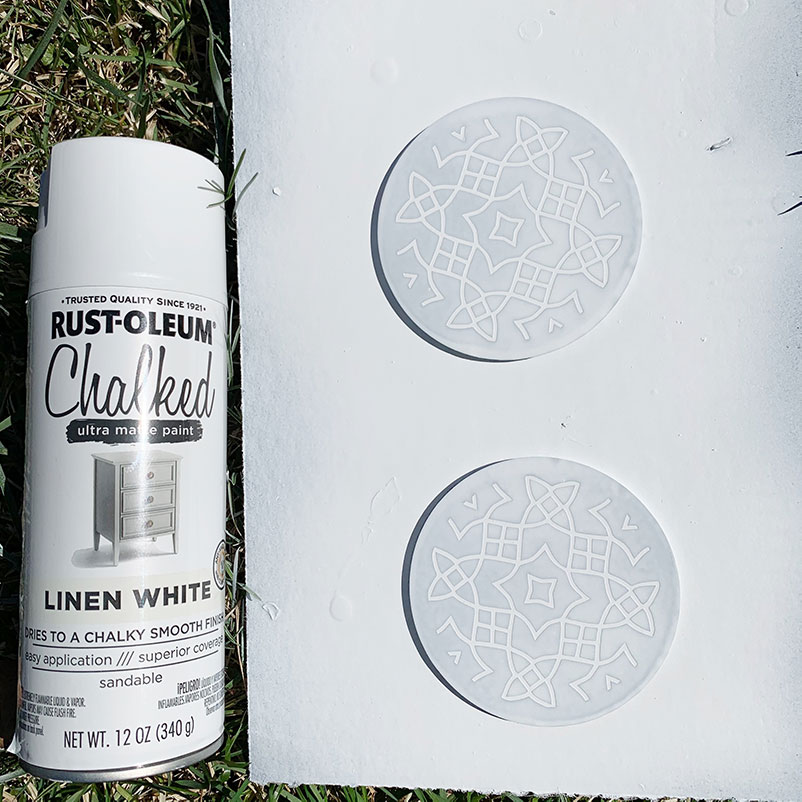
Here is the biggest game changer when painted stencils. The first stencil coat of paint should be your base coat color. This helps seal in all of the edges and if there is a leak, it will be with the same color underneath and won’t be noticeable!
Once again, double check your paint for directions on when to apply a second coat. Once it is time, paint the desired color for the stencil.
Peel off Vinyl
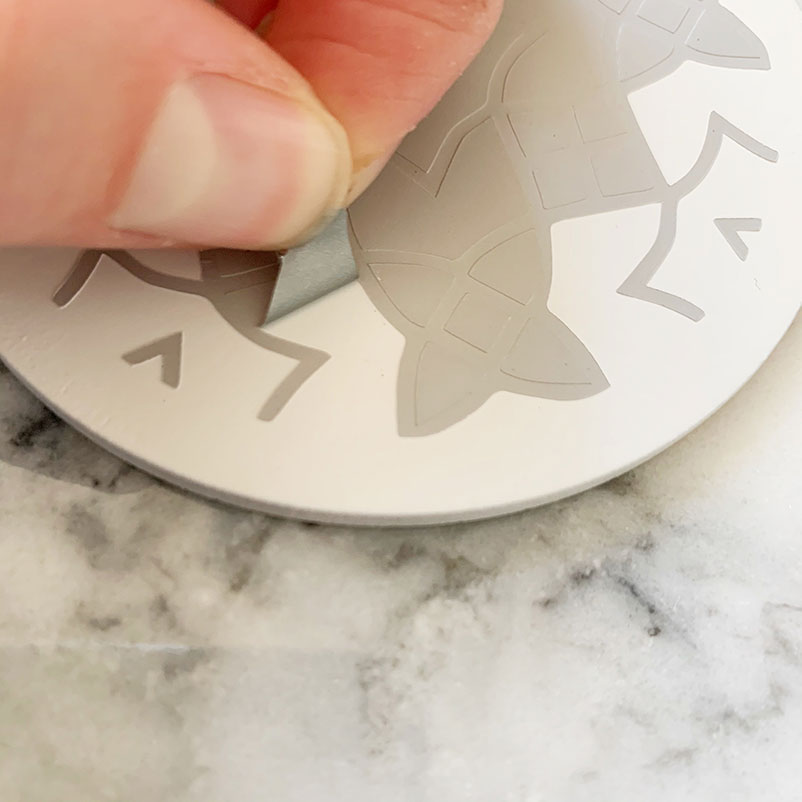
This is the worst part of this project, but makes all the difference. Before you peel off the vinyl, you have to wait for your paint to fully dry. This took 48 hours for my paint.
I tried to take off my vinyl before, but the paint wasn’t fully hardened and I just put a lot of dents into my paint. Do yourself a favor and wait!
Once your paint is fully dry, then you can peel off the vinyl! I suggest using a small pin or your nails if they are long enough, to try to get the edges of the vinyl for the smaller pieces.
It may be hard to pull off some of the vinyl because you made such a good seal with your paint. Just be patient!
Enjoy your Stenciled Coasters!
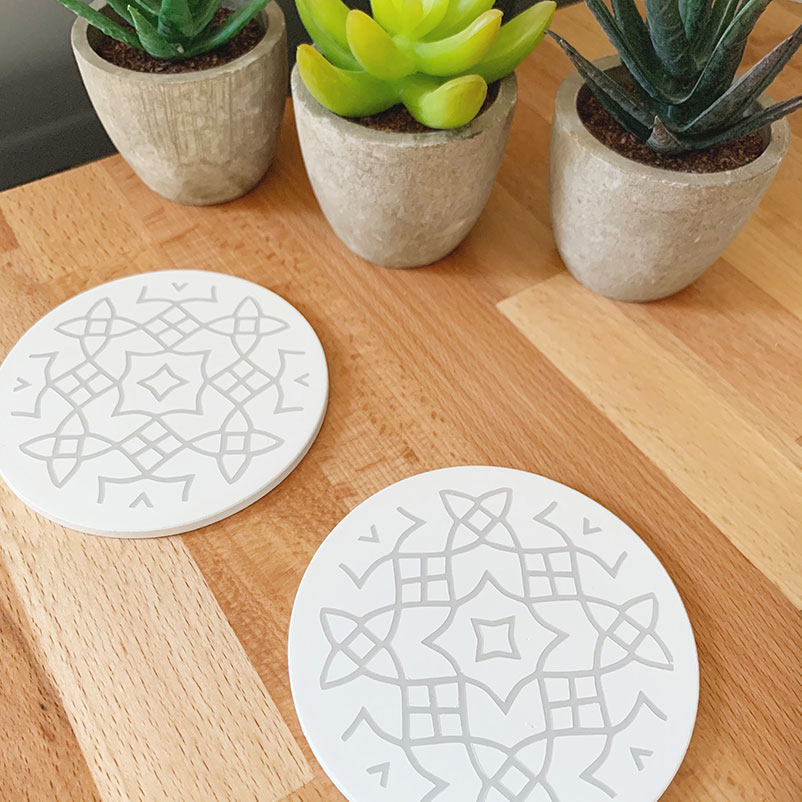
Feel free to add a clear coat to the coasters if you want extra protection or add some cork or felt to the bottom for a more professional look. When you are done, pour yourself a fun drink and enjoy your new coasters.