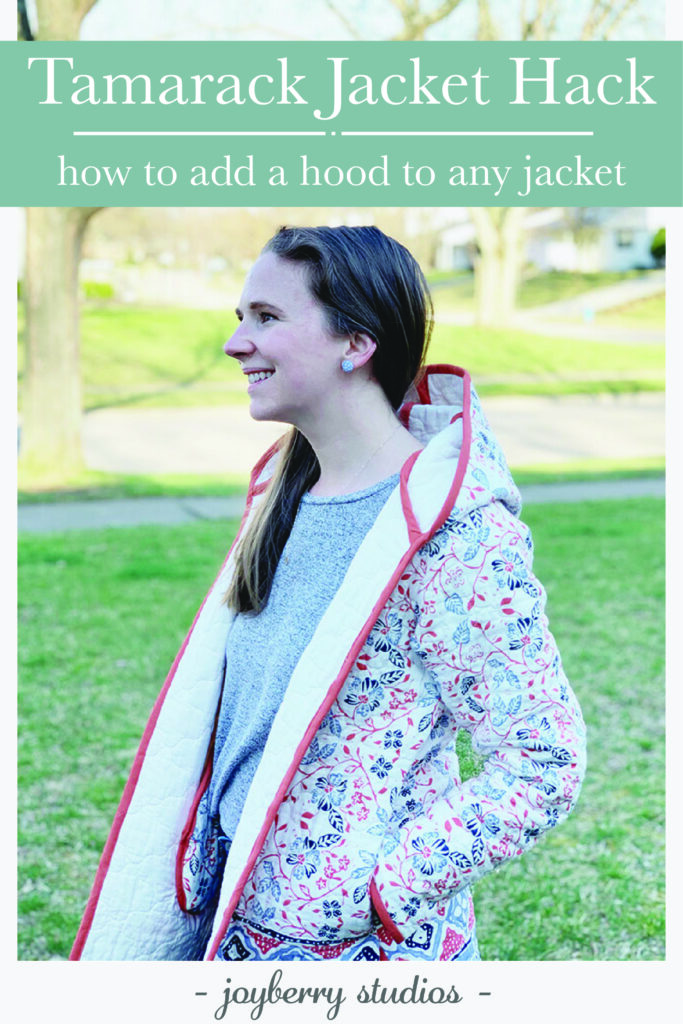
Add a Hood to a Tamarack Jacket
Quilted Jackets
Who doesn’t love the recent quilted jackets trend? I thought it would be fun to make matching quilted jackets for me and my daughter. The quilted jacket pattern of my dreams did not exist, the next best option was the Tamarack Jacket from Grainline Studios. I found a way to add a hood to a tamarack jacket. I also modified the length and added in seam pockets.
For this project, I also wanted to make a matching jacket for my daughter. I’ve done some quilting, but the thought of doing all of that quilting on top of sewing two jackets was daunting. It was going to be mid summer by the time I finished quilting and sewing two jackets. So I thought outside the box a little and used one of my old store bought whole cloth quilts that I no longer used because we upgraded from a queen to a king sized mattress. This is a quick hack to make a quilted jacket in less than half the time! Just use an old quilt!
Details About the Hood
One of my favorite additions to this jacket was adding a hood. I think the hood makes it a bit more cozy, fun, and trendy. I like the shape of a hood where it has one rectangular piece that goes from the nape of the neck to the forehead and two identical curved pieces on the side. This hood design prevents the hood from becoming pointy at the crown of the head.
I’m not sure if this particular hood has a name. (If you do, please let me know in the comments!)
Cut Fabric for Hood
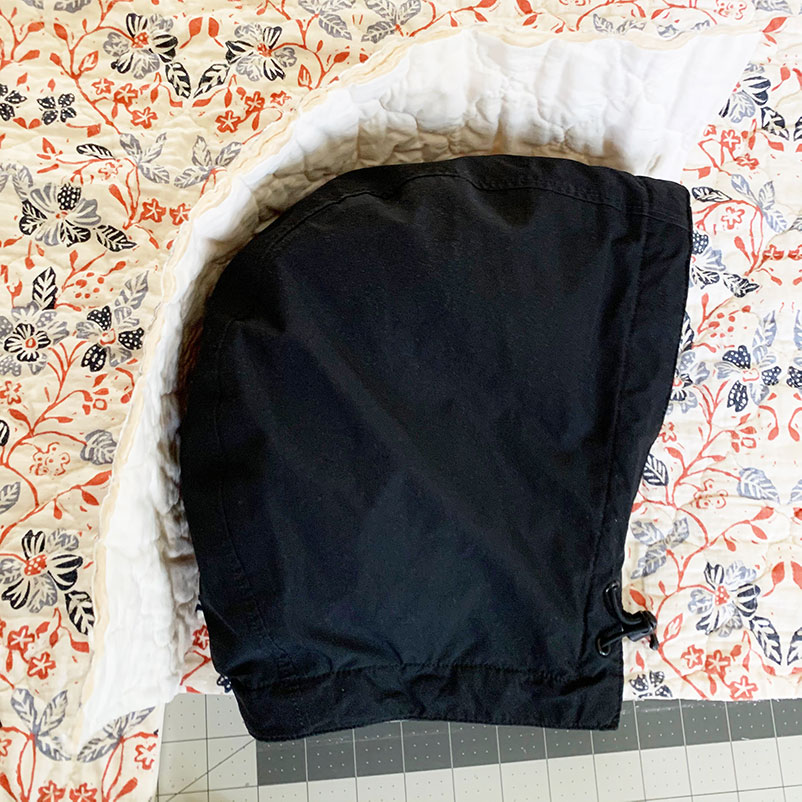
I started off with tracing the hood off of my down jacket. This hood is a little snug, so I tried to make it bigger. If you are tracing from an existing hood, make sure you account for seam allowances!
If you don’t have a hood to trace, that’s okay! I will provide measurements for the pieces that I cut out below.
The following measurements also account for seam allowances where there is stitching and a bias tape finish on the front of the hood. If you plan to hem the front of your hood, account for that in your cuts.
For this hood I also found that it was best to make the pieces a little bigger and cut them down later so everything fits. Since this is not an exact pattern, things most likely won’t fit perfectly and that’s okay!
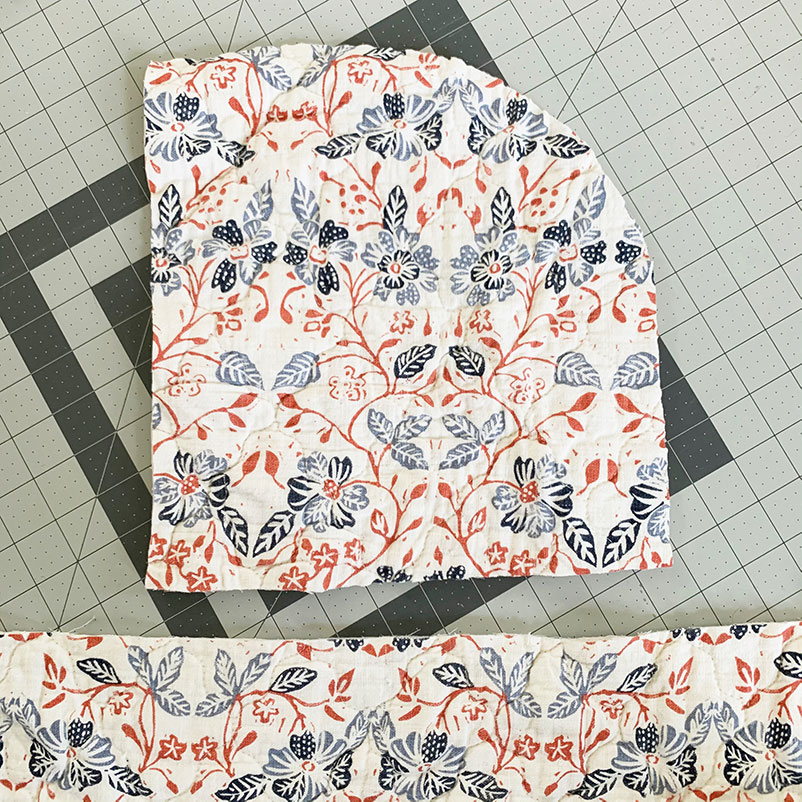
Cut out a 6×21 inch rectangle and two 12×12 inch squares.
Draw a curve cutting off one of the corners of the square piece. This curve will be the profile view of the hood, so be careful to not make it too extreme of a cut. You can always start with a small curve and take out more fabric if needed.
Also make sure that the curve is no longer than 21 inches. You can simply pick up your longer rectangle piece to make sure it fits along this curve.
Trace this curve onto the other square and cut that square’s curve as well.
Sew Hood to a Tamarack Jacket

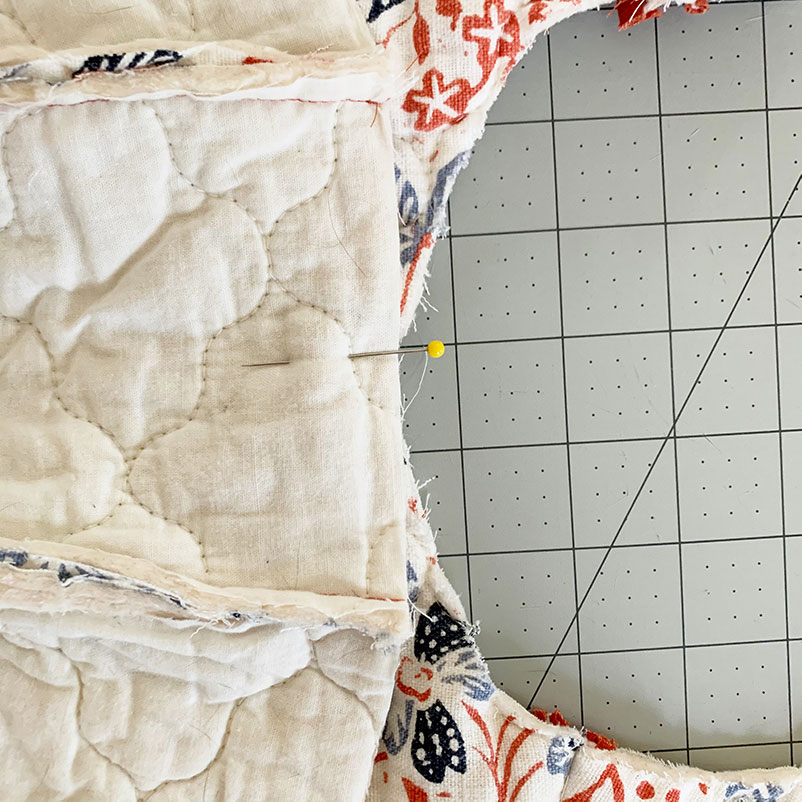
Pin the 21 inch side of your rectangular piece to the curve you just made. If the rectangle piece is a bit longer than your curve, that’s okay. Just give it a quick trim so everything is even. Take it to your machine and sew with a ⅜ seam allowance.
Pin the other curved square to the other side of the rectangle and sew.
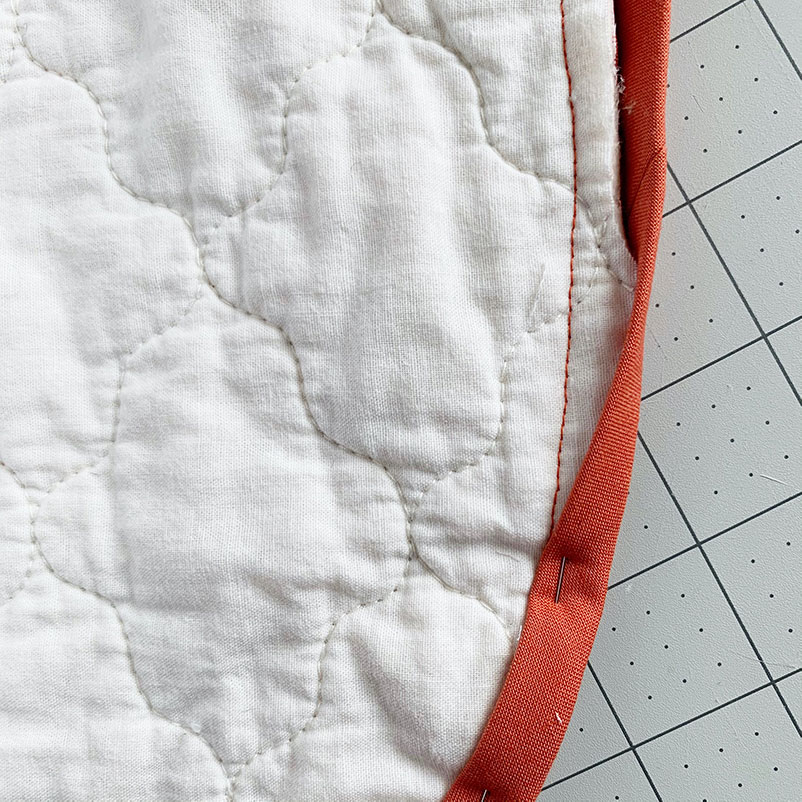
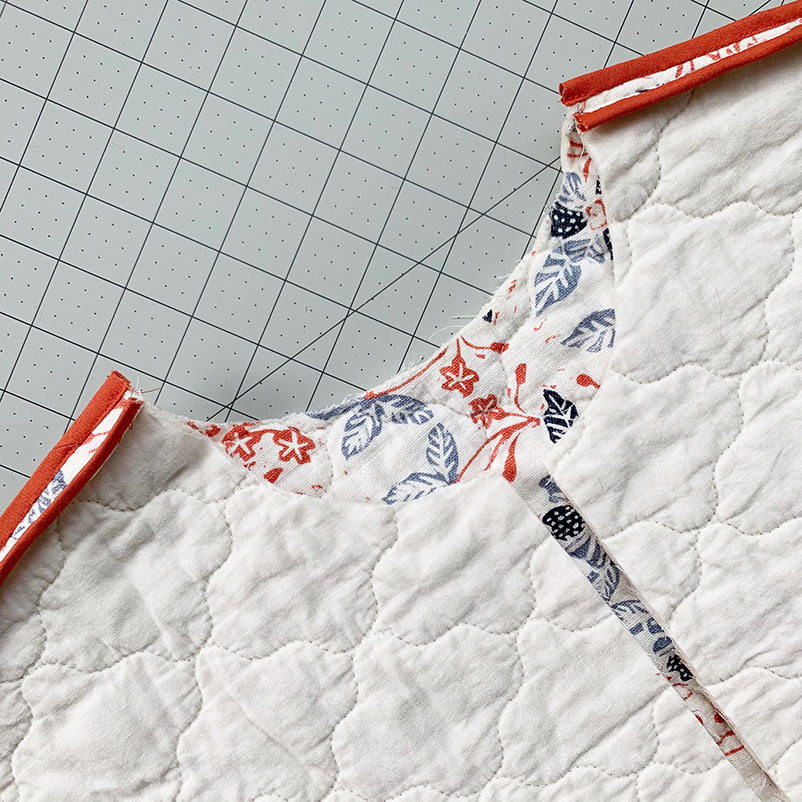
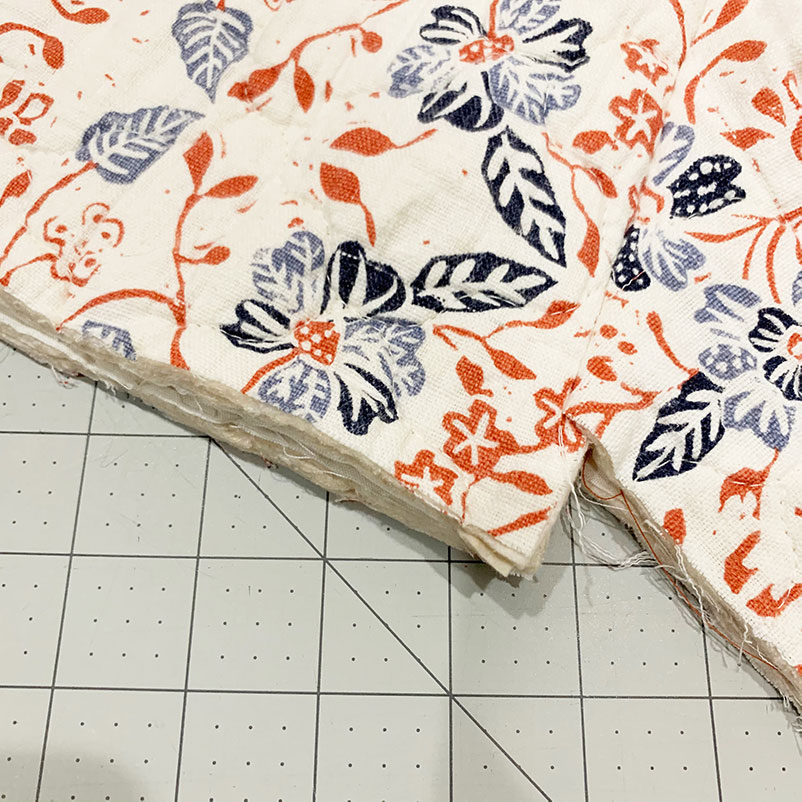
At this point you should finish the seams. I just covered my seams in bias tape. I think this looks cute because you can see the seam finishes pretty easily when you are wearing the jacket, so you want them to look nice.
When I made a matching jacket for my daughter I just finished the edges with an overcast stitch. Much faster and less bulky, but not as fun. You could use a contrasting thread for a bit of color if you wanted to go this route.
You could also do a Hong Kong seam, which takes a bit more time, but I love how it looks and it lays really well! If you do one, make sure your seam allowance is ½ inch. (I only did the Hong Kong seams on the shoulder, the first seam)
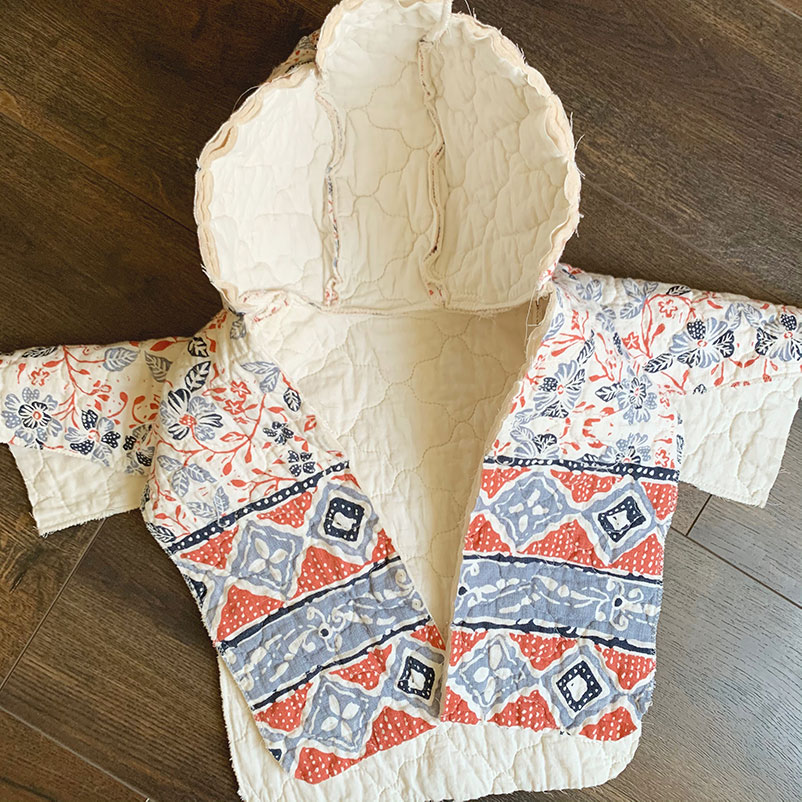
Add the Hood to a Tamarack Jacket
Next you want to attach the hood to a Tamarack Jacket. Find the middle of your hood and the middle back of your jacket and pin them together. Continue to pin the rest of the hood to the jacket. It is okay if the seams don’t quite match!
Take it to your sewing machine and sew the hood to the jacket with a ⅜ seam allowance.
You may notice that the front of your hood is a little longer than the collar.
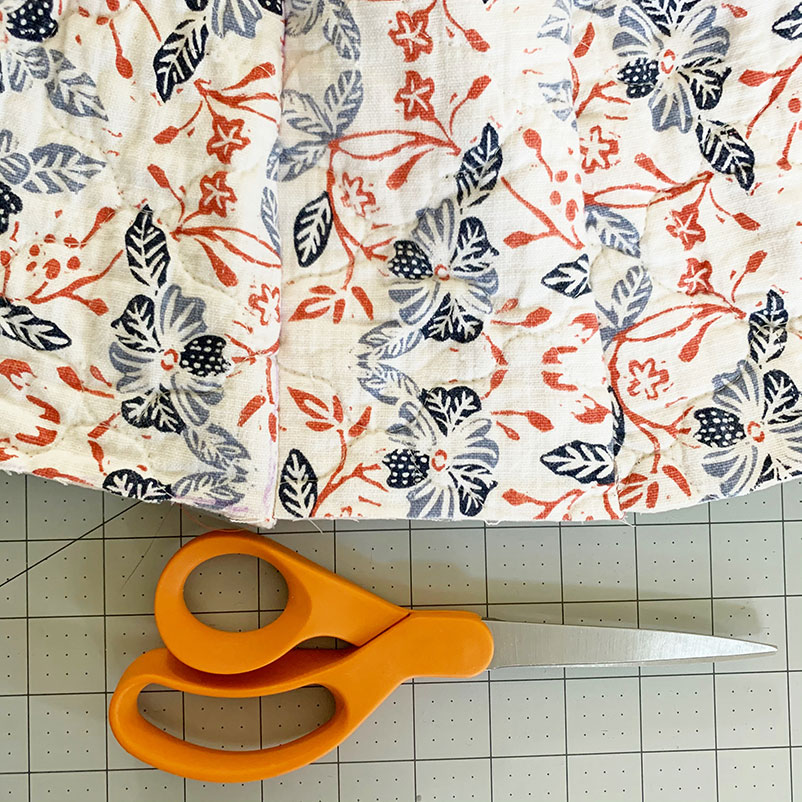
Simply trim the hood starting from the collar with a diagonal line up to the middle rectangular piece. (If your hood is a bit too short, just trim the front of the coat to match.)
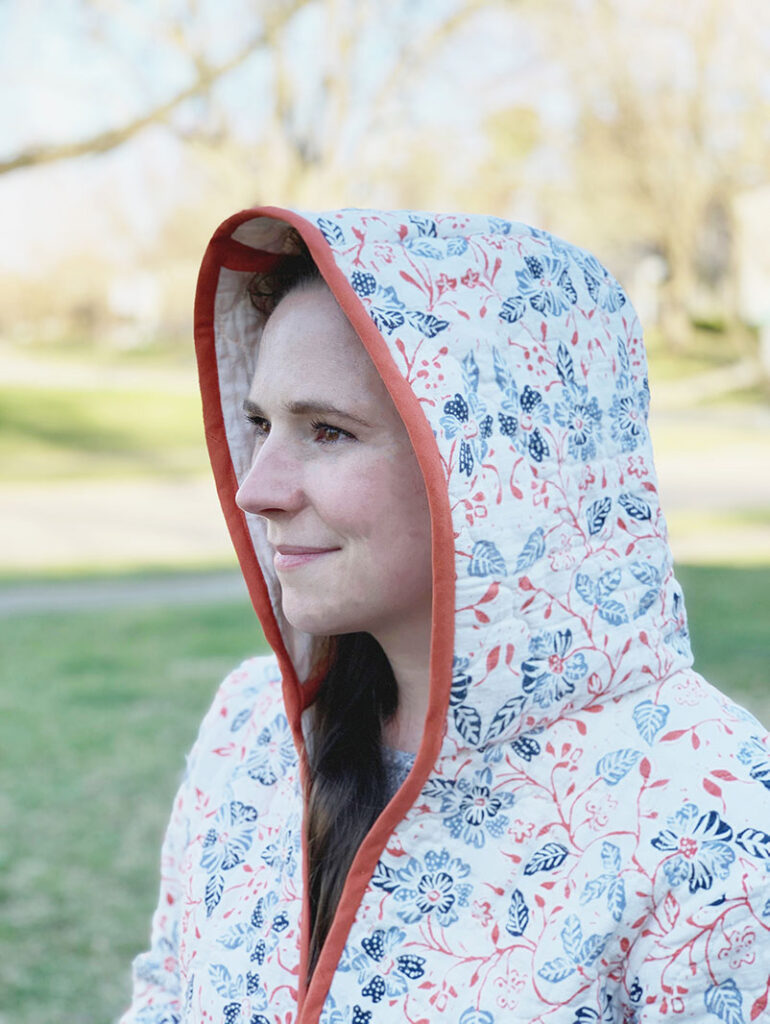
When you do the bias tape to finish the front of the jacket, just continue the bias tape up around the hood.
This is such an easy way to add a fun detail to this classic jacket. I’m so happy I took a bit of time to figure out how to add a hood to a Tamarack Jacket!
Other Alterations – Added Length & In Seam Pockets

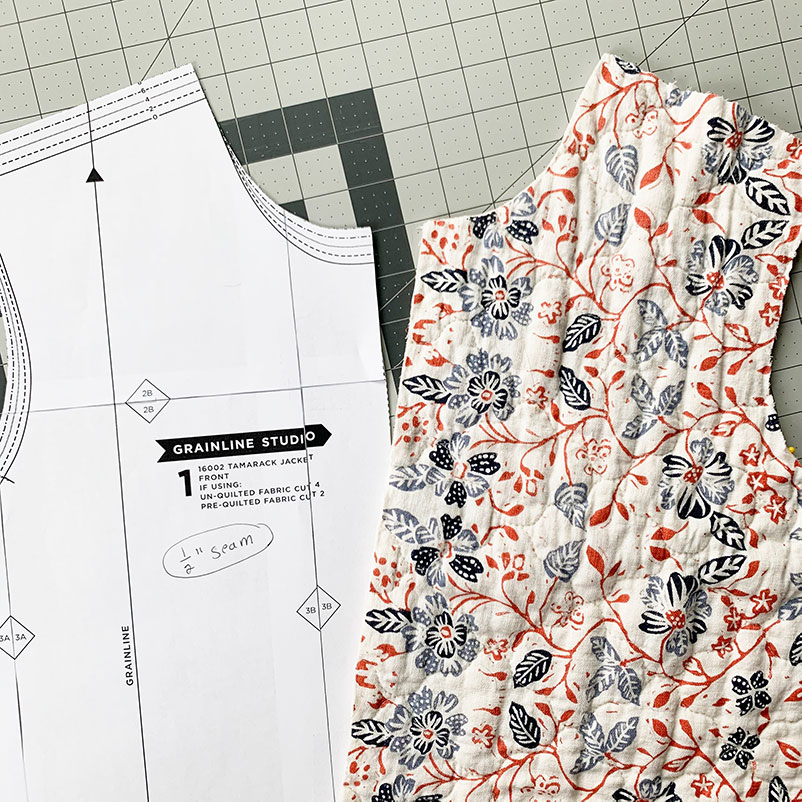
For my Tamarack Jacket I also wanted to make a few changes. I wanted it to be a little longer and for the front and back pieces to align so the bottom detail on the quilt would match up. So I added around six inches to the front and lengthened the back pieces to match the length.
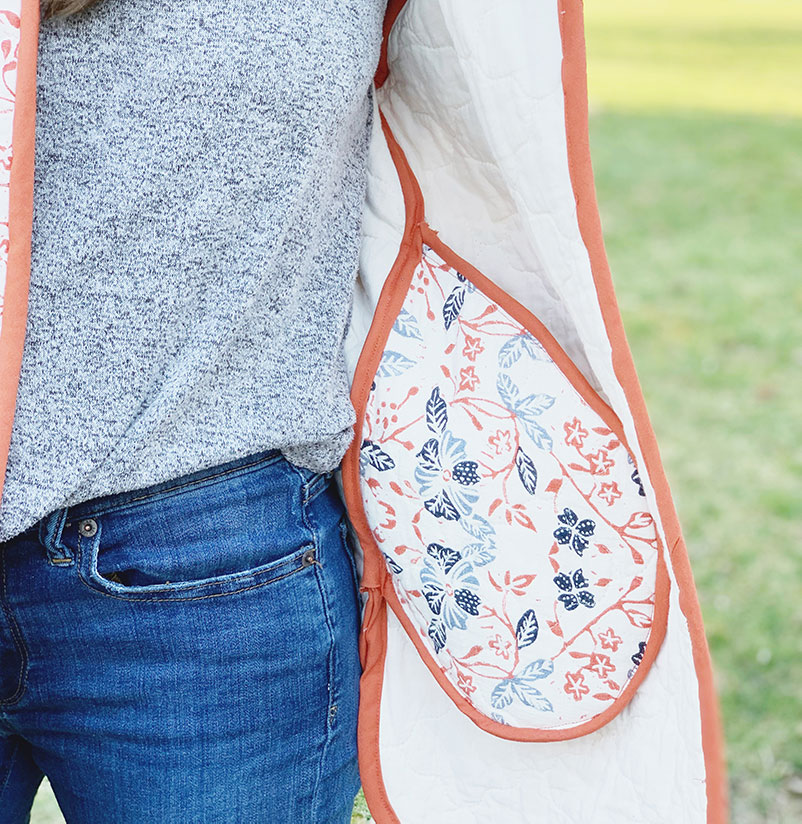
I also wanted to add in seam pockets. The original welt pockets on the pattern were a little too much for my tight time frame for this project and I loved the idea of having a pop of color on the inside.
I simply traced out a pocket shape using my hand as a guide. I then stitched them into place. Adding the bias tape to finish the seams was more tricky than I anticipated. I had issues figuring out how to hide the bias tape. (read: I was frustrated and eager to finish.)
I think it is best to finish the seams between the coat and the pocket with an overcast stitch or serger. There ends up being a lot of bulk in this area, so cut down where you can’t see the finishing! Then finish the outside seam between the pocket and coat with bias tape. Then finally finish the outside rim of the pocket with the bias tape that travels up the entire inside of the jacket. Just like the path you follow to sew the entire side and arms of the coat.
I also hand stitched the pockets to the front of the jacket. I found that they awkwardly flapped with the coat and since I didn’t add any closures in the front, I wanted to be able to “close” the coat with my hands in my pockets.
Final Thoughts
I really enjoyed this project and I will probably make another Tamarack Jacket in the future. For my next project I will probably do a few things differently.
I would choose to either finish my seams with an overcast stitch or go all in and do hong kong seams. Simply just covering the entire seam with bias tape was a little bulky and I love the contrast but I definitely don’t want people looking too closely! It’s not perfect!
I probably wouldn’t add quilted in seam pockets again. If I wanted to add in seam pockets I would probably just use a contrasting fabric. It got a little bulky, especially in the seams.
If you try any of these hacks, please let me know! You can find me on Instagram or comment below!