How to Make a DIY Magic Wand
DIY Guide for Kids and Parents
Creating a DIY magic wand is a fun and creative project that both kids and parents can enjoy together. This simple craft uses felt, fabric scraps, and a few other materials to make a whimsical wand perfect for imaginative play or as a charming accessory for Halloween. Follow these easy steps to make your own magic wand.
Imaginative Play and Halloween Fun
A magical wand is not just a craft project; it’s a gateway to imaginative play for children. With a wand in hand, kids can become wizards, fairies, or any magical character they can dream up. This kind of imaginative play is crucial for child development, fostering creativity, problem-solving skills, and emotional expression.
Ideas for Imaginative Play:
- Wizard Adventures: Create a simple cape, and let your child use the wand to cast spells, explore enchanted forests, or defend against imaginary dragons.
- Fairy Fun: Pair the wand with wings. Your child can sprinkle pretend fairy dust, help flowers bloom, or embark on secret missions.
- Royal Roles: Use the wand as a scepter for a prince or princess, ruling over a kingdom of toys and stuffed animals.
Halloween Use: A magical wand is a versatile accessory for Halloween costumes. Whether your child wants to be a wizard, a fairy, or even a magical creature like a unicorn, the wand adds a special touch. You can customize the felt star to match the costume, adding glitter, sequins, or fabric paint for extra sparkle!
Materials Needed:
- Felt sheets
- Fabric scraps (for stuffing), or you could use cotton balls, or FiberFill
- A wooden stick (like a dowel or a sturdy twig)
- Ribbon, yarn, or thin fabric scraps
- Hot glue gun and glue sticks
- Embroidery floss (optional)
- Embroidery needle (optional)
- Scissors
- Template (optional: a star shape)
Step-by-Step Instructions:
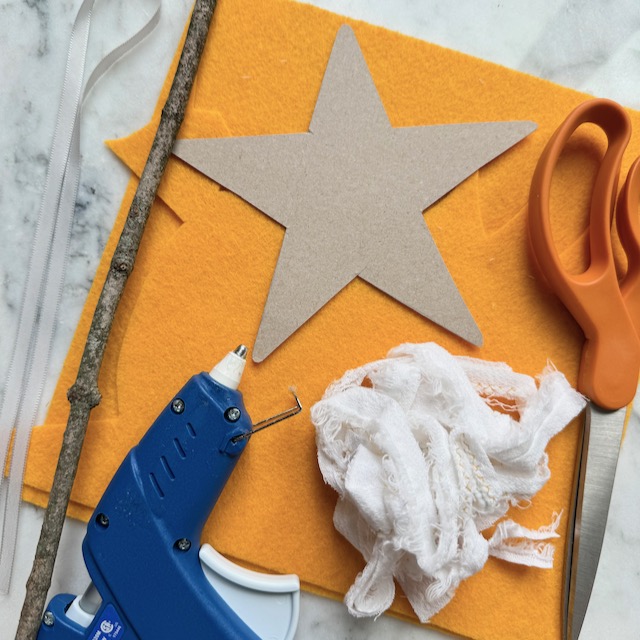
1. Prepare Your Star Shape
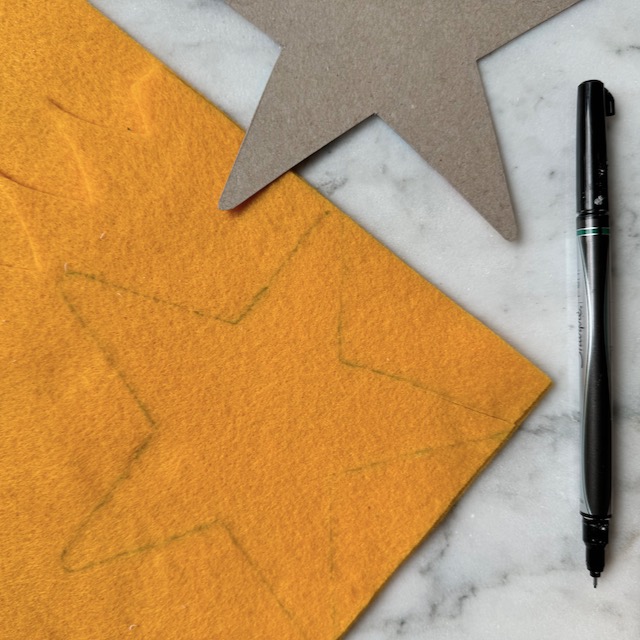
- Using a pen or fabric marker, draw two identical star shapes on your felt sheets. You can freehand the star shape (just make sure to cut out two of the same stars) or you can print a star template below to use!
- Cut out the two stars carefully, making sure they are the same size and shape.
2. Assemble the Star
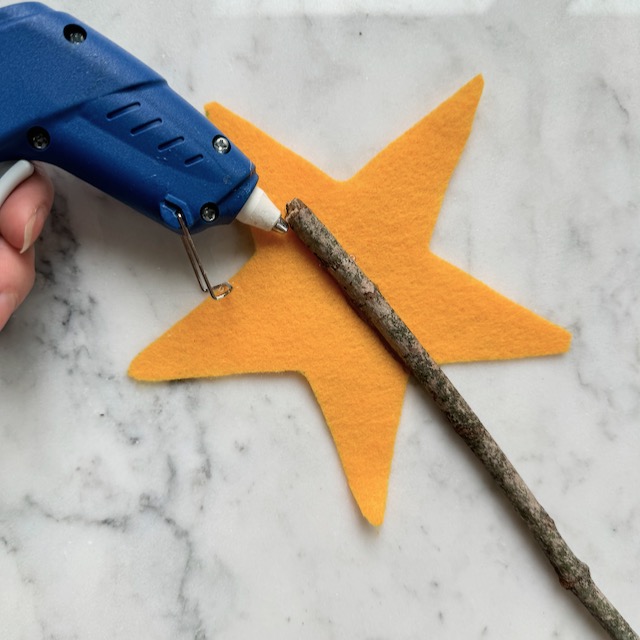
- Heat your glue gun and apply a generous amount of hot glue to one end of the wooden stick.
- Carefully place the stick on one of the stars, pressing firmly to ensure it adheres well. Hold it in place until the glue cools and sets.
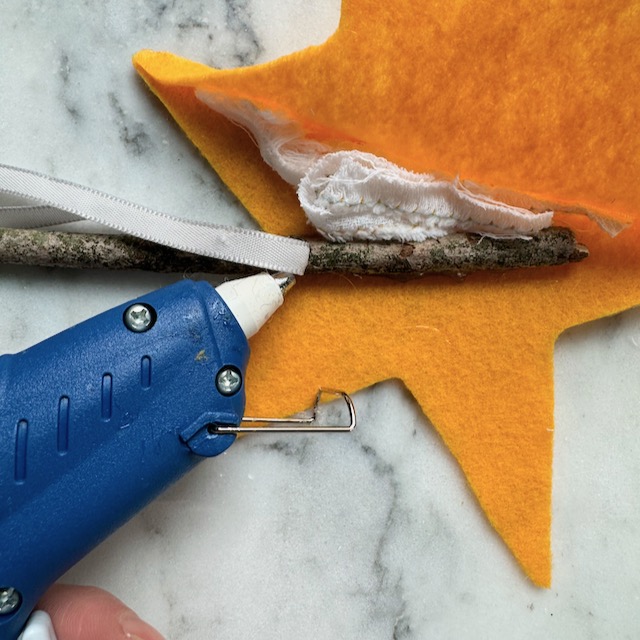
- Glue the ribbon, fabric scraps, or yarn at the base of the star on the stick at this point.
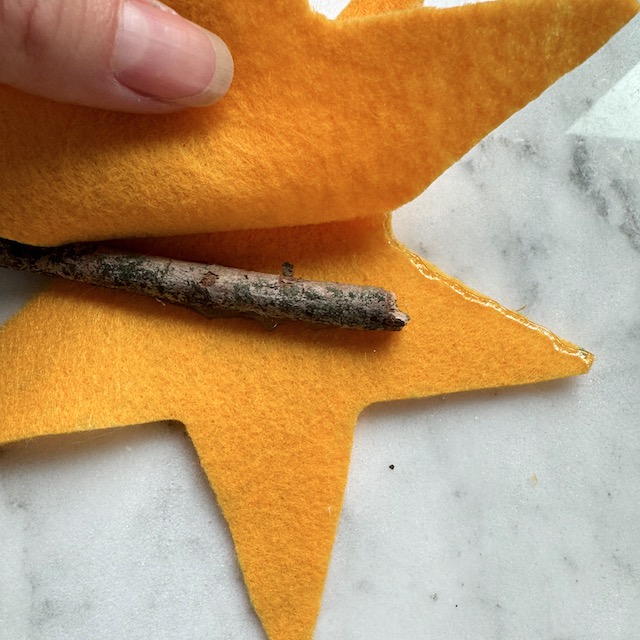
- Apply a thin line of hot glue along an edge and hold the other star’s matching side to the glue to adhere it together.
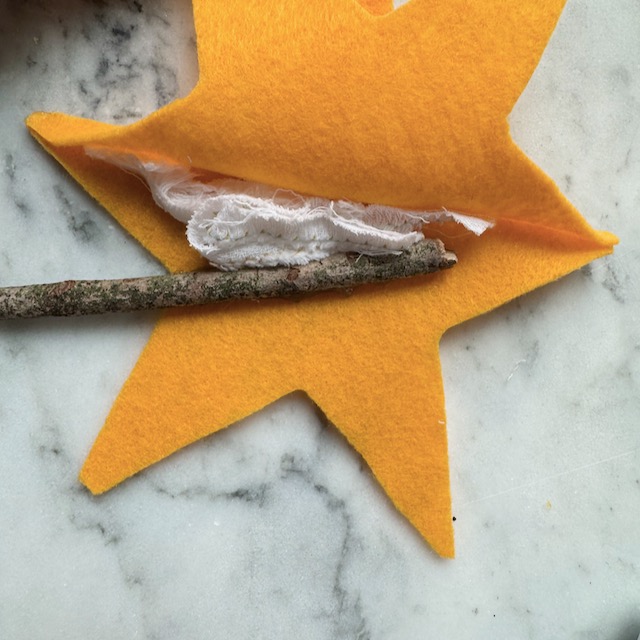
- Once you have a few edges glued, begin to gently stuff the star with fabric scraps, Polyfill, or cotton balls. Continue to glue edges and stuff the star until the star is complete and the entire outside is glued.
3. Embroider the Edges (optional)
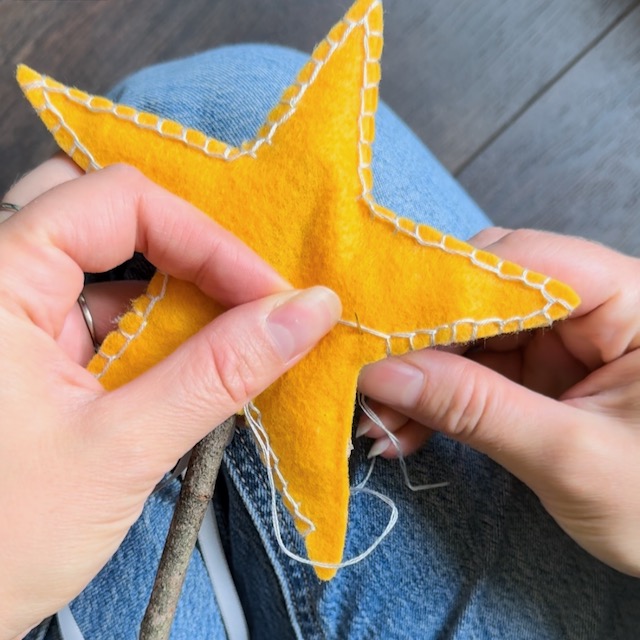
- A blanket stitch works beautifully for this project, adding a decorative touch while securing the edges.
- Begin at one point of the star, stitching around the edge. (There are so many great tutorials on Youtube if you need one!)
- I like to hide the knotted ends of the embroidery floss inside of the seams of the star.
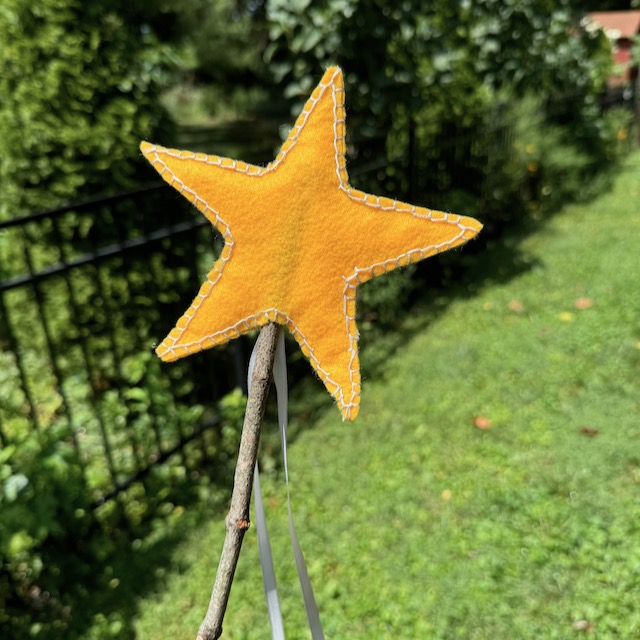
4. Finish & Enjoy!
- Inspect your wand to make sure all edges are secure and the stick is firmly glued in place.
- Your magical wand is now ready for play or as a delightful Halloween accessory!
Adding a Bit of Magic to Everyday
Making a DIY magical wand is a simple and enjoyable project that offers endless opportunities for imaginative play and can be a wonderful addition to Halloween costumes. By following these steps, you can create a charming and personalized wand that will delight any child. Happy crafting!