How to Sew a Wet Bag for Swimsuits or Diapers
A wet bag is a practical solution for storing wet or soiled items while on the go. Whether you love to visit the pool and need a place for your wet swimsuit, you’re a parent dealing with cloth diapers, or an outdoor enthusiast needing a waterproof bag for wet gear, learning to sew a wet bag is a useful project. Follow this step-by-step guide to create your own!
Materials Needed:
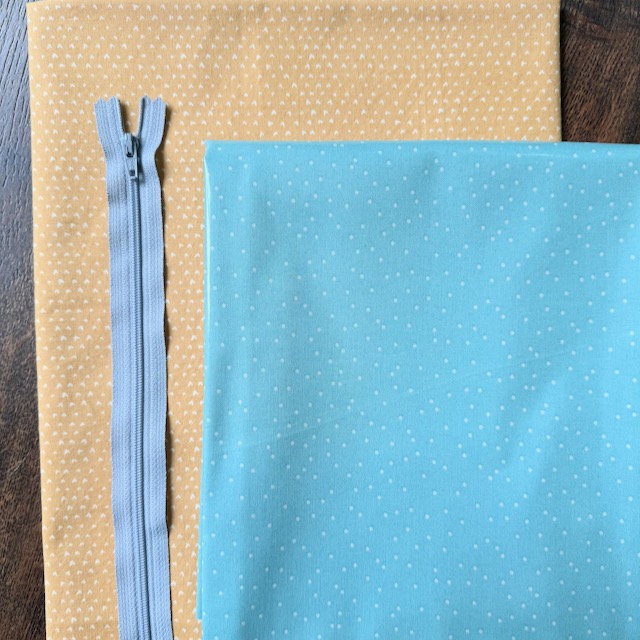
- waterproof fabric (PUL, laminated cotton, or nylon) or an old waterproof shower curtain
- exterior fabric (cotton, canvas, or upholstery fabric works best)
- coordinating thread
- zipper (approximately the same size as your finished bag)
- sewing machine (can be difficult to hand sew waterproof fabrics)
- clips (can use special sewing clips or simple binder clips)
Instructions to Sew a Wet Bag:
1. Choose Your Fabric:
Select a suitable waterproof fabric for the inside of your wet bag. PUL (polyurethane laminate), laminated cotton, or waxed canvas are commonly used for their water-resistant properties. Pellon 102 Matte Vinyl Fuse is a product where you can iron on a vinyl covering to make any woven fabric waterproof. Consider the size and purpose of your wet bag when choosing the fabric.
If you have an old waterproof shower curtain laying around, that could also work! Or perhaps a thicker grocery bag could be used as well. Be resourceful when you sew a wet bag!
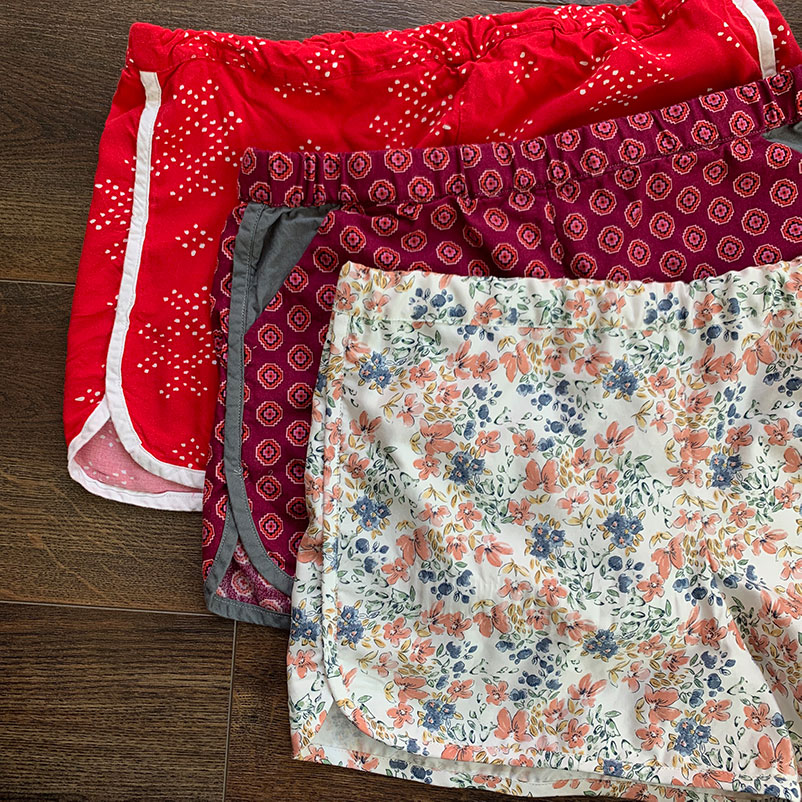
For the outside of the bag a thicker canvas or upholstery fabric would work well. You could also use fabric from an old curtain, sheet, or dress. Any quilting cotton would also work.
Stay away from knit stretchy fabrics and sheer light weight fabrics.
2. Determine Bag Size:
Decide on the dimensions and style of your wet bag. Common sizes range from small pouches for cosmetics to larger bags for diapers or wet swimsuits.
Your zipper should almost span the length of your bag. If you have a plastic zipper, you can easily cut them with normal scissors to make them smaller. I like to buy zippers in bulk in a larger size so I have the flexibility to cut them down. I used a 13 inch zipper and cut my fabric to 14 inches.
The wet bag I made is to store my families wet swim suits for when we go to the pool. So I cut my main fabric to be 14 inches x 14 inches.
3. Cut Fabric Pieces:
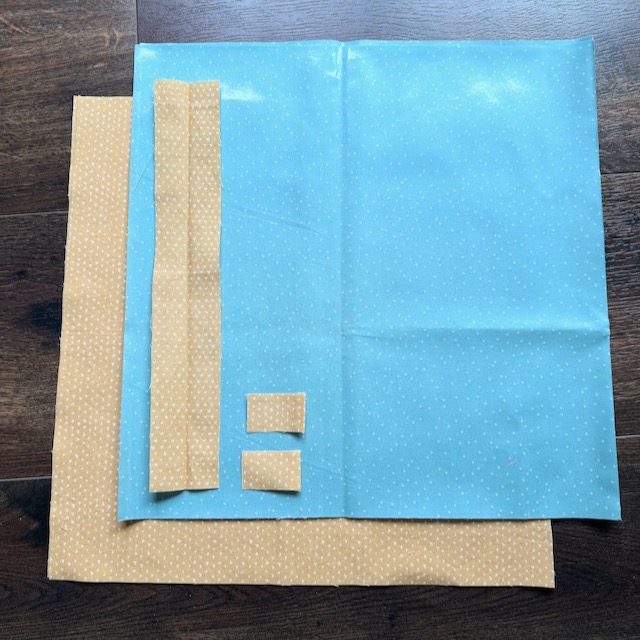
**Feel free to change the overall size of the bag by cutting the exterior and interior fabric either larger or smaller than 14 inches. Just makes sure they are the same dimensions if altering.
Exterior Fabric:
- 14 inches x 14 inches – cut two (main bag)
- 1 inches x 2 inches – cut two (zipper tabs)
- 2 inches x 12 inches – cut one (strap)
Interior Fabric
- 14 inches x 14 inches – cut two (main bag)
4. Prepare Zipper:
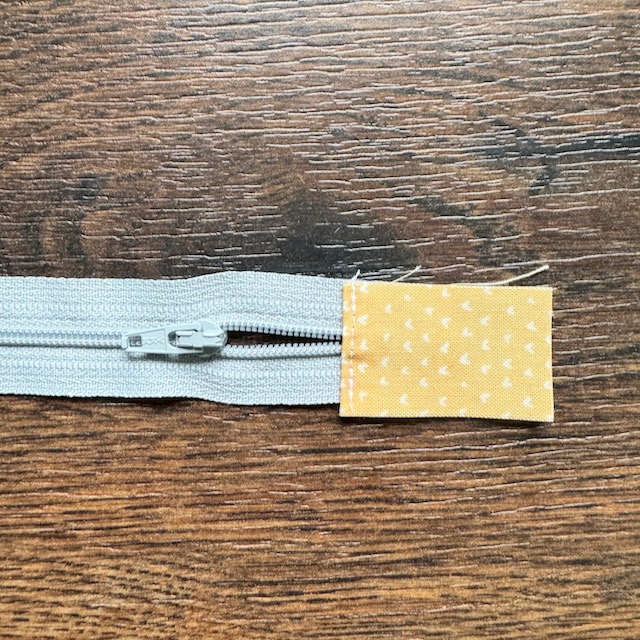
Iron 1/4 inch folds onto the short side of the 2 inch x 1 inch exterior fabrics.
Pin pressed fabric onto the zipper just covering the zipper stops on either side. Sew the fabric into place on just the ironed portion of the fabric. Repeat for the other side of the zipper.
5. Inserting the Zipper:
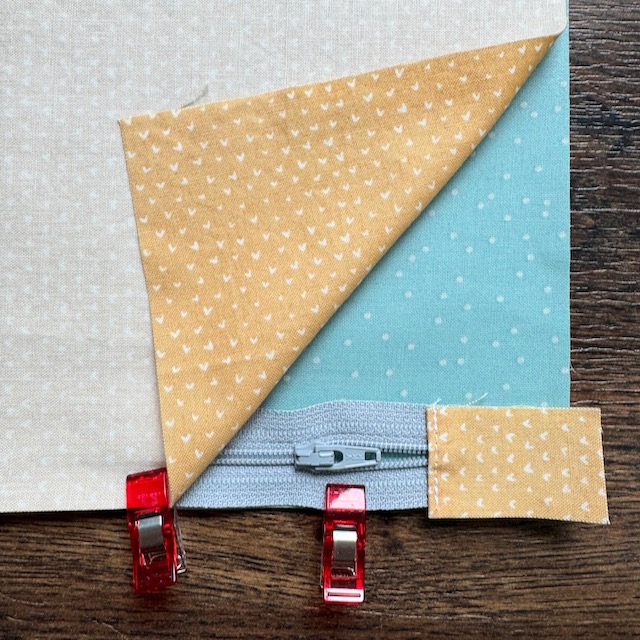
Make a little fabric sandwich: interior fabric UP, zipper UP, and exterior fabric DOWN. Line up all of the edges and clip them into place. (It is common to avoid pins for waterproof fabric since the pins add holes to the fabric that don’t disappear like normal fabric and makes it less waterproof..)
Baste stitching with zippers seems like an extra step, but it will make your entire zipper process go much faster and smoother! Basting in just means quickly sewing together the fabric without back stitching or much attention to the precision of your stitches because the stitches just act like strong pins.
Baste stitch in your zipper with a 1/8 inch seam allowance.
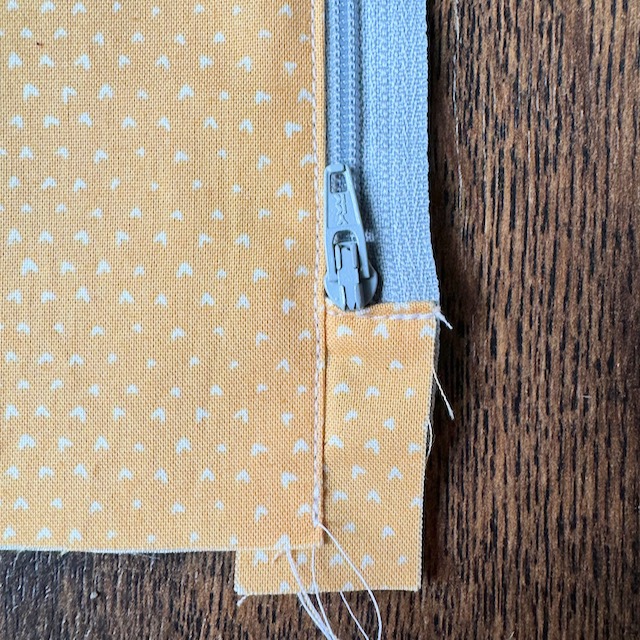
Install the zipper foot on your sewing machine. Lower the presser foot and move the fabric so the zipper teeth rest on the side of the zipper foot. Stitch along the zipper teeth (but not into them! If you stitch into the zipper it won’t zip past the stitches.) down the entire length of the zipper. Be sure to forward and back stitch to secure your stitching at the start and end.
Fold down the fabric to expose your zipper. Finger press the exterior and interior fabric away from the zipper. (I try to avoid the heat of an iron against plastic zippers and the waterproof fabric.)
Slowly top stitch along the fabric to hold it into place. This prevents the fabric from getting caught in the zipper. I like to go slowly and gently pull the fabric away from the zipper while I’m sewing to ensure I get a secure top stitch.
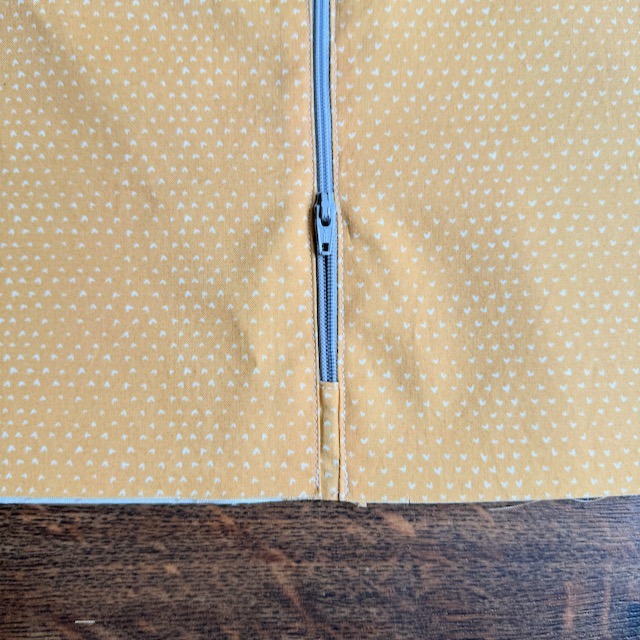
Repeat on the other side of the zipper!
6. Prepare the Strap

Iron the strap in half lengthwise. Stitch then long side with a 1/4 inch seam allowance.
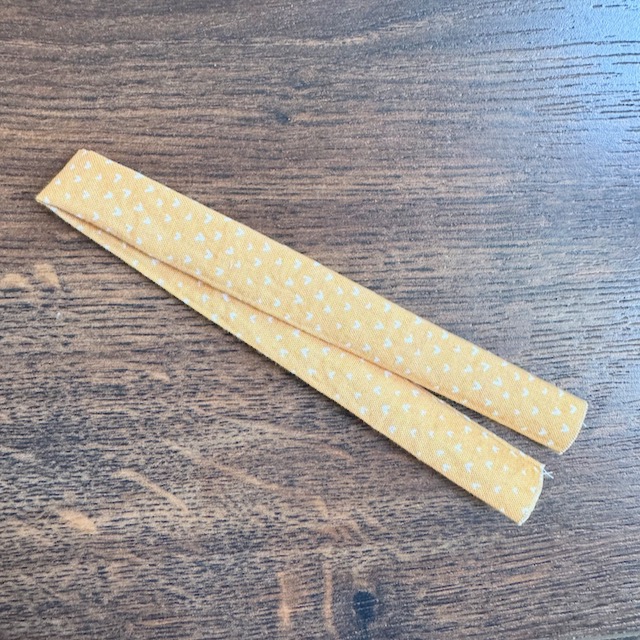
Using a safety pin, turn the fabric right side out and press.
Fold the strap in half (as shown above). You will place the strap into the bag during the next step.
7. Sew Sides:
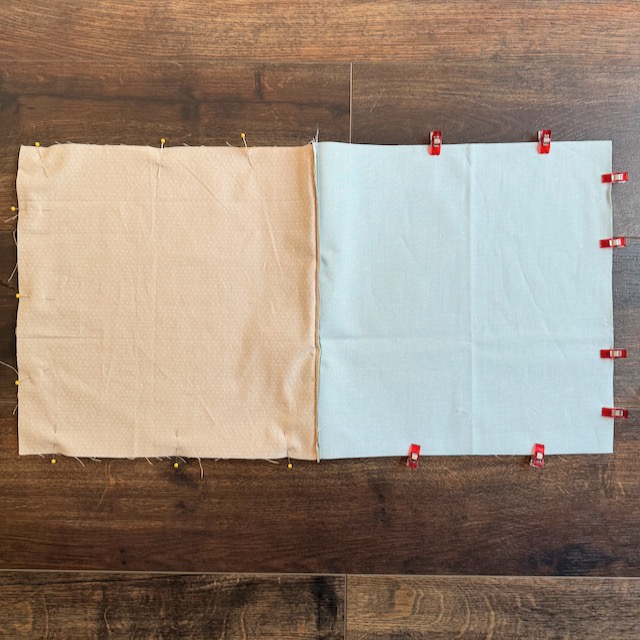
**OPEN UP YOUR ZIPPER. If you sew zippered bags with the zipper closed, some times it can be impossible or very difficult to turn the bag right side out.
Line up your fabric so the exterior fabric is right sides together and your interior fabric is right sides together. (It should look like a big rectangle with the zipper in the middle.) Pin the exterior fabric and clip the waterproof fabric together.
Pin the folded strap in-between the exterior fabric close to the zipper. The raw edges should be aligned. The strap will be tucked inside the bag
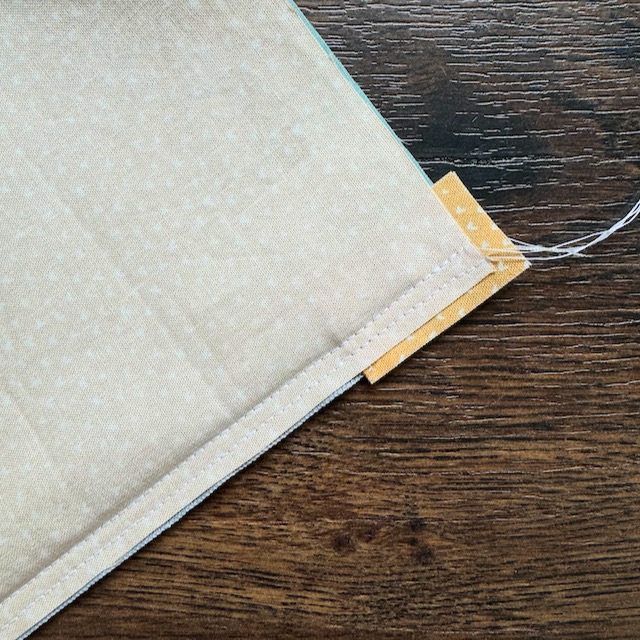
To sew the sides of the bag you will simply stitch almost all the way around the outside of this large rectangle with a 1cm seam allowance. Leave a 3-4 inch gap at the bottom of the interior waterproof fabric to turn the back right side out.
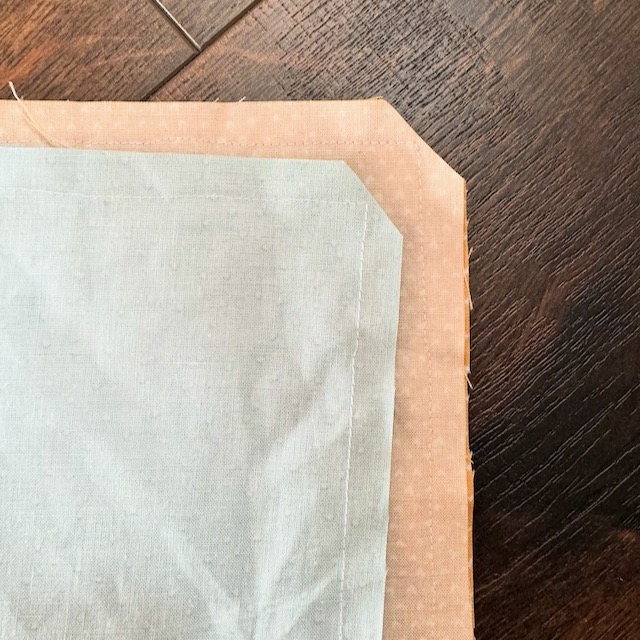
Once you stitch nearly all the way around the outside, trim the corners as shown. This allows the fabric to lay more flat when turned right side out.
8. Close Interior Seam:
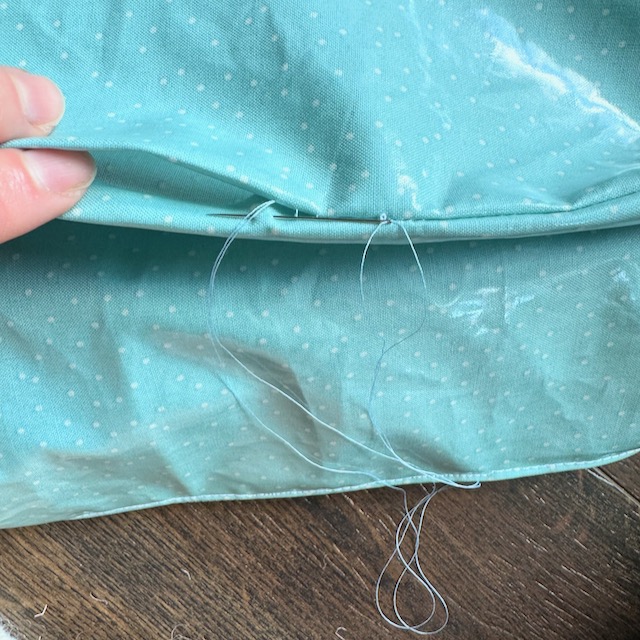
Place your hand into the hole at the bottom of the fabric, reach all the way in grab onto the exterior fabric. Pull the exterior fabric and interior fabric through the hole to turn everything right side out.
Use a chopstick, knitting needle, or pencil to push out the corners of the bag.
Press the exterior fabric. (Don’t press the interior waterproof fabric. It may melt.)
Close the opening with a slip stitch or use a sewing machine to sew it closed neatly. Ensure all seams are secure and trim any stray threads.
9. Finishing Touches:
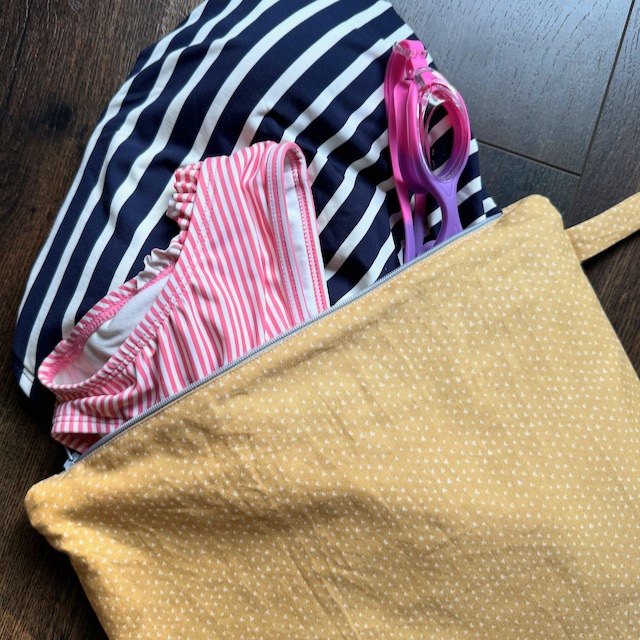
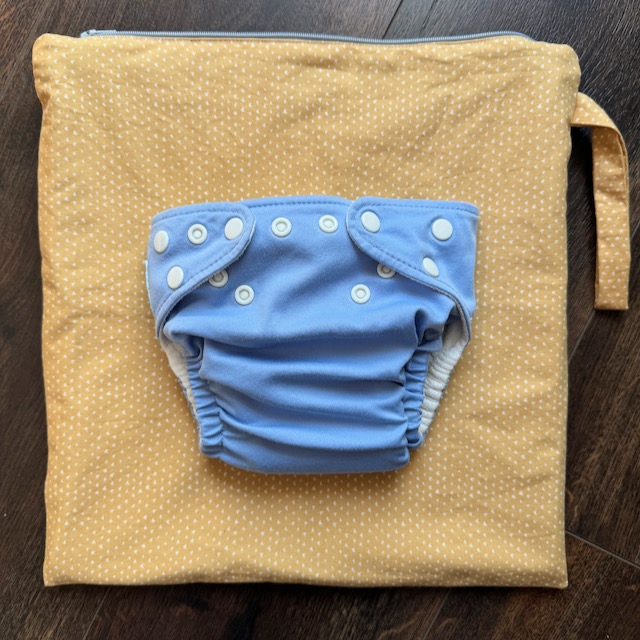
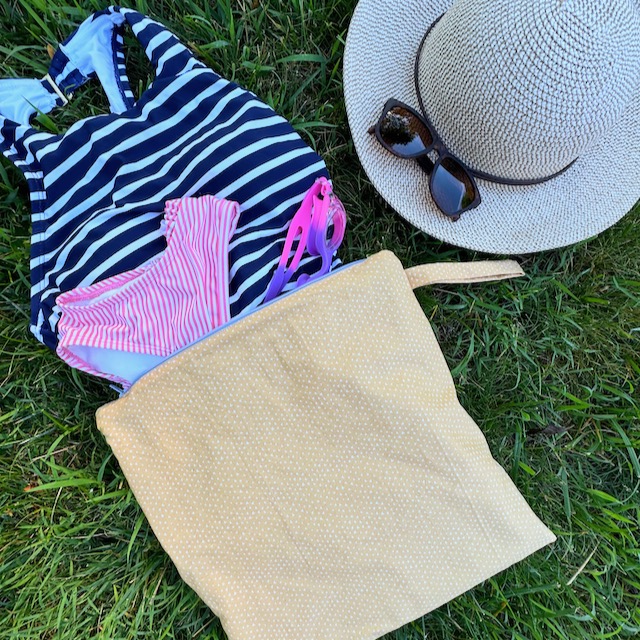
Push the interior fabric into the inside of the bag and you are good to go! Your wet bag is ready to use for storing wet swimsuits, diapers, gym clothes, or any other damp items while on the go.
Conclusion

Learning to sew a wet bag is a practical and customizable project that allows you to create a reusable solution for storing wet or damp items.
These bags can be great for a variety of different situations. You could make larger ones for sweaty gym clothes, smaller ones for reusable wet wipes, and a size in between for smaller bathing suits or diapers.