How to Sew a Reusable Snack Bag
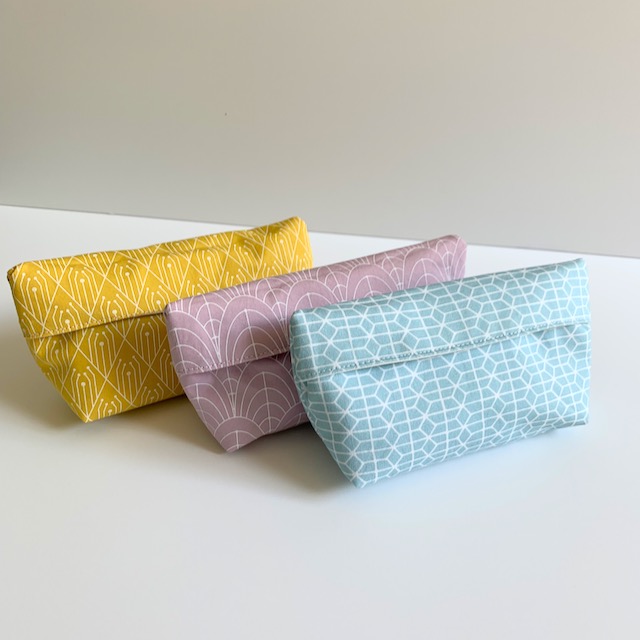
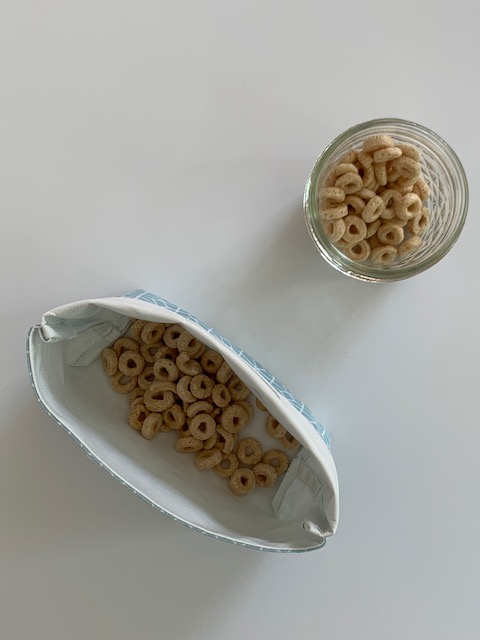
Learning to sew a reusable snack bag is a great way to reduce waste and add a personal touch to your lunch routine or a great way to pack snacks for kids! I love the design of these snack bags. The folded over top ensures that the snacks stay secure within the bag and the boxed corners allow for them to stand upright when in use. In this tutorial, we’ll guide you through the steps to sew your own reusable sandwich bags.
Choosing Fabric
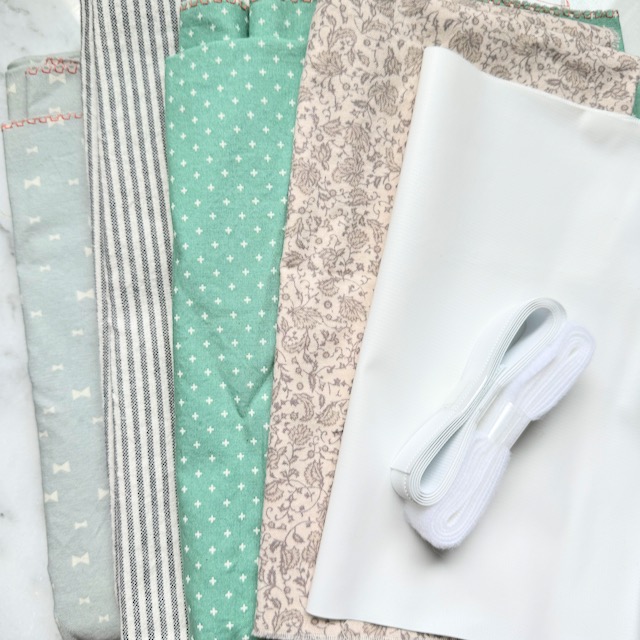
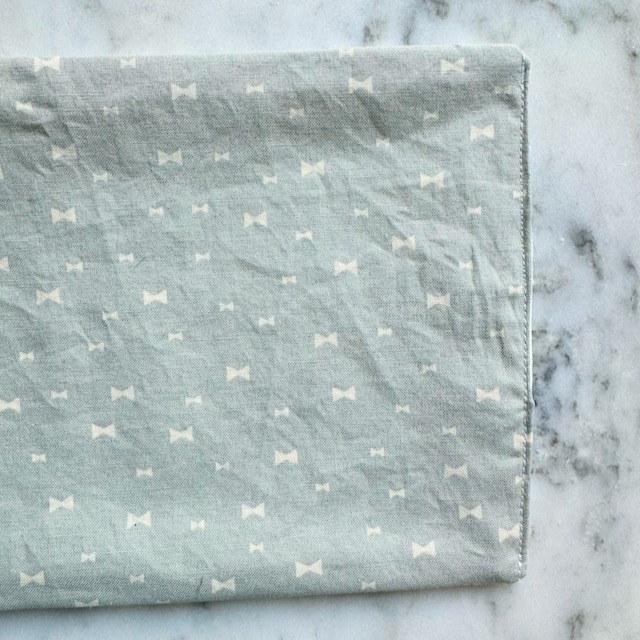
OUTSIDE FABRIC: For the outside of the reusable sandwich bag you can use nearly any kind of medium weight woven fabric. This is a great project for quilting cotton scraps!
INSIDE FABRIC: If you want the inside to be wipeable you can use a food safe PUL fabric. There are multiple laminated fabrics available, but you should really make sure that it is food safe for this project. I used to make these snack bags for an Etsy shop that I used to run, so I made the investment in the PUL fabric from Wazoodle. I’ve also made these bags with normal quilting cotton and they work great! So don’t feel the need to go out and buy new materials just for this project.
Materials Needed
- Interior & Exterior Fabric: See above for suggestions
- Velcro: For the closure.
- Thread: Match the color of your fabric.
- Basic Sewing Supplies: sewing machine, scissors, rulers, pins
Step-by-Step Instructions
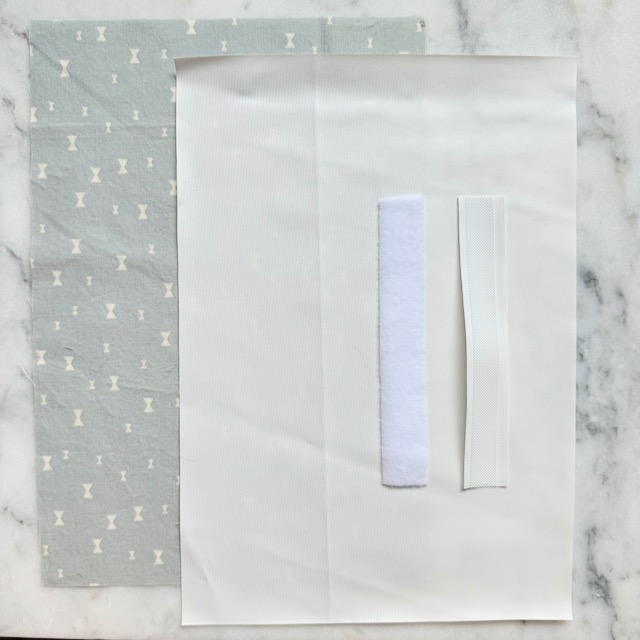
Step 1: Cut Your Fabric
First, cut your fabric pieces. You’ll need one piece of outer fabric and one piece of lining fabric. Each piece should measure 10.5 x 8 inches for a snack bag size and 16 inches x 8 inches for a sandwich bag size.
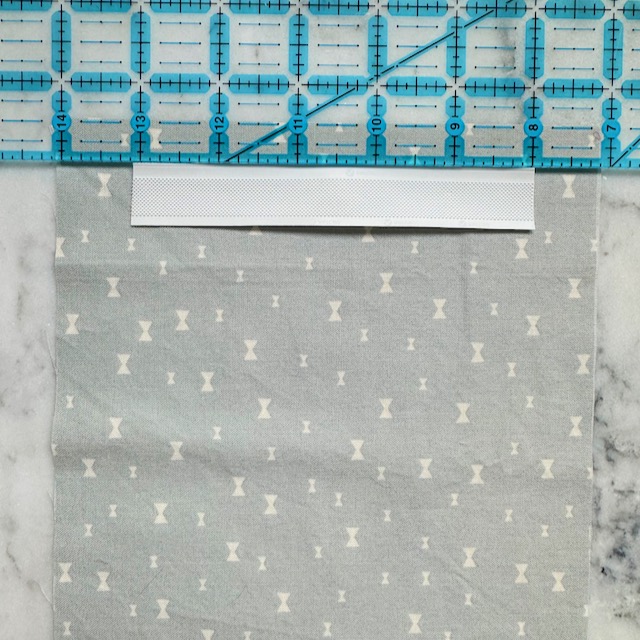
Step 2: Prepare the Velcro
Cut two matching pieces of Velcro, each about 3-6 inches long. Sew one piece of Velcro centered on the right side of the outer fabric, about 0.5 inches from the top edge. Sew the other piece of Velcro centered on the right side of the lining fabric, also about 0.5 inches from the top edge.
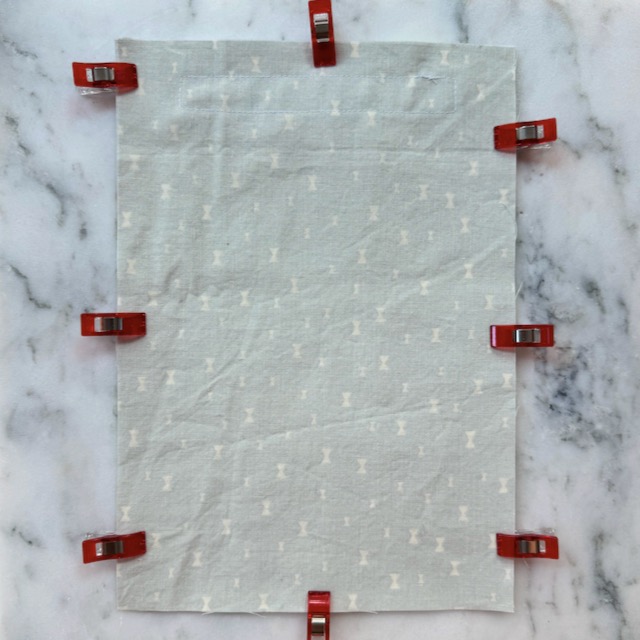
Step 3: Sew the Sides
Place the outer fabric and the lining fabric right sides together with velcro on OPPOSITE sides. Pin or clip the fabrics together to keep them from shifting. Sew around the edges with a 1/4 inch seam allowance, leaving a 2-3 inch opening on one of the short sides for turning.
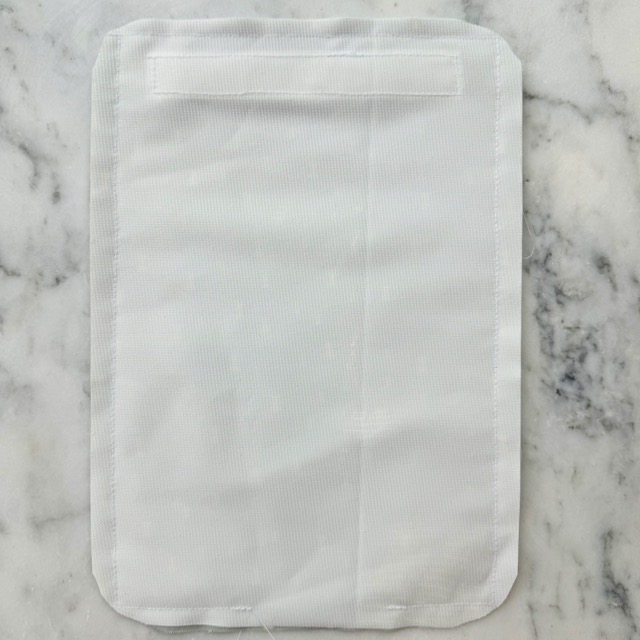
Step 4: Trim and Turn
Trim the corners of the fabric to reduce bulk, being careful not to cut through the stitches. Turn the fabric right side out through the opening you left. Use a point turner or a blunt tool to push out the corners so they are nice and sharp.
Step 5: Press the Fabric
Once the fabric is turned right side out, press it with an iron. Ensure the edges are neatly pressed and the opening you left is folded in line with the rest of the seam. Be careful your iron isn’t too hot if using the waterproof fabric.
Step 6: Topstitch the Opening
Topstitch around the entire edge of the fabric, about 1/8 inch from the edge.
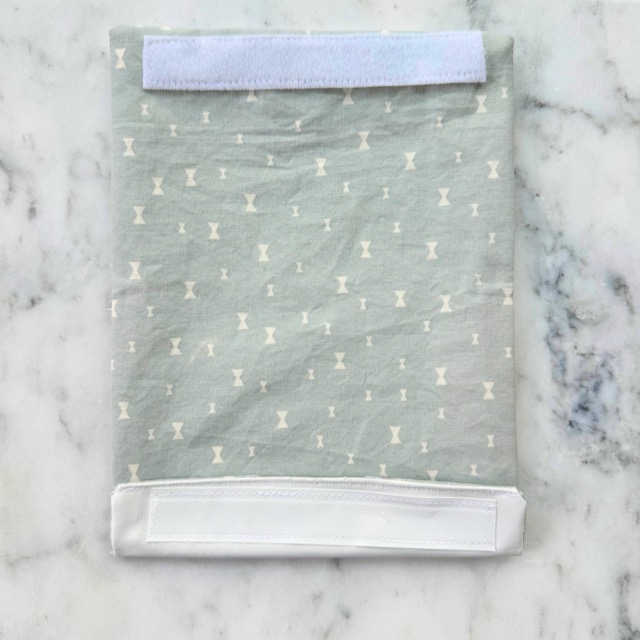
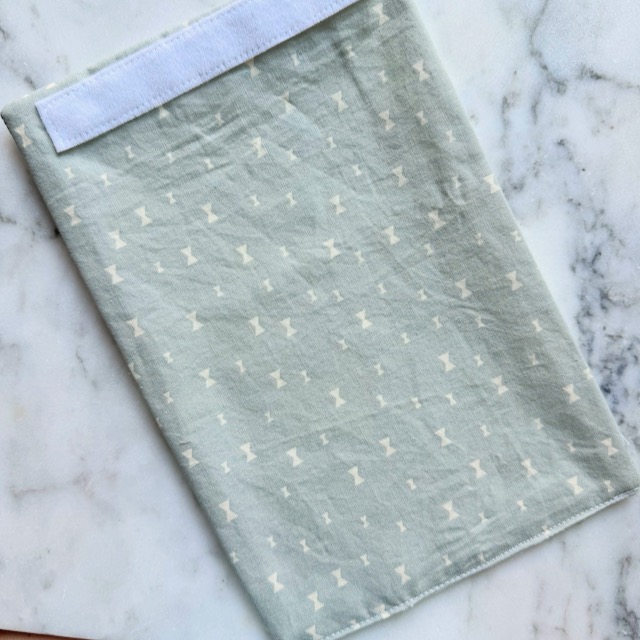
Step 7: Fold and Sew
Place the lining fabric down on your work surface. Fold the bottom of the fabric up about 1 inch to expose the velcro on the lining. Fold down the the top to align with the bottom. The Velcro pieces should overlap . Pin or clip the sides to hold the fold in place. Sew along the sides with a 1/8 inch seam allowance.
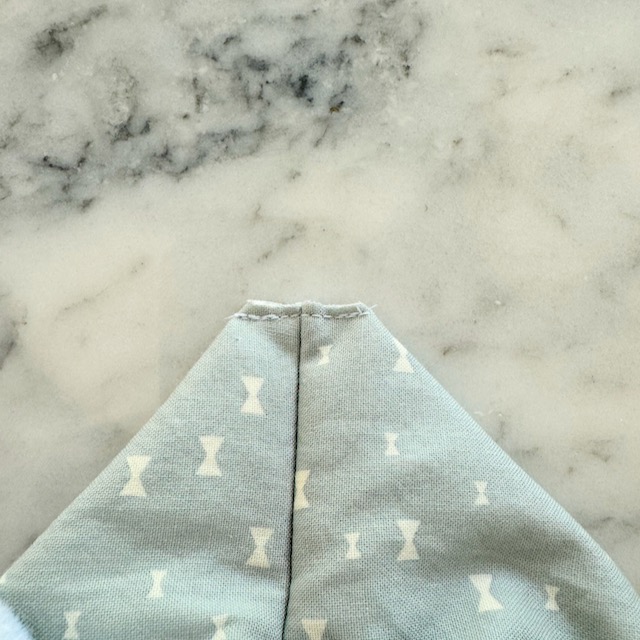
Step 8: Boxing the Corners
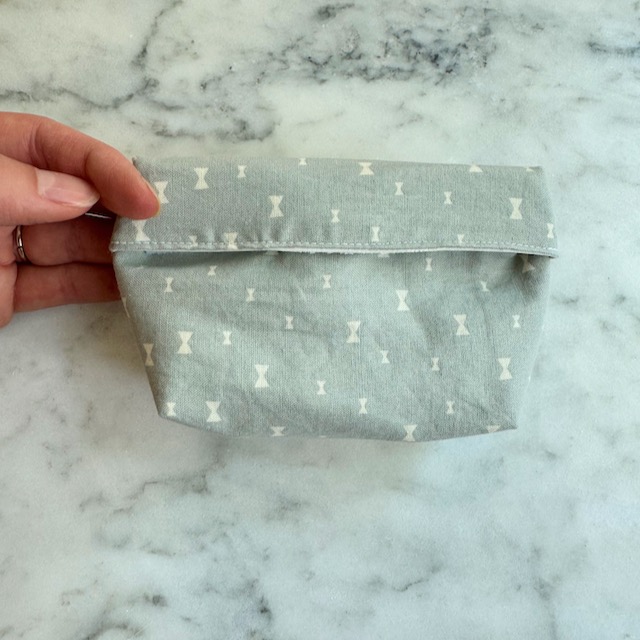
Turn right side out. To box the corners fold the bottom corners as shown above, with the side seam in the middle. Place a little clip, and sew across about 1/2 inch from the corner. Trim the corner
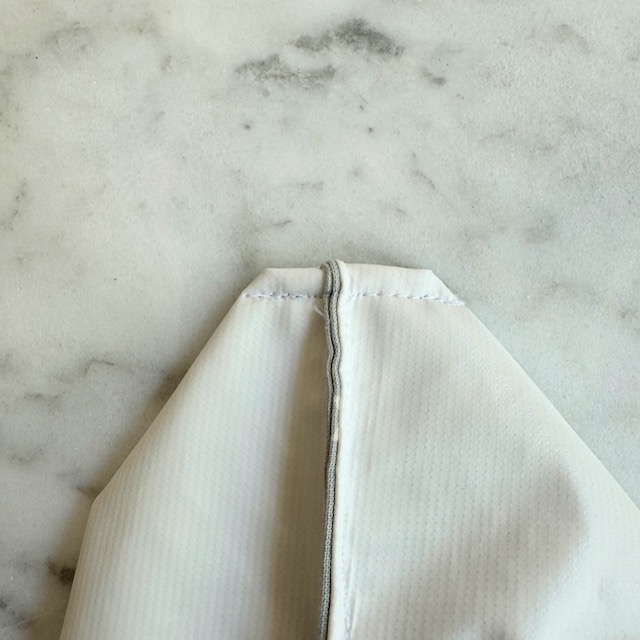
Last step, turn the bag inside out, sew the boxed corner again to enclose the seam on the inside. Now you know how to sew a reusable snack bag!
Care and Maintenance for Reusable Snack & Sandwich Bags
To keep your reusable sandwich bags clean, simply turn them inside out and wipe them with a damp cloth after each use or scrubbed with a dish brush and dish soap. For a more thorough cleaning, they can be machine washed inside out on a gentle cycle and air-dried. Avoid using harsh detergents or bleach, as these can break down the waterproof lining over time.
Tips for Customization

- Size Variations: Adjust the size of the fabric pieces to create different sizes of sandwich bags for various uses, such as snack bags or larger bags for bigger sandwiches.
- Fabric Choices: Use different fabrics for the outer layer to match your style or make themed bags for different occasions, holidays, or seasons.
- Labels and Embellishments: Add labels or embellishments to personalize your sandwich bags. Embroider names or fun designs to make them unique.
Conclusion
Learning to sew a reusable snack bag is a fun and practical project that helps reduce waste and adds a bit of fun to your daily routine. With just a few materials and basic sewing skills, you can make these handy bags for yourself or as thoughtful gifts for friends and family. Enjoy your sewing project and the satisfaction of contributing to a more sustainable lifestyle!