How to Make a Clay Flower Frog – With Air Dry Clay
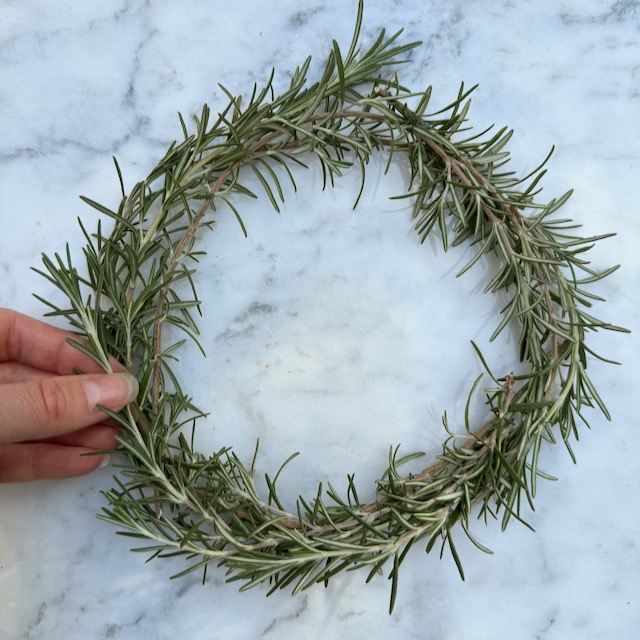
Flower arranging is one of my new favorite hobbies. I’ve been expanding my flower garden and foraging for flowers and greenery to add as decor to my home. I love it because I can use what grows in my garden and compost it when done! It returns back to the Earth, I don’t have to store anything, and I didn’t pay for it either. An air dry clay flower frog can be an indispensable tool in creating beautiful arrangements.
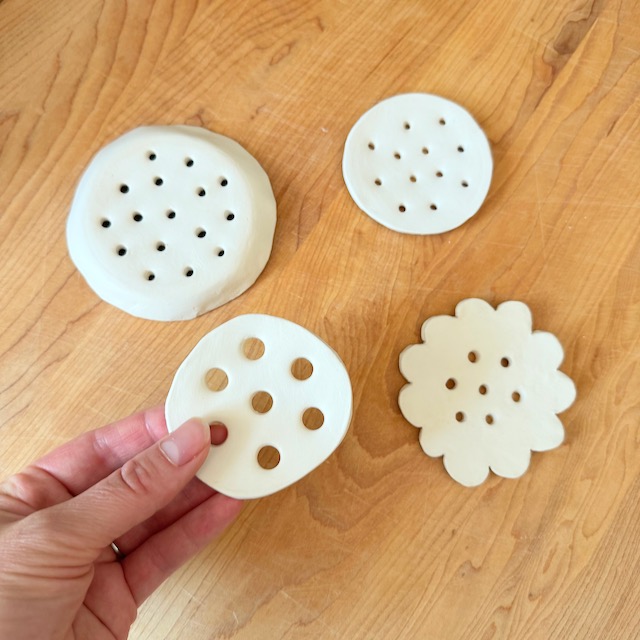
A flower frog is a device placed at the bottom or top of a vase to hold flower stems in place, allowing for precise and creative positioning. While you can purchase flower frogs, making one out of air dry clay is a great way to use materials you may already have on hand. (Air dry clay is my favorite, you can use it for so many different projects!) This guide will walk you through the steps to create your own air dry clay flower frog, including tips on shaping, drying, and using your new tool.
Materials and Tools Needed to Make an Air Dry Clay Flower Frog
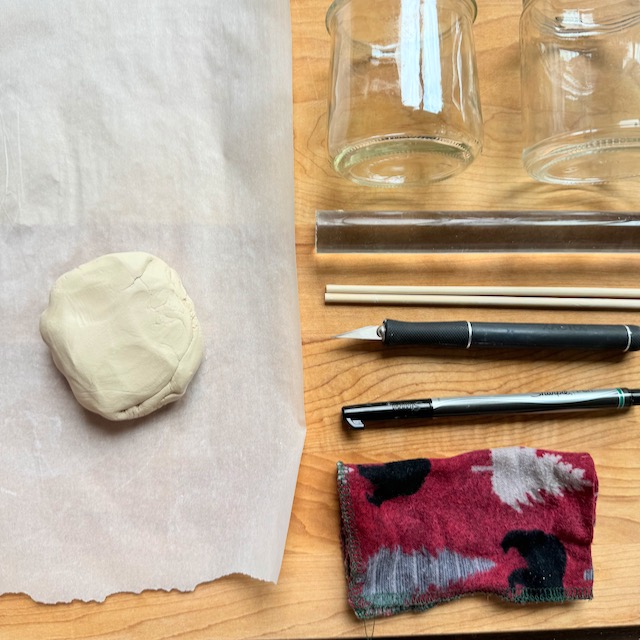
- Air dry clay (homemade or store-bought)
- Jar you plan to use with the flower frog (I love to reuse jars from the kitchen – yogurt, jam, sauce, salsa)
- Rolling pin or smooth cylindrical object
- Pencils or chopsticks
- Knife or clay cutter
- Wet cloth or napkin
- Paint and/or sealant
Step-by-Step Instructions
1. Prepare Your Workspace: Start by preparing a clean, non-stick surface to work on, such as a silicone mat or a piece of parchment paper. (Don’t use a wood cutting board or stone countertop.)
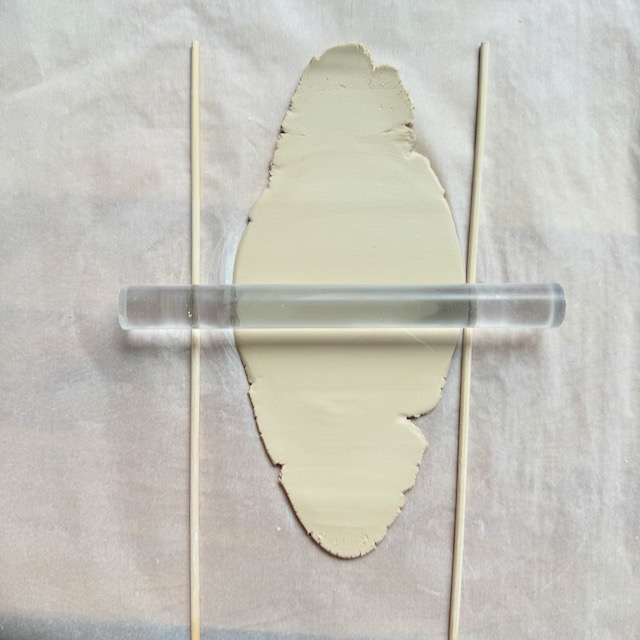
2. Roll Out the Clay: Take a portion of air dry clay and knead it until it’s soft and pliable. (Trust me, this makes it much easier to use!) Place two chop sticks, skewers, or pencils on either side of your clay and use a rolling pin to smooth the clay between the two sticks. This ensures the clay is rolled to a uniform thickness.
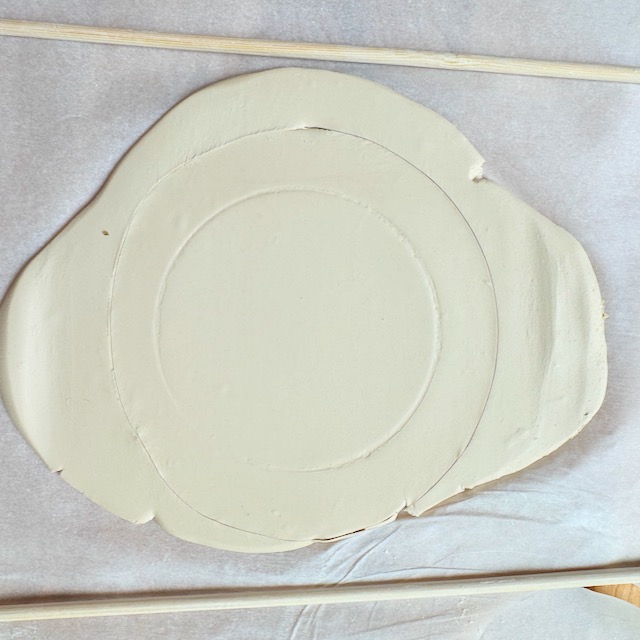
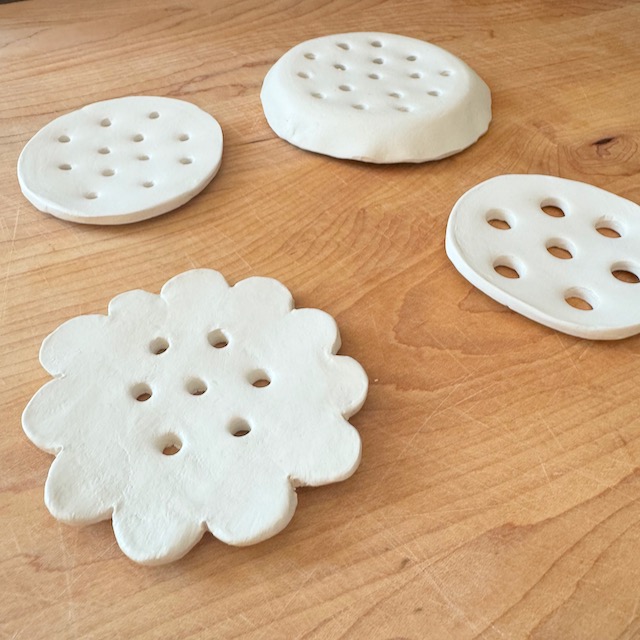
3. Cut Out the Base: Gently stamp the jar into the clay. Use a knife or clay cutter to cut a circle about 1/2 inch larger than the stamp. Smooth the edges with a wet cloth to create a neat finish.
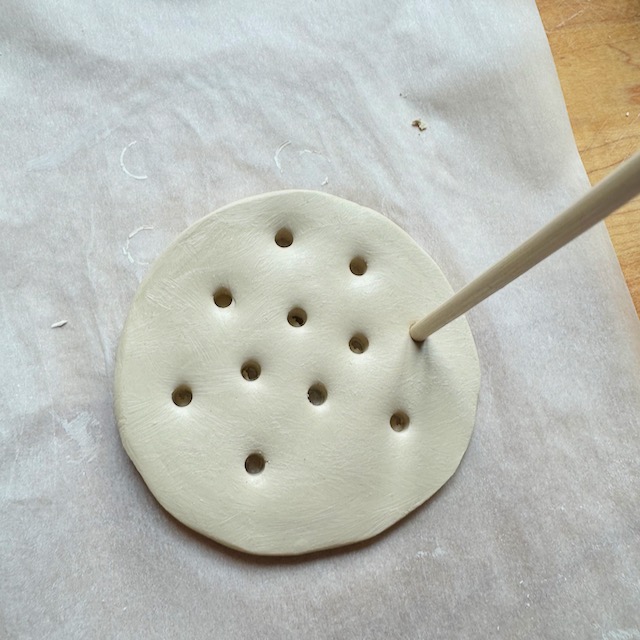
4. Form the Holes: The holes in the flower frog are essential for holding the flower stems. Use a marker cap, skewer, pencil, or chopstick to carefully poke holes into the clay base. Space the holes evenly, about 1/2 inch apart, and ensure they go all the way through the clay. The number and size of the holes can vary depending on the type of arrangements you plan to make.
5. Shape the Edges: If you want a more polished look, gently smooth the edges and surface of the clay with a damp cloth.
6. Dry the Clay: Place the shaped clay on a flat surface to dry. Air dry clay typically takes 24-48 hours to dry completely, but drying times can vary based on the thickness of the clay and the humidity in your environment. To ensure even drying, flip the clay piece over occasionally.
7. Sand the Surface (Optional): Once the clay is completely dry, you can use fine-grit sandpaper to smooth any rough edges or surfaces. Or you can try using a damp cloth to smooth things over. (If you use a damp cloth, give it time to dry before painting or sealing.) This step is optional but can give your flower frog a more finished appearance.
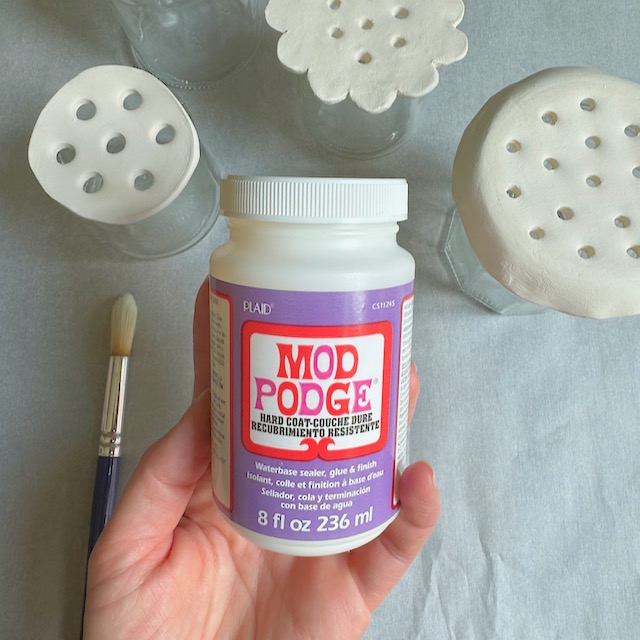
8. Paint and Seal (Optional): If you’d like to add color to your flower frog, you can paint it with acrylic paints. Once the paint is dry, apply a sealant to protect the surface from water and extend the life of your flower frog. Most sealants are water resistant and not waterproof. This is okay as long as your flower frog isn’t sitting in the water. (If you are nervous, Modge Podge makes an outdoor sealant that is highly water resistant.)
Tips for Using Your Air Dry Clay Flower Frog
- Placement: Place the flower frog so it rests on the top of a vase or container. If necessary, you can secure it with a bit of floral clay or adhesive putty.
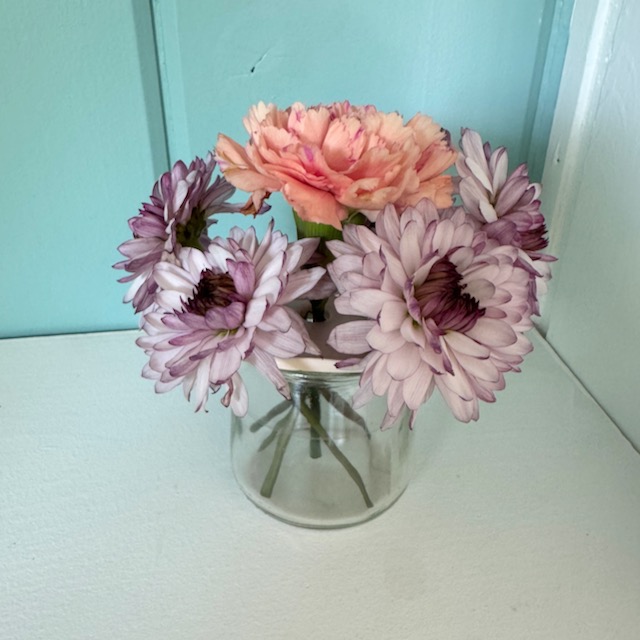
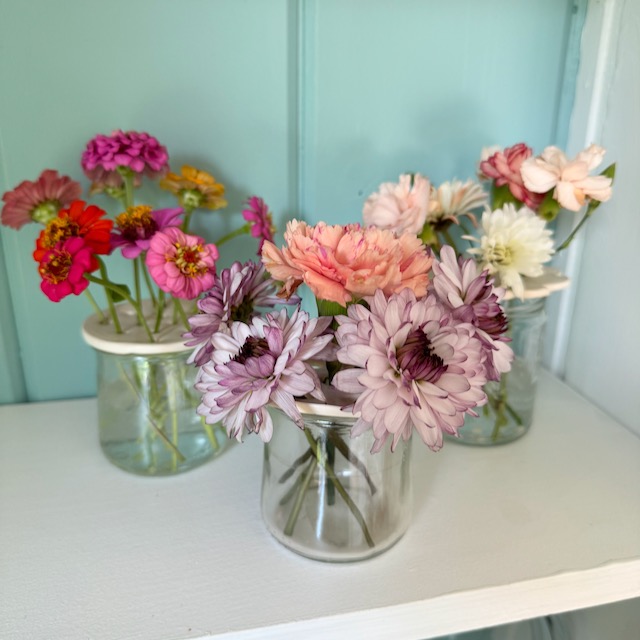
- Arranging Flowers: Insert the flower stems into the holes of the flower frog. This will help hold the stems in place and allow you to create intricate and stable arrangements.
- Cleaning: After use, clean your flower frog with a damp cloth to remove any dirt or plant residue. Let it dry completely before storing.
Troubleshooting Common Issues
- Cracking: If your flower frog cracks during the drying process, it may be due to uneven drying or too thick clay. Ensure even thickness and turn the piece occasionally during drying to prevent cracking.
- Weak Structure: If the flower frog feels fragile, it might be too thin. Aim for a thickness of at least 1/4 inch to ensure durability.
- Uneven Holes: If the holes are uneven or too close together, it can compromise the structure. Use a ruler or a guide to space the holes evenly and maintain a sturdy design.
Creative Ideas for Customizing Your Flower Frog
- Decorative Patterns: Add texture or patterns to the surface of your flower frog using stamps, lace, flowers, or textured objects before the clay dries.
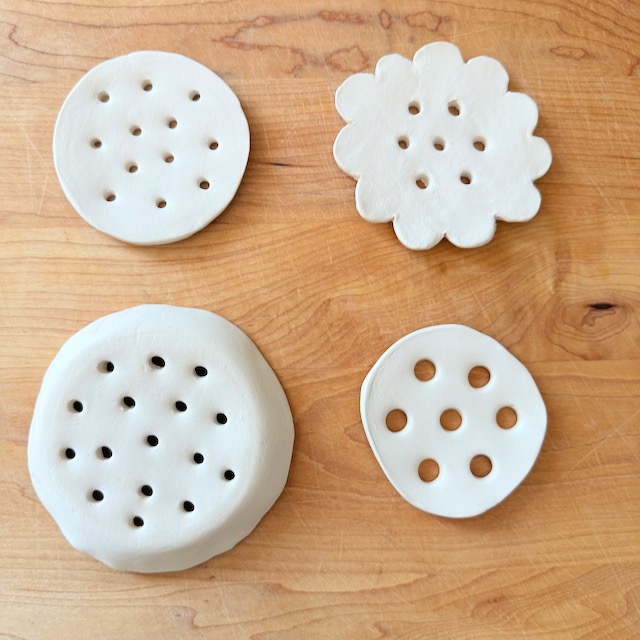
- Shapes and Sizes: Experiment with different shapes and sizes to create a variety of flower frogs for different vases and arrangements.
- Personal Touch: Customize your flower frog with initials, dates, or small designs to make it a unique piece of functional art.
Have Fun with It!
Making a flower frog out of air dry clay is a quick and fun project that will boost your flower arranging skills. By following these simple steps, you can create a durable and customizable tool that will help you craft gorgeous floral displays. Whether you’re a seasoned florist or a casual hobbyist, a homemade flower frog adds a personal touch to your creative endeavors. This would also be a great activity for kids!