Shirt No 1: Pattern Review
Shirt No1 by 100 Acts of Sewing is an incredibly popular sewing pattern for a reason! It is a great beginner garment to sew and looks great on nearly everyone.
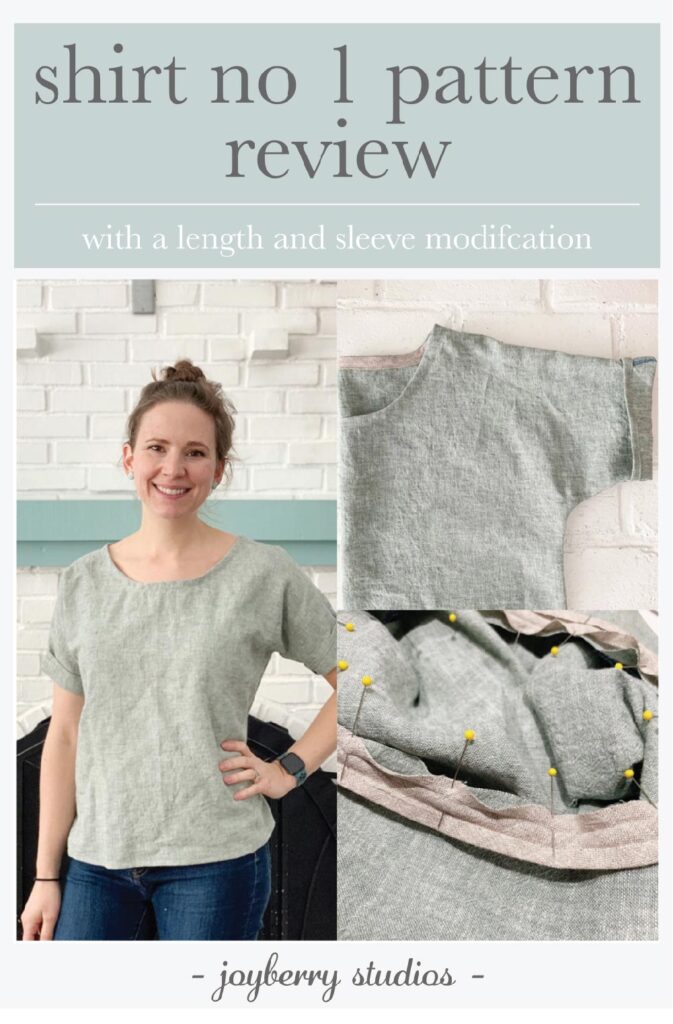
Shirt No. 1 by 100 Acts of Sewing: Pattern Review
To be honest, I haven’t sewn a lot of clothes for myself. Before I started this project, I had sewn myself a Zadie Jumpsuit from Paper Theory Patterns and the City Gym Shorts from Purl Soho. When my sister asked me to start sewing clothes with her in January of 2021, I was thrilled to be able to share the experience of sewing with someone. Our first pattern was the Shirt No. 1 from 100 Acts of Sewing.
Creative Bug has a class taught by the pattern maker for the Shirt No. 1. She walks you through every step in a video format and even gives you the pattern for free! I get free access through my library, but you can also pay for a membership. They also have other great sewing and creative classes!
Size & Modifications
If you are ever making any clothes, I really encourage you to make a muslin or toile first. This is simply just a test garment made out of scrap fabric. I have friends and family give me their old sheets, which I cut up and use for this purpose. It allows you to really test the fit of the garment and make changes before you cut into the nice fabric. My measurements originally sized to a medium, but I decided I liked the fit of an extra small better.
In the end I made two modifications to the pattern: I cut the sides of the pattern to an XS, but the length to an XL and I lengthened the sleeves by ~3 inches. I felt more comfortable with a bit more length in the torso and I wanted to give the sleeves a cuffed look. These are things that I practiced and worked out on my toile first.
Fabric for Shirt No. 1
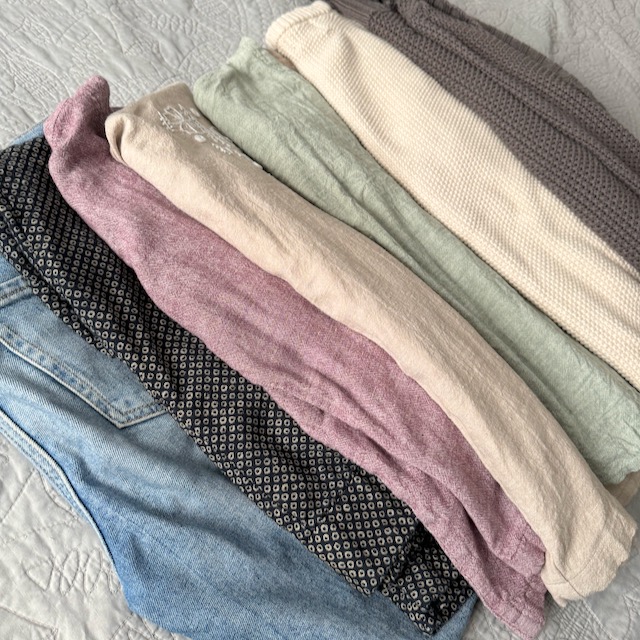
For the fabric, I used Brussels Washer from Robert Kaufman in sage. I bought my fabric from Sew to Speak, my favorite local fabric store. I only needed 1.5 yards and I was able to cut out a dress for my daughter from the scraps! For the bias tape for the neckline I also used some scrap Brussels Washer in Flax that I had from a dress I sewed my daughter. This shirt is really designed for flowy woven fabrics. Brussels washer is a mix of linen and rayon, so it has great drape and doesn’t wrinkle quite as much as linen. In the future, I would love to make this out of a cotton lawn.
This pattern is a boxy top and looks best with drapey fabric. Any light weight cotton, rayon, or linen would work great for this pattern. I don’t think quilting cotton would hang very well.
Assembly Tips
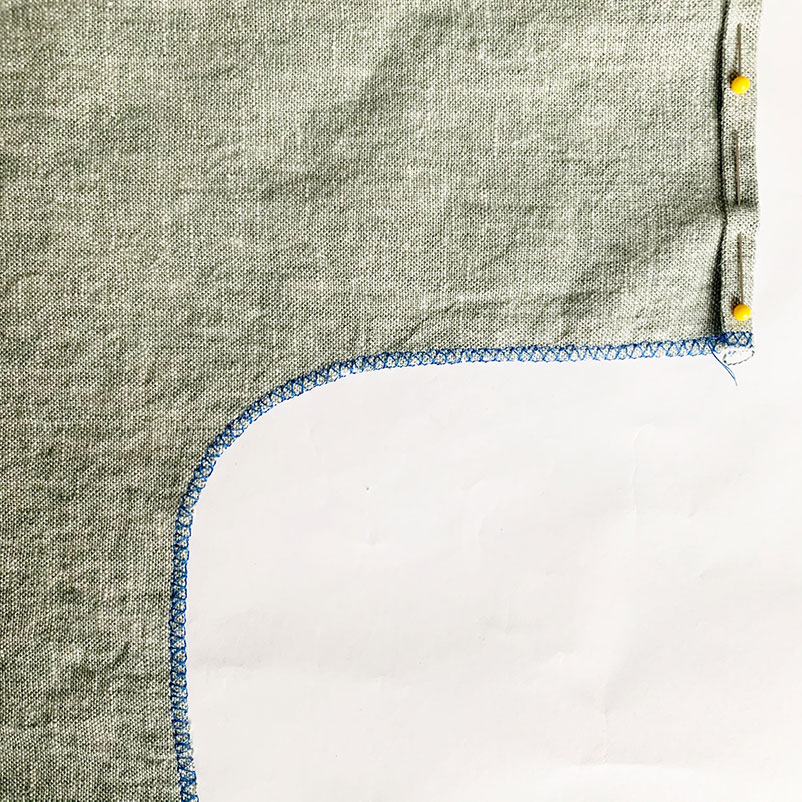
One of my favorite things to do while sewing clothes is finish the edges with a fun contrasting thread. It is also a great way to use up extra thread! Sometimes I do multiple different colors if I run out in the middle of a project. I used a fun blue color to overcast stitch the edges that would be exposed in the final shirt (shoulder and side seams). You don’t need to finish seams that will be in a hem. I also like to finish seams before I start sewing. That lessens the amount of fraying while I’m working with the fabric. (This shirt would also look great with French seams!)
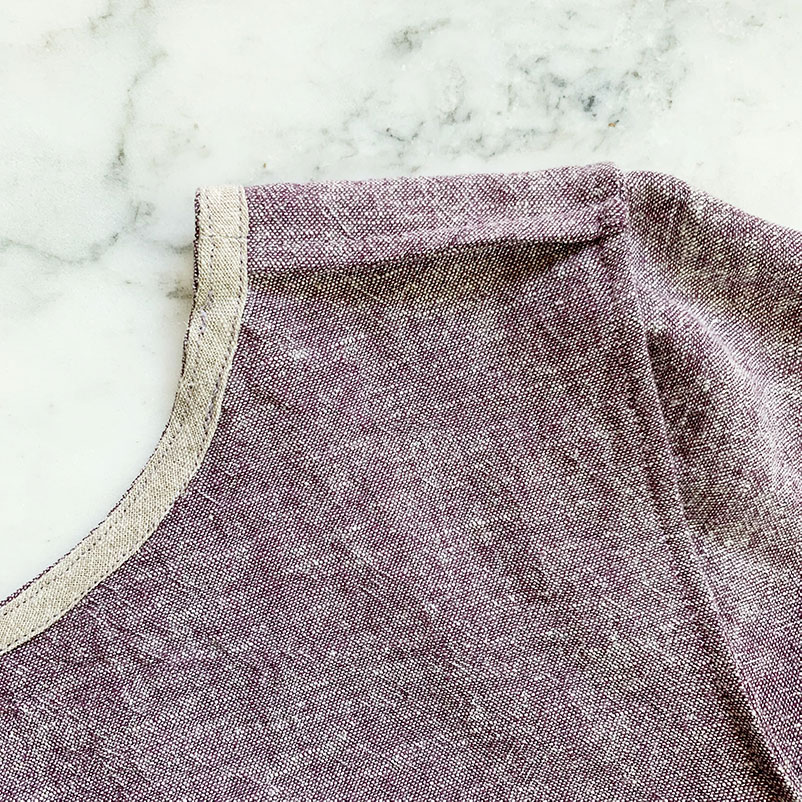
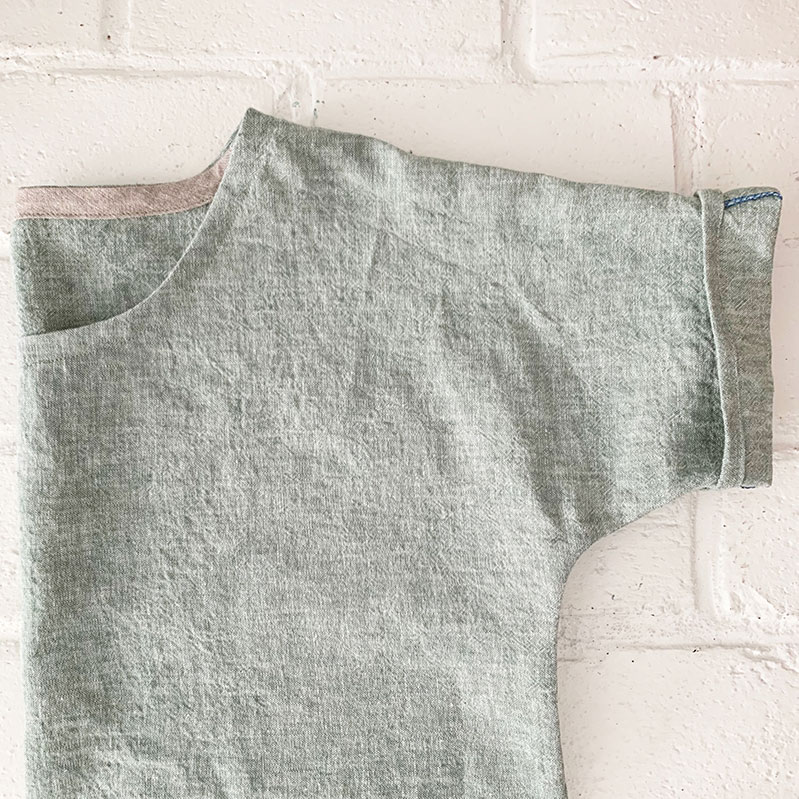
One great hack that I learned is that before you sew a garment together you should iron the hems. It is much easier to iron hems when you can lay them flat. So you will notice in the photo above that I already ironed the hems for the sleeves on the shirt, before I sewed anything together! When you approach that area for sewing the seams, just uncurl your hems and carry on with sewing. I did just a small ¼ inch seam.
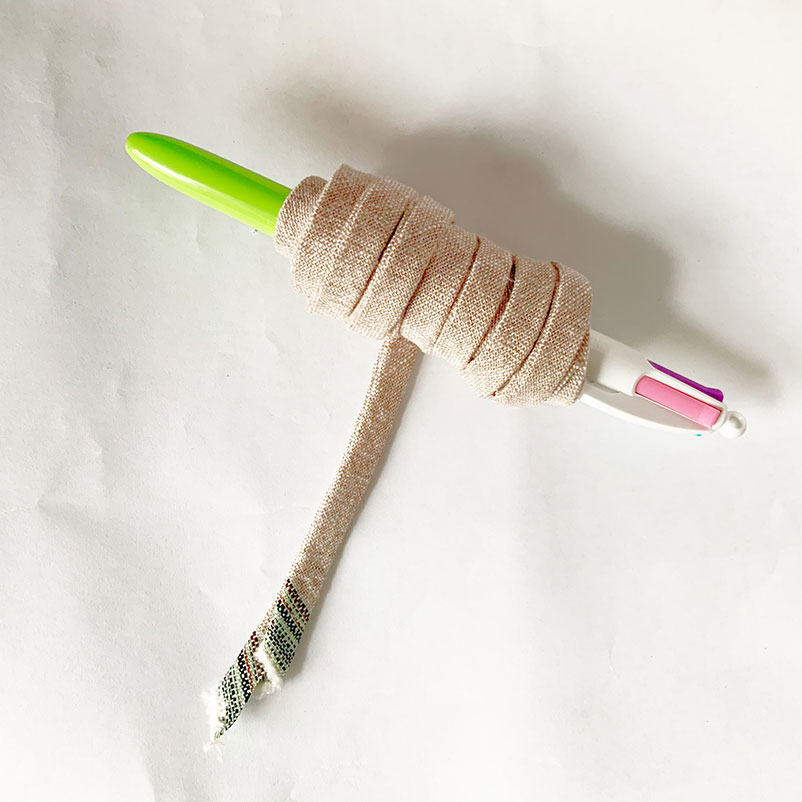
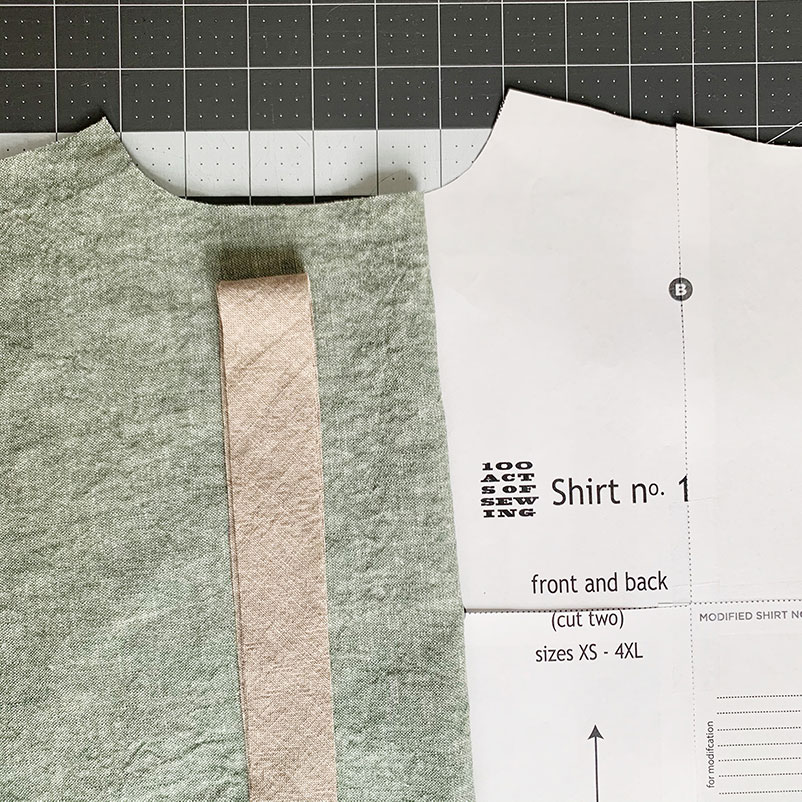
While you have your iron on, you can also make your bias tape. I loved making it out of a contrasting fabric. It would be so fun to make it out of a patterned fabric for a pop of color! Just make sure your two fabrics are of similar weight. I also love wrapping my bias tape around a pen or you could use an old thread spool. It keeps all of your ironing neat and tidy!
Sewing
Next I pinned the shoulder and side seams and sewed everything with the prescribed ½ inch seam allowance. You can either press the seams to the back or apart once you are done. I like to press mine apart. I find it a little less bulky. It also helps that I finished the edges before sewing the side seams.
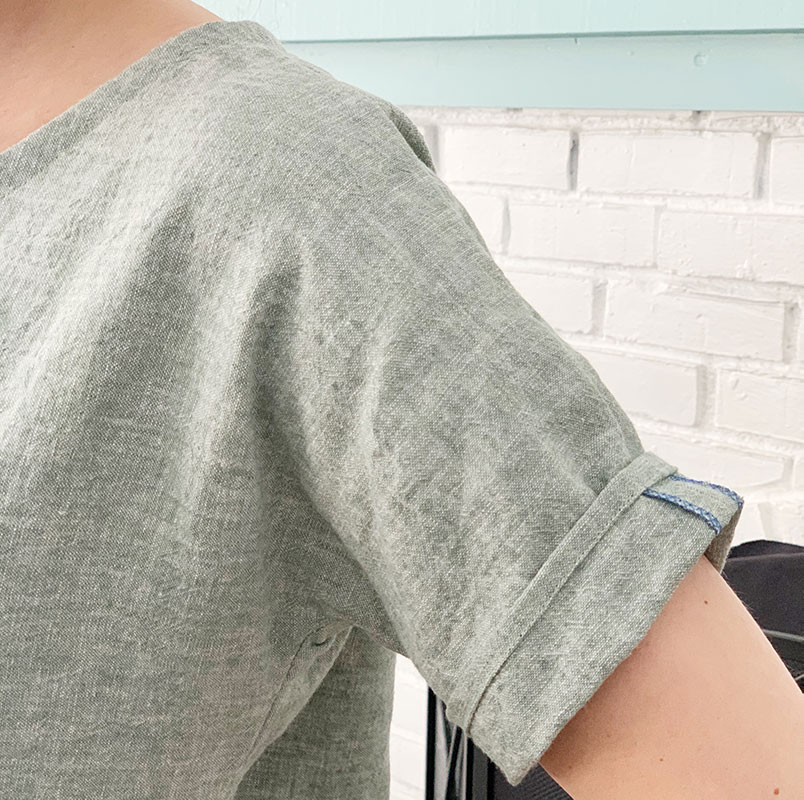
I repinned the previously ironed hems at the seams and sewed all of the hems. For the sleeves I folded up the hems an inch so I could have this cuffed look. I also love that you can see a bit of the contrasting thread that I used to finish the seams. To hold the cuff in place I stitched in the ditch over the hem line.
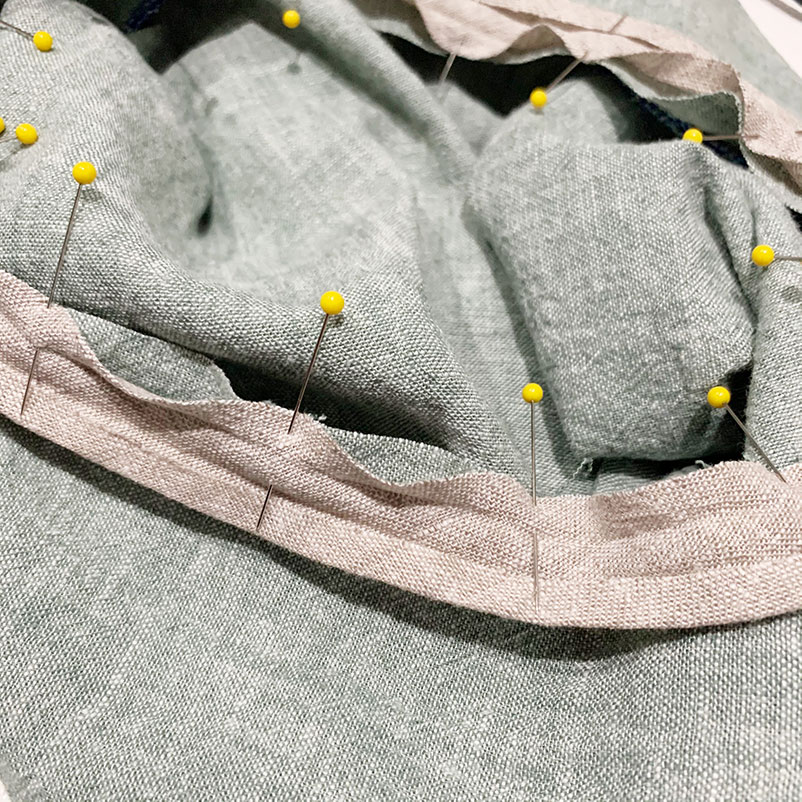
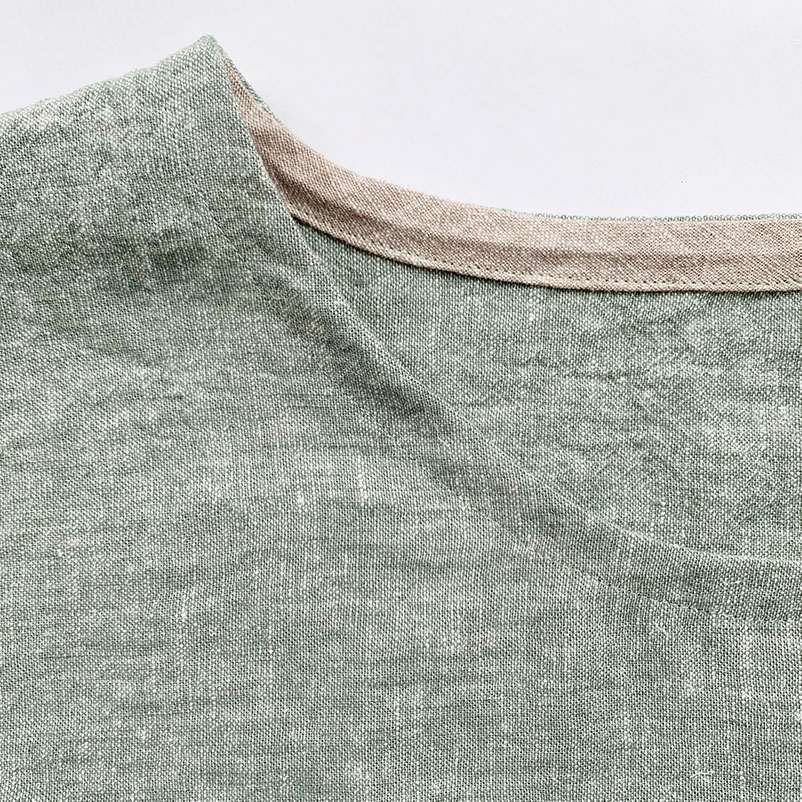
I was absolutely daunted by doing the bias tape collar. After spending two minutes rewatching the video on CreativeBug I felt confident. Videos are so helpful! I pinned the bias tape to the outside of the shirt around the collar, placing pins approximately every 1.5 inches. I really wanted to make sure everything lined up and that neither fabric was stretched nor loose when I brought it to my machine. Sew the bias tape around the collar with a ¼ inch seam allowance. It should line up with the first ironed seam in your bias tape.
Wear it Proudly!
And you’re done! My biggest philosophy when it comes to making things is that you really should enjoy them. If you make this shirt, don’t put it in the back of your closet for fear that you will get a stain on it or you don’t have the right occasion. Give it as much love and wear as you can! This is one reason why I love sewing simple shirts. I can wear them nearly anywhere!
Possible Pattern Hacks/Modifications for Shirt No. 1
Shirt No. 1 is a basic boxy tee, which makes it perfect for modifications or pattern hacks. Here are just a few of the ways you could make quick modifications to this pattern
- lengthen it to a tunic or even dress length (double check width will fit comfortably over your hips)
- shorten it into a crop
- add longer sleeves by sewing rectangles onto the sleeve edges
- curve the back hem
- reverse curve the front hem
- add a boxy, scoop neck, or cutout neckline
- make into a tank (bias tape finish arm holes)
- add color blocking with different colored fabrics
- add small quilt block onto the front or back
Those are just a few ideas! If you do a fun hack or just sew up your first Shirt No. 1 pattern, I would love to see! Feel free to tag me on Instagram.